Lately, I’ve been spending quite some time moving my content away from Ravelry, mostly to Airtable. Airtable is an online platform where you can create your own workspaces, which are basically Excel sheets/database tables on steroids. The free Airtable account has a 1200 records/2GB limit per workspace. The styling is pretty and you can customize it too.
There are some people who have created Airtable bases that you can use as a starting point. There is a base by Victoria Marchant, and Evanita Montalvo has also recently published a base that includes spinning as well. If you are not interested in importing your existing Ravelry content, I can highly recommend starting from one of these bases. I preferred to bring along my history and create my own workspace, to also get to know Airtable a bit better. I finished importing my project and stash history yesterday.
So, how did I do it? I’ve decided to write up my process in the hope that it helps you if you want to do the same. You will need Microsoft Excel for this, as well as a free Airtable account. At the moment, the tool that combines the jsons only works on Windows, but I’m working on a platform-independent version at the moment. NOTE: I have created a new version of the app that converts the json files, see Combining Ravelry jsons on MacOs.
This tutorial assumes that you are creating your own workspace from scratch instead of using a base. If you are using a base, copy and paste your content in there after step 4. After executing the steps below, your data will be in Airtable, but there won’t be connections between the data entries yet (for example, between your stash and your projects). You will still have to add those manually.
To migrate your Ravelry data to Airtable
- Export your data from Ravelry:
- Click Export data in the menu under your profile picture. Here you can export your projects, stash, and posts. Click Export data to download those items in a zip file. Additionally, you can download Excel sheets containing your Library and Stash inventory.
- Download your patterns from your library. Ravelry only gives you the option to download them one by one, but you can use the DownThemAll extension to download them in batches, or connect via WebDav and download the whole set in one go.
- Combine the json files in your Ravelry zip to prepare them for import into Excel:
- Extract the Ravelry zip file. It contains a folder with images and a folder with json files.
Each json file contains information about one subject (for example, one project, or one stash entry, depending on its parent folder). In this form it is not very handy to use. These are some of my projects, for example: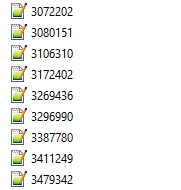
You would have to open these files one by one to see what’s in there, decipher the json syntax, and copy/paste the content to Airtable manually. But wait, there is hope! - Mac only: instead of this step and step 2c, run RavCat on your Ravelry export (see Combining Ravelry jsons on MacOs).
Windows only: Download the JsonConcatenator2000 that my husband wrote. It’s a simple little program that you can put into a folder that contains multiple json files (like those that the Ravelry export creates).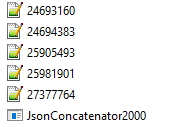
If you run it (just double-click), it will create a json file that contains the concatenated content of all the json files in the folder. It is called 0_output.json.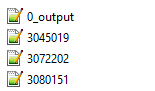
- Windows only: Run the JsonConcatenator2000 in each of the folders of which you want to import the content into Airtable. I ran it on my projects, stash, and fiberstash so far.
- Extract the Ravelry zip file. It contains a folder with images and a folder with json files.
- Create a blank Excel workbook.
- Import the json data into your Excel workbook and prepare/order it. Repeat the steps for each of the json output files that you created previously. Each data import is added to its own sheet automatically (it won’t overwrite the existing sheet), so you can just collect everything in one workbook.
- In your Excel workbook, select the Data tab.
- Select Get data > From file > From JSON.
Tip: old versions of Excel might not have this option. In that case, you need to download PowerQuery to import the JSON into Excel.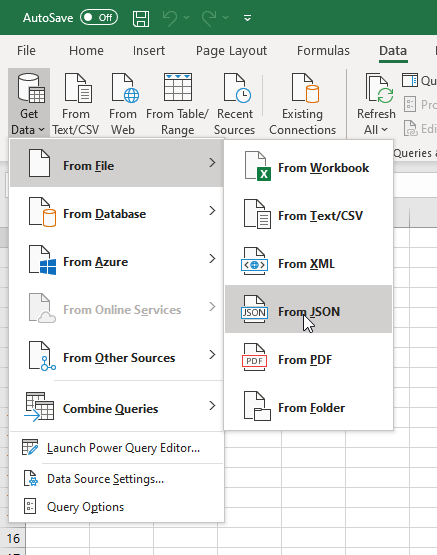
- Navigate to one of the output files that you have created earlier and click Import. A new window opens, called the Power Query Editor. This is kind of a prep environment, in which you can make sure that the json data is transformed to Excel correctly. You don’t really see the data yet, just a list of [Record] items. Each of these records contains one of the entries in your selected content set, for example, a project, or a stash entry.
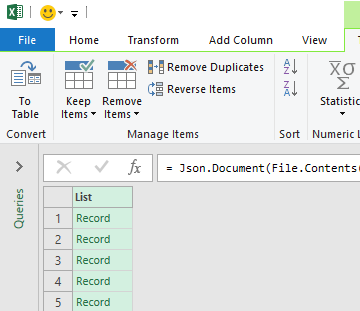
- Convert the [Record] items to a table by clicking To Table. You can accept the default options.
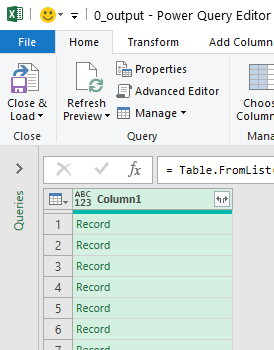
- At the top of the table of records, click the arrows icon
 next to Column1 (which you can rename to something more clear, if you like, for example, Projects). This expands the records and shows what attributes are inside. You can select/deselect the attributes that you want to include. You may not want to bring everything along, so just deselect what you don’t expect to use in Airtable (for example, ends_per_inch if you don’t have any weaving projects). When you’re done, click OK.
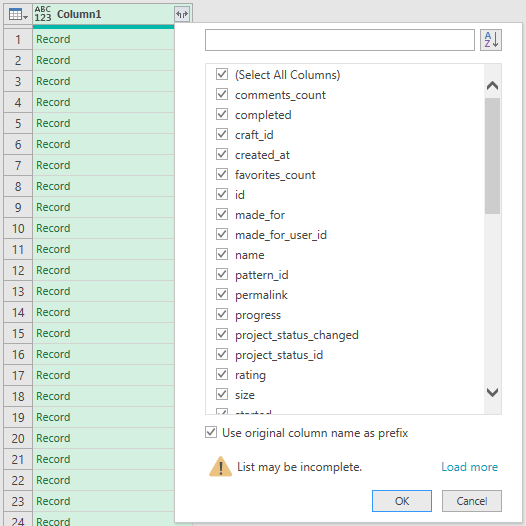
- Click OK. Excel now transforms the selected items into a table. Each row represents an entry (project, stash item, etc, depending on the data set), and each column represents one of its attributes (creation date, status, etc).

Some columns still contain records that you can expand further (for example, needle size can have multiple values for one entry, and the yarn you used for a project is hidden in the “packs” column). I have not expanded those in my initial import process, because it creates an extra duplicate entry for each option. I have not found a good solution for getting that data imported automatically in the process yet. - At the top left, click Close & Load. Excel now transforms the json data to an Excel sheet.
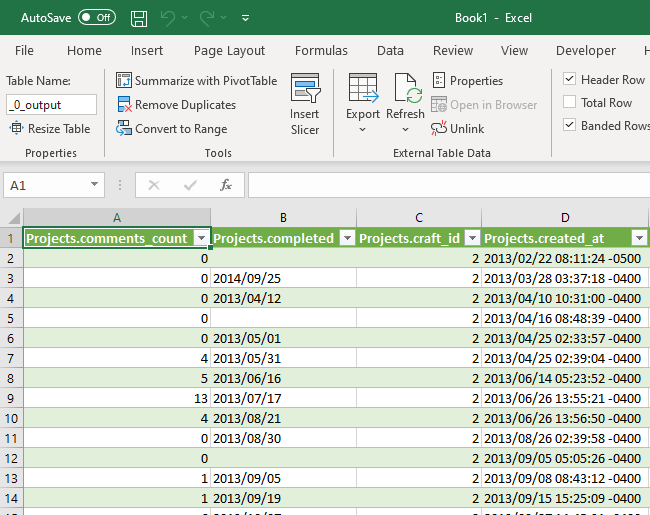
- Now that your data is in Excel, you can start playing with it. You can change the order of the columns to your liking, give them better headings, etc (but you can also do that later in Airtable, if you like). Delete any columns that you won’t use.
If you are using a base, you can start ordering your data in a similar order and format as the base to make uploading it easier.
Note: Make sure that the first column of the sheet contains the primary data of your set of content, for example, the project name for your projects, or the yarn brand for your stash. Once uploaded into Airtable, you cannot move this column.
- Import your Excel workbook into Airtable:
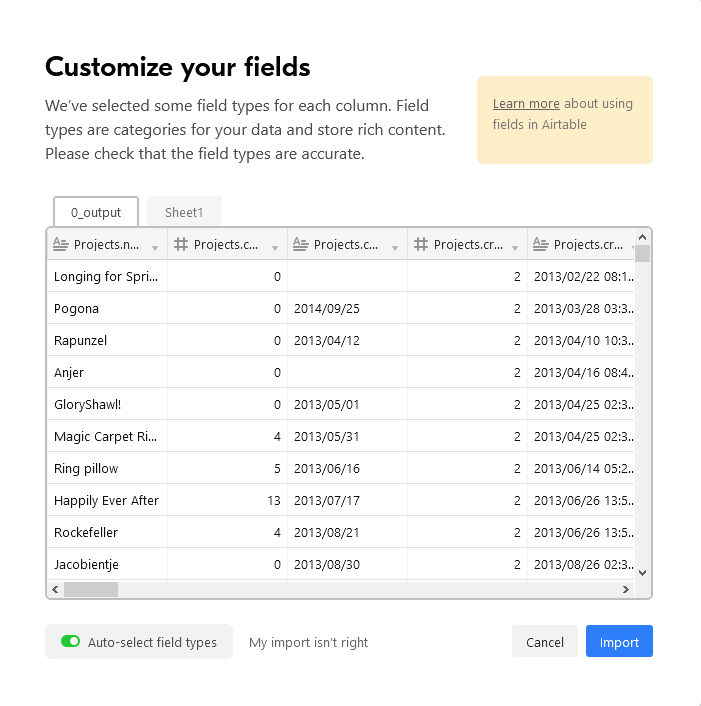
- In Airtable, click Add a base > Import data. Select Microsoft Excel as the source and select the workbook that you have created.
- Click Upload. A window appears in which you can edit the format of each column of the Excel sheet. Update the column names and formats if necessary.
- Click Import. The Excel sheet is now converted to the format that Airtable uses. Each sheet that was included in your Excel sheet becomes a table in your Airtable base.
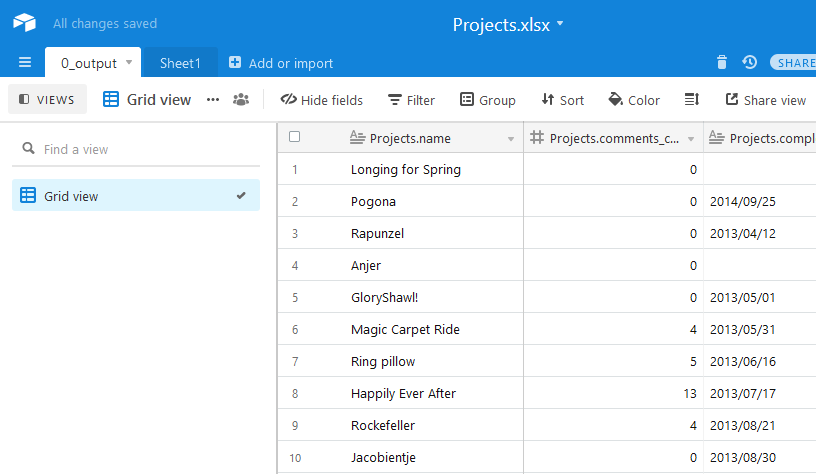
- Check if all your content is there. You can also drag and drop columns to change their order if you like, or edit their names and settings.
- Upload your photos:
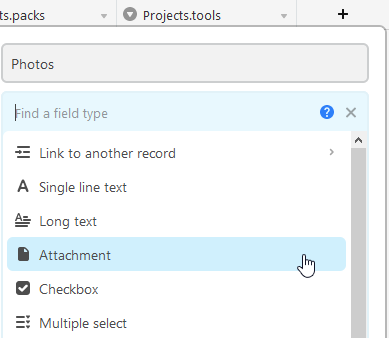
- Add a new column for your photos to each table.
- Open the photos folder in your Ravelry export. For each entry in your tables, find the corresponding photos in the subfolder of their category. For projects, the photo names are based on the pattern name (or your project name, if you didn’t link a pattern). For your stash, they’re based on the yarn name (excluding the brand name) if you linked those.
- Drag and drop the photos for each entry in each table on its cell in your new Photos column. Keep in mind that the free Airtable account has a 2GB limit for attachments, so make sure not to upload too many files or files that are too large.
- Add a new column for your photos to each table.
- Create a pretty overview of your content:
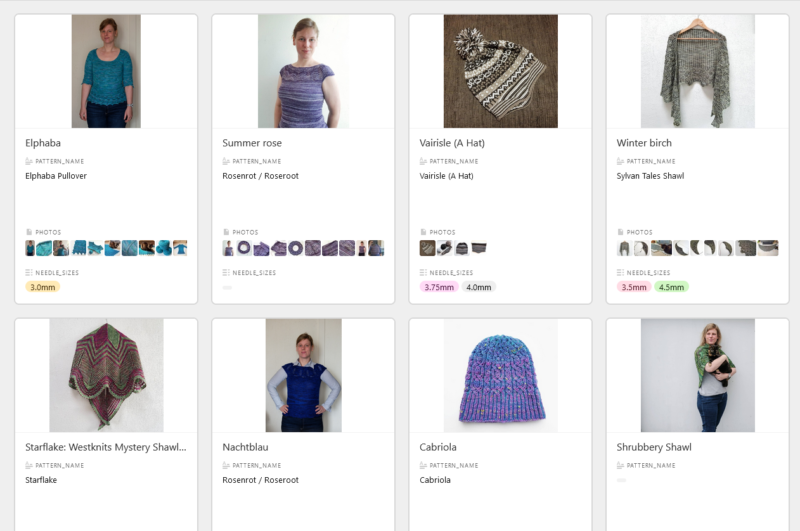
- At the bottom left of the screen, select the Gallery view. In the Gallery view, a set of attributes of each entry is displayed on a card, including a photo. This looks a lot like the Ravelry notebook.
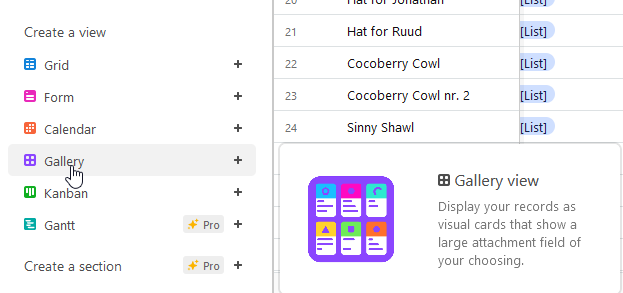
Note: You can switch back to the previous view (Grid view) in the left-hand pane. - Customize your Gallery view to your liking by including or excluding attributes on the cards.
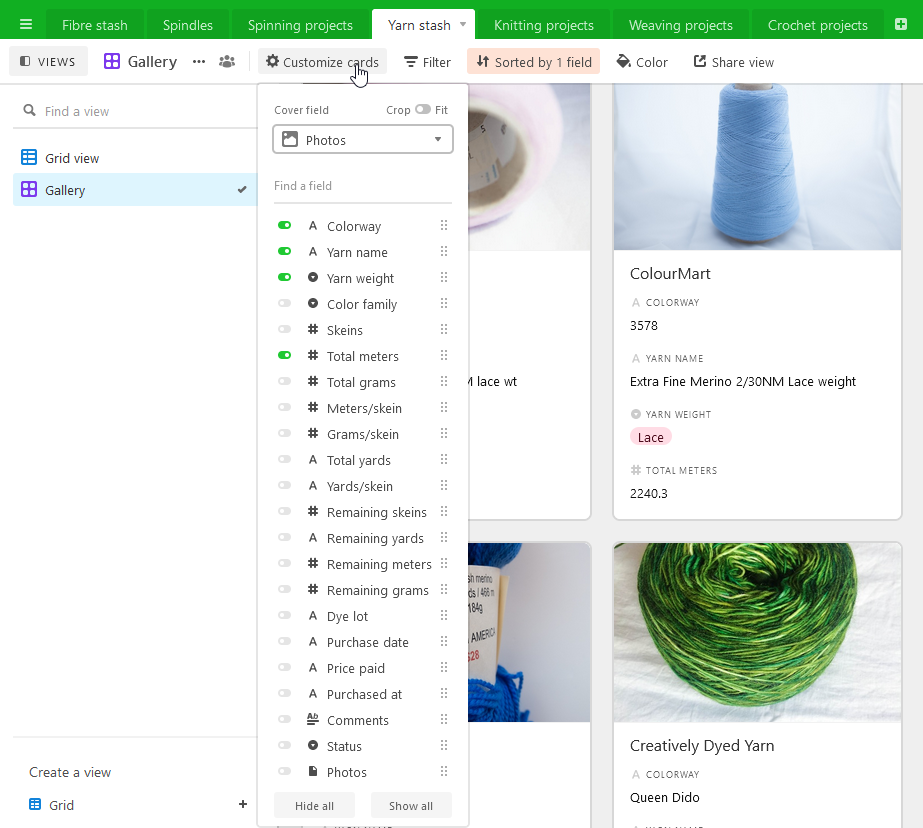
- At the bottom left of the screen, select the Gallery view. In the Gallery view, a set of attributes of each entry is displayed on a card, including a photo. This looks a lot like the Ravelry notebook.
That’s it! Now all your data is in Airtable and it’s starting to look like a proper notebook. You can add new projects or stash by clicking the ![]() at the bottom right. You can also start adding connections between the entries in the different tables (for example, between your fibre and your handspun, or between your pattern library and your projects). Here’s a link to the Airtable help page about linking records to get you started. I’m still working on this as well, and I might add another tutorial about that process once I have some more experience.
at the bottom right. You can also start adding connections between the entries in the different tables (for example, between your fibre and your handspun, or between your pattern library and your projects). Here’s a link to the Airtable help page about linking records to get you started. I’m still working on this as well, and I might add another tutorial about that process once I have some more experience.
Notes
One thing that I didn’t manage to do automatically is adding needle sizes to my projects. In the end, I re-imported my content into Excel, and expanded the needle size column before the transformation to include the info in the Excel sheet. I then manually updated my records in Airtable. If you have a better/quicker way, please let me know! I’m also still looking for the best way to include the fibre content percentages in my fibre stash. For now, I’ve only included the fibre content.
When adding photos, make sure that their file size is not too large because of the storage limit of the free account. I’m restricting the number of photos I add and I add links to my blog posts (that contain those photos too) for if I want to see more.
My Airtable workspace is built up as follows:
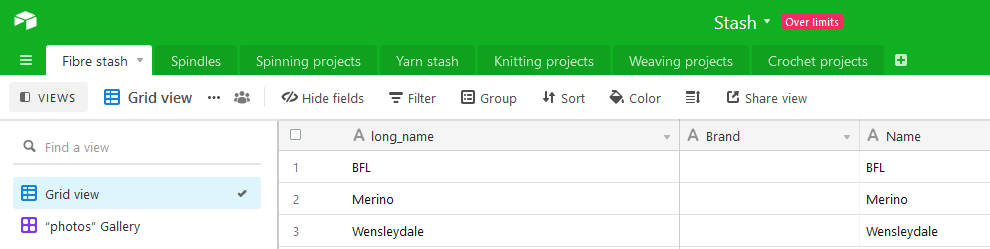
I have created tables “From sheep to FO”. My fibre stash and spindles are the first tables, and those will both be linked to my spinning projects. Then there is my yarn stash table (including my handspun, but I’m still looking into automating adding finished handspun to that tab automatically – the Ravelry “Make yarn” option). My projects have a table per craft, which are also (going to be) linked to my yarn stash. I still want to import my favourites, queue, and library, and link those to my projects as well.


Wow thanks for all these details!! I just heard about Airtable this week and am trying to decide what to do with my Ravelry account.
Thanks so much! That was EXACTLY the level of info & hand-holding I needed. I did it in well under 3 hours (in which I was also somewhat distracted) – from setting up the account, requesting my Rav data (& waiting for it to become available), and getting it all put in (except for my photos, which I’ll save for another day).
P.S. Also “thank you” to your husband for the exe file!
That’s great to hear! I’m glad that you were able to get your data into your new notebook 🙂
I’ll pass on the “thank you” to my husband.
Thank you so much for writing up these instructions! Also thank you for writing the app to convert the JSONS on a Mac–worked perfectly. The only little glitch I had is that the Mac version of Excel won’t import the JSONS, but thankfully I have a windows computer on my desk, too, so I was able to do that part there and bring it back over to my beloved Mac. I have now brought everything over into AirTable and am going to get some lunch before I try to cross-index the various tables together. Again, thank you so much for taking the time to do this. What a relief! OH—-the DownThemAll extension is miraculous! I sent the developer a little money to thank him and would gladly send some for you and your husband if there is a way for me to do that.
Let me add that I am 60 years old. I am certainly not a tech “native” although my daughter tells me I could pass for one. I wanted to add that tidbit to illustrate just how clear your instructions were.
Thank you, Cathy! It’s great to hear that the Mac version works as expected. I didn’t realise that the Mac version of Excel wouldn’t be able to import the jsons, that’s good to know. And I’m glad that you managed to do that conversion despite that.
At the moment we don’t really have donate option (I might look into that at some point), but if you like, you could head over to my Shop section and purchase a knitting pattern 🙂
But it really isn’t necessary – I’m glad that I was able to help!