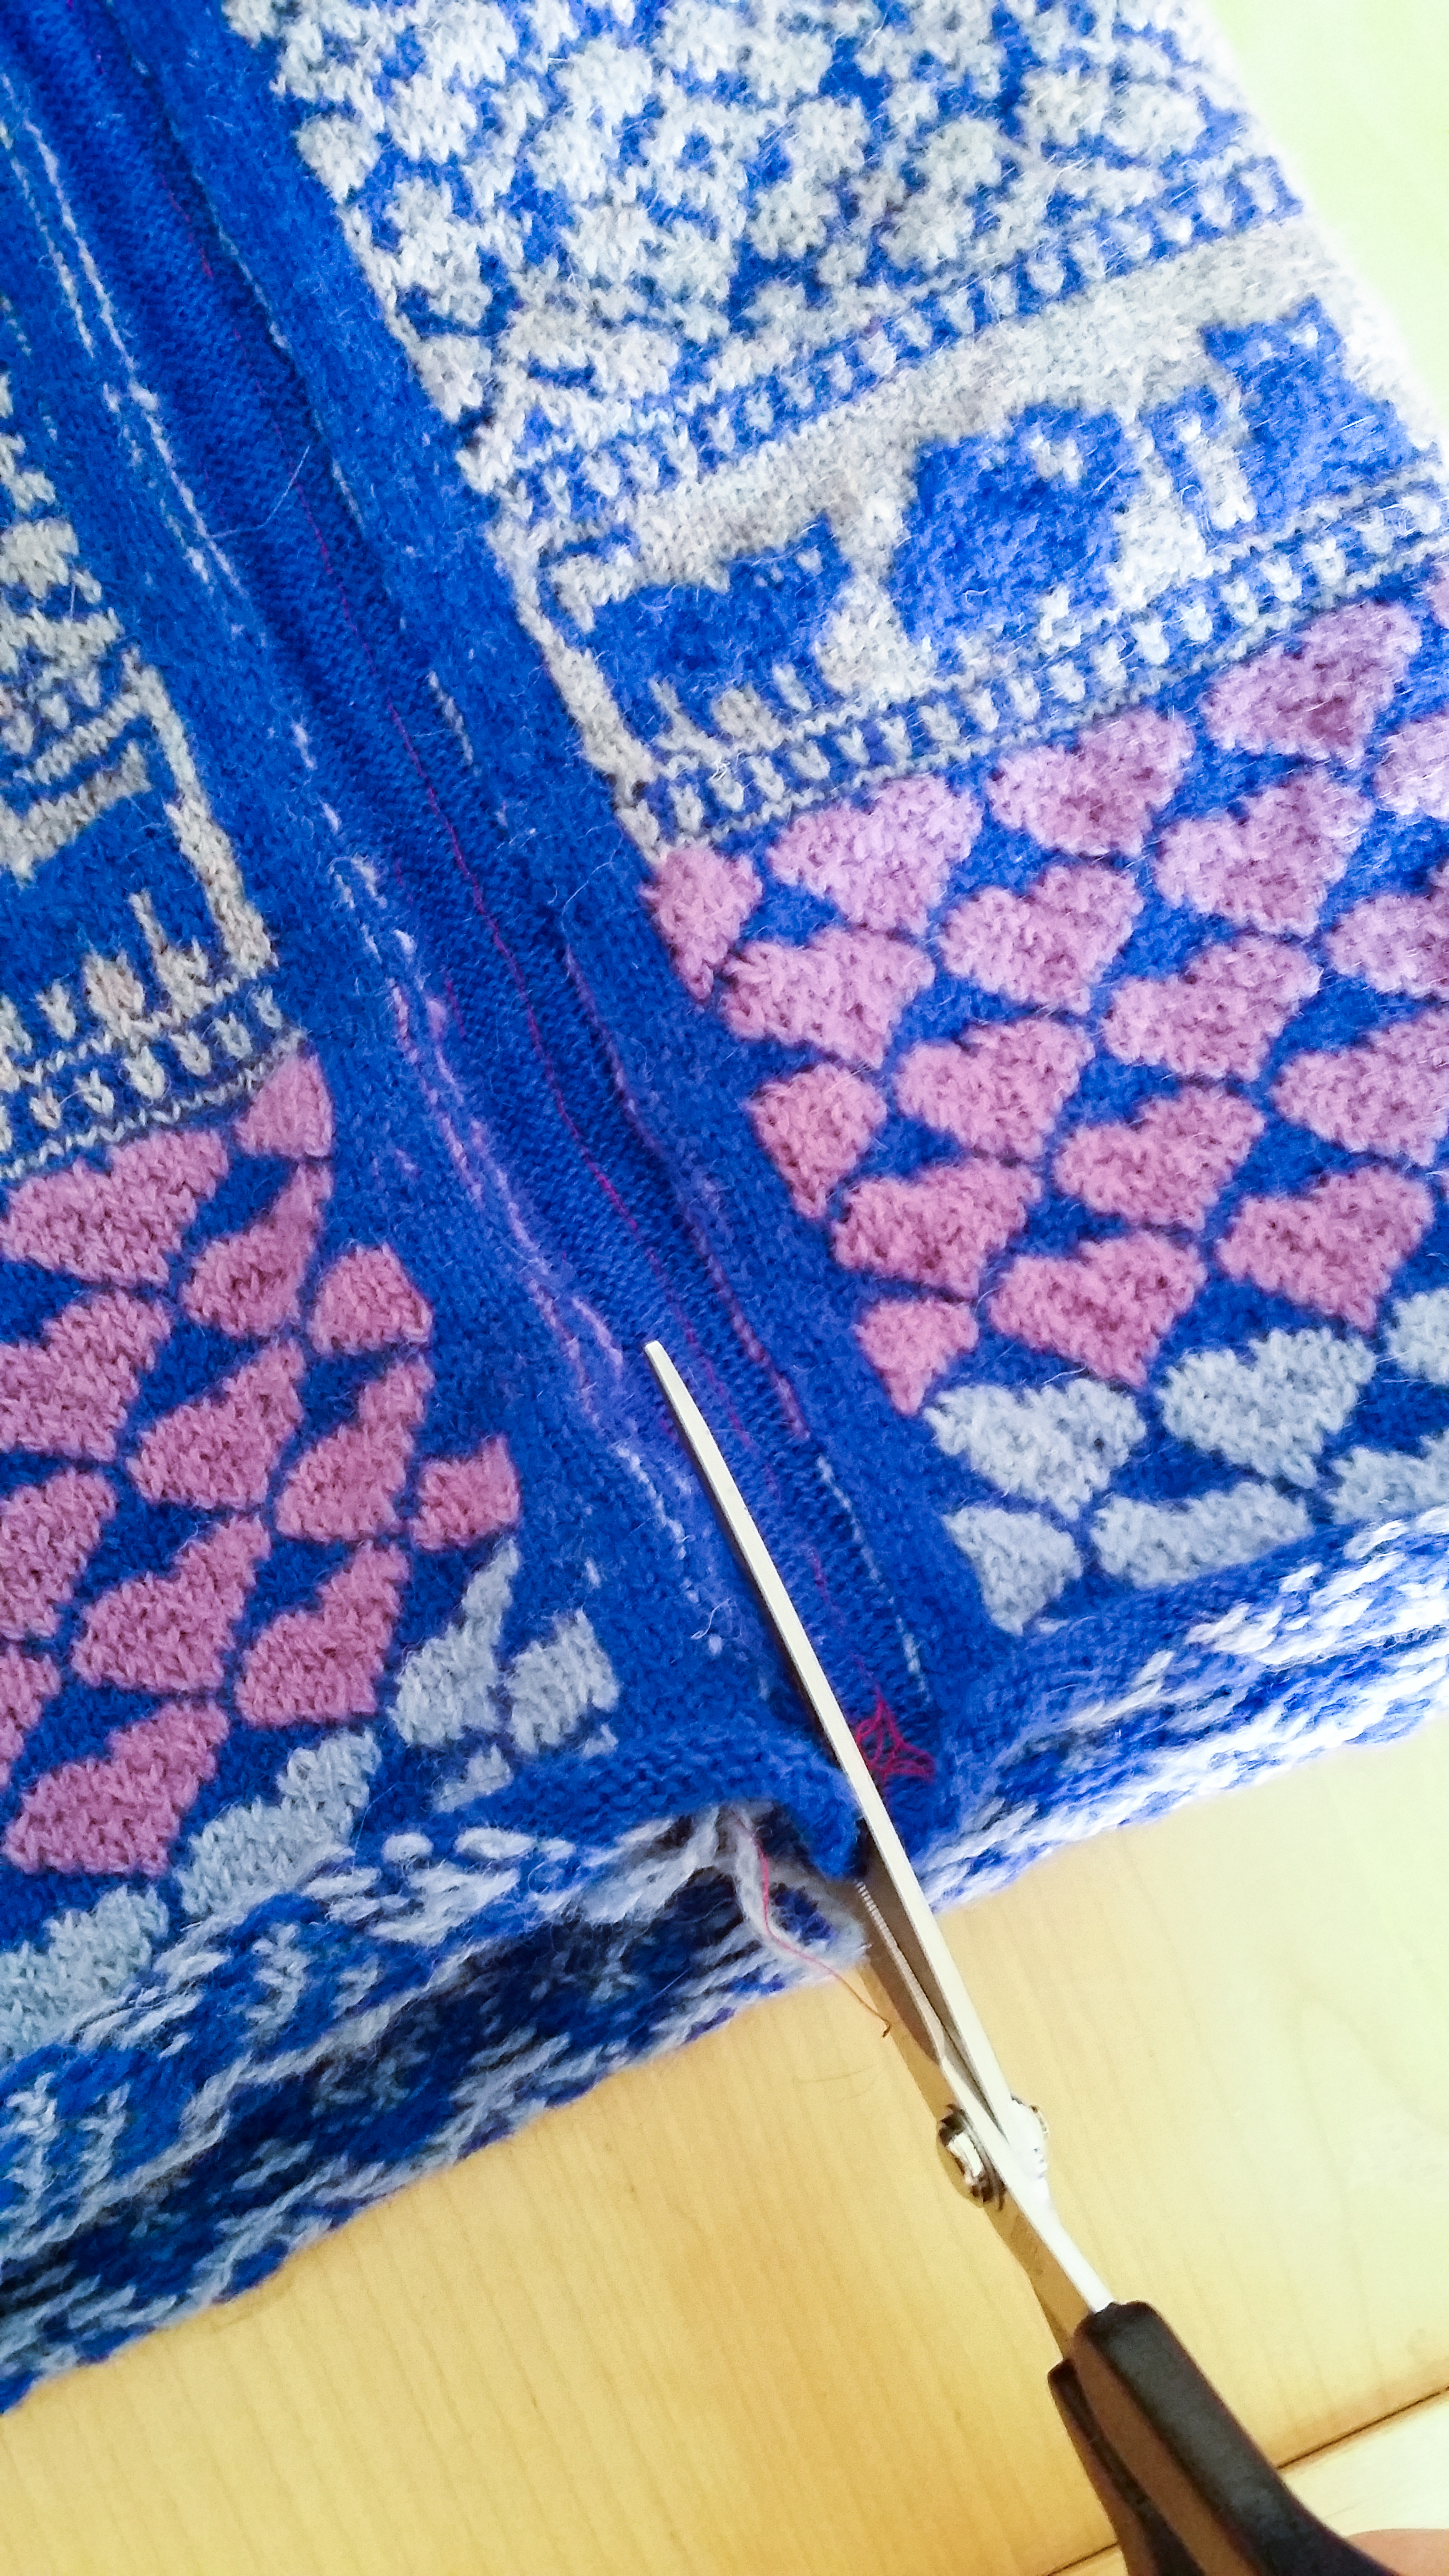
After a lot of knitting, my blanket is finally finished! It looks gorgeous, the colours are very nice together. After the knitting it was time for the kind of scary part: steeking! The blanket is knit in the round, and after knitting it, you cut it open with scissors…
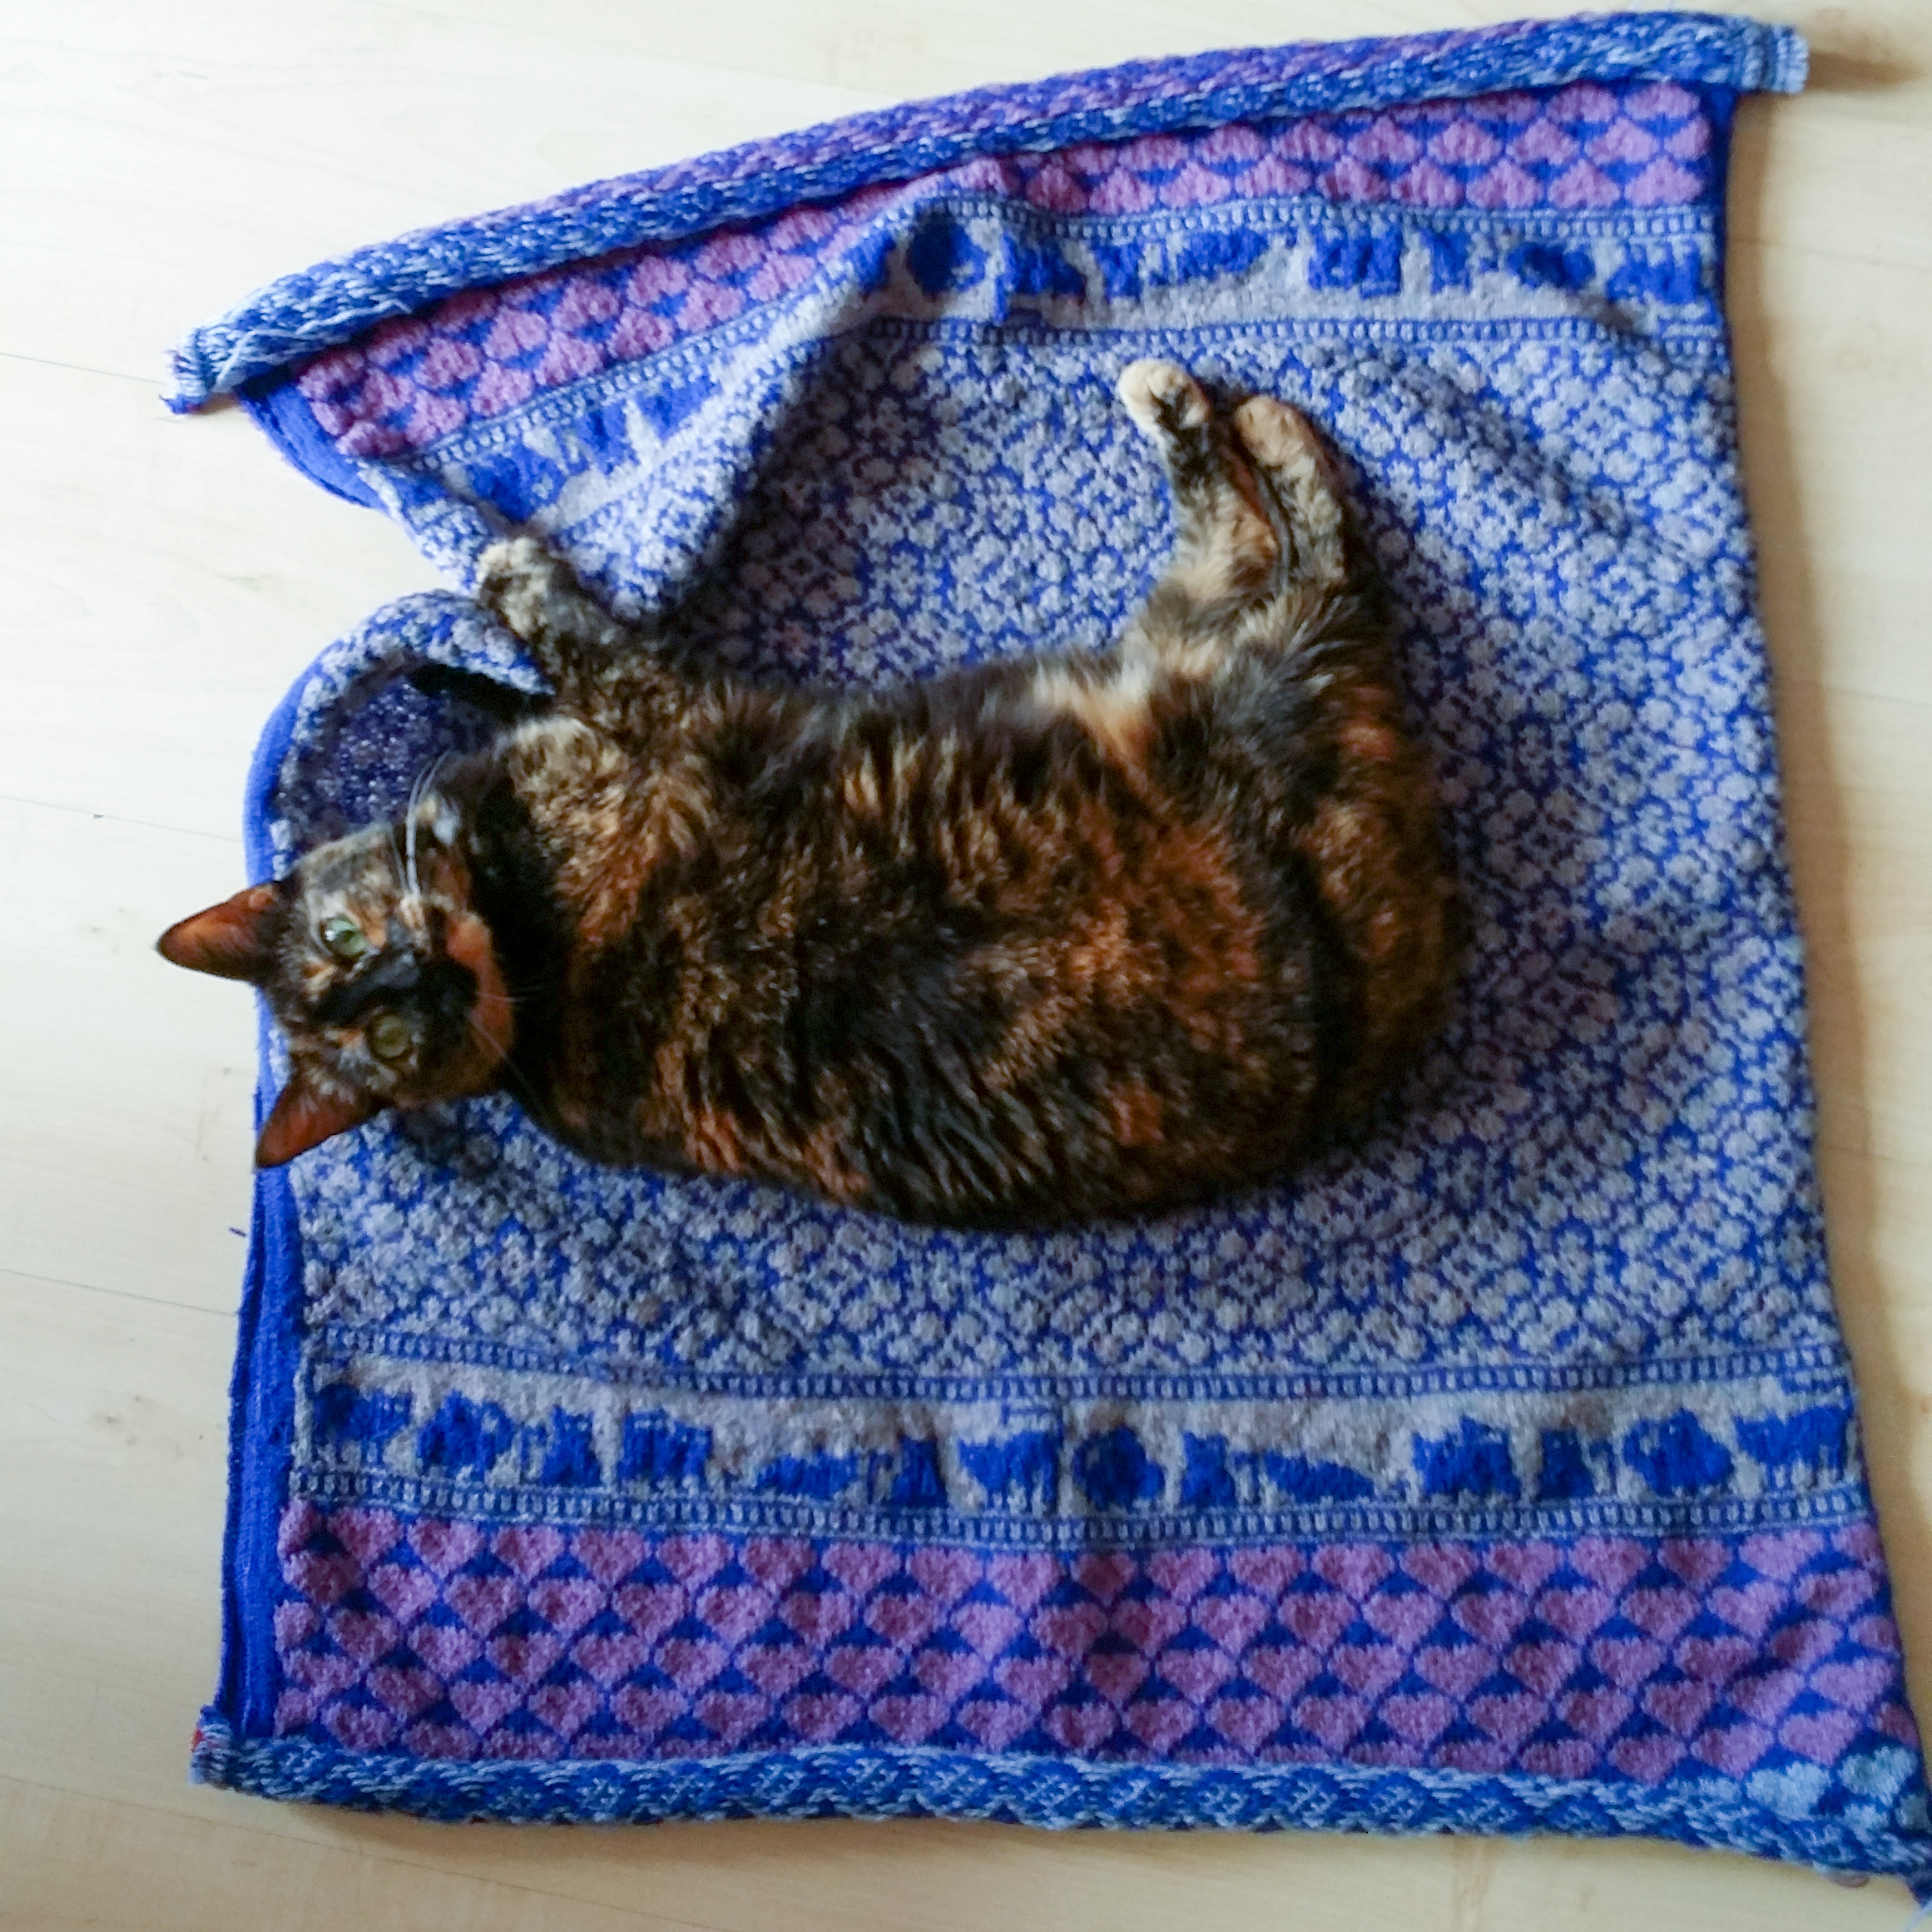
The blanket is quite big when cut open: 72 cm by 105 cm!

I blocked the knitted part quite much, because I wanted to line the blanket with non-elastic fabric (cotton). That way, I think it would stay nice and even together.
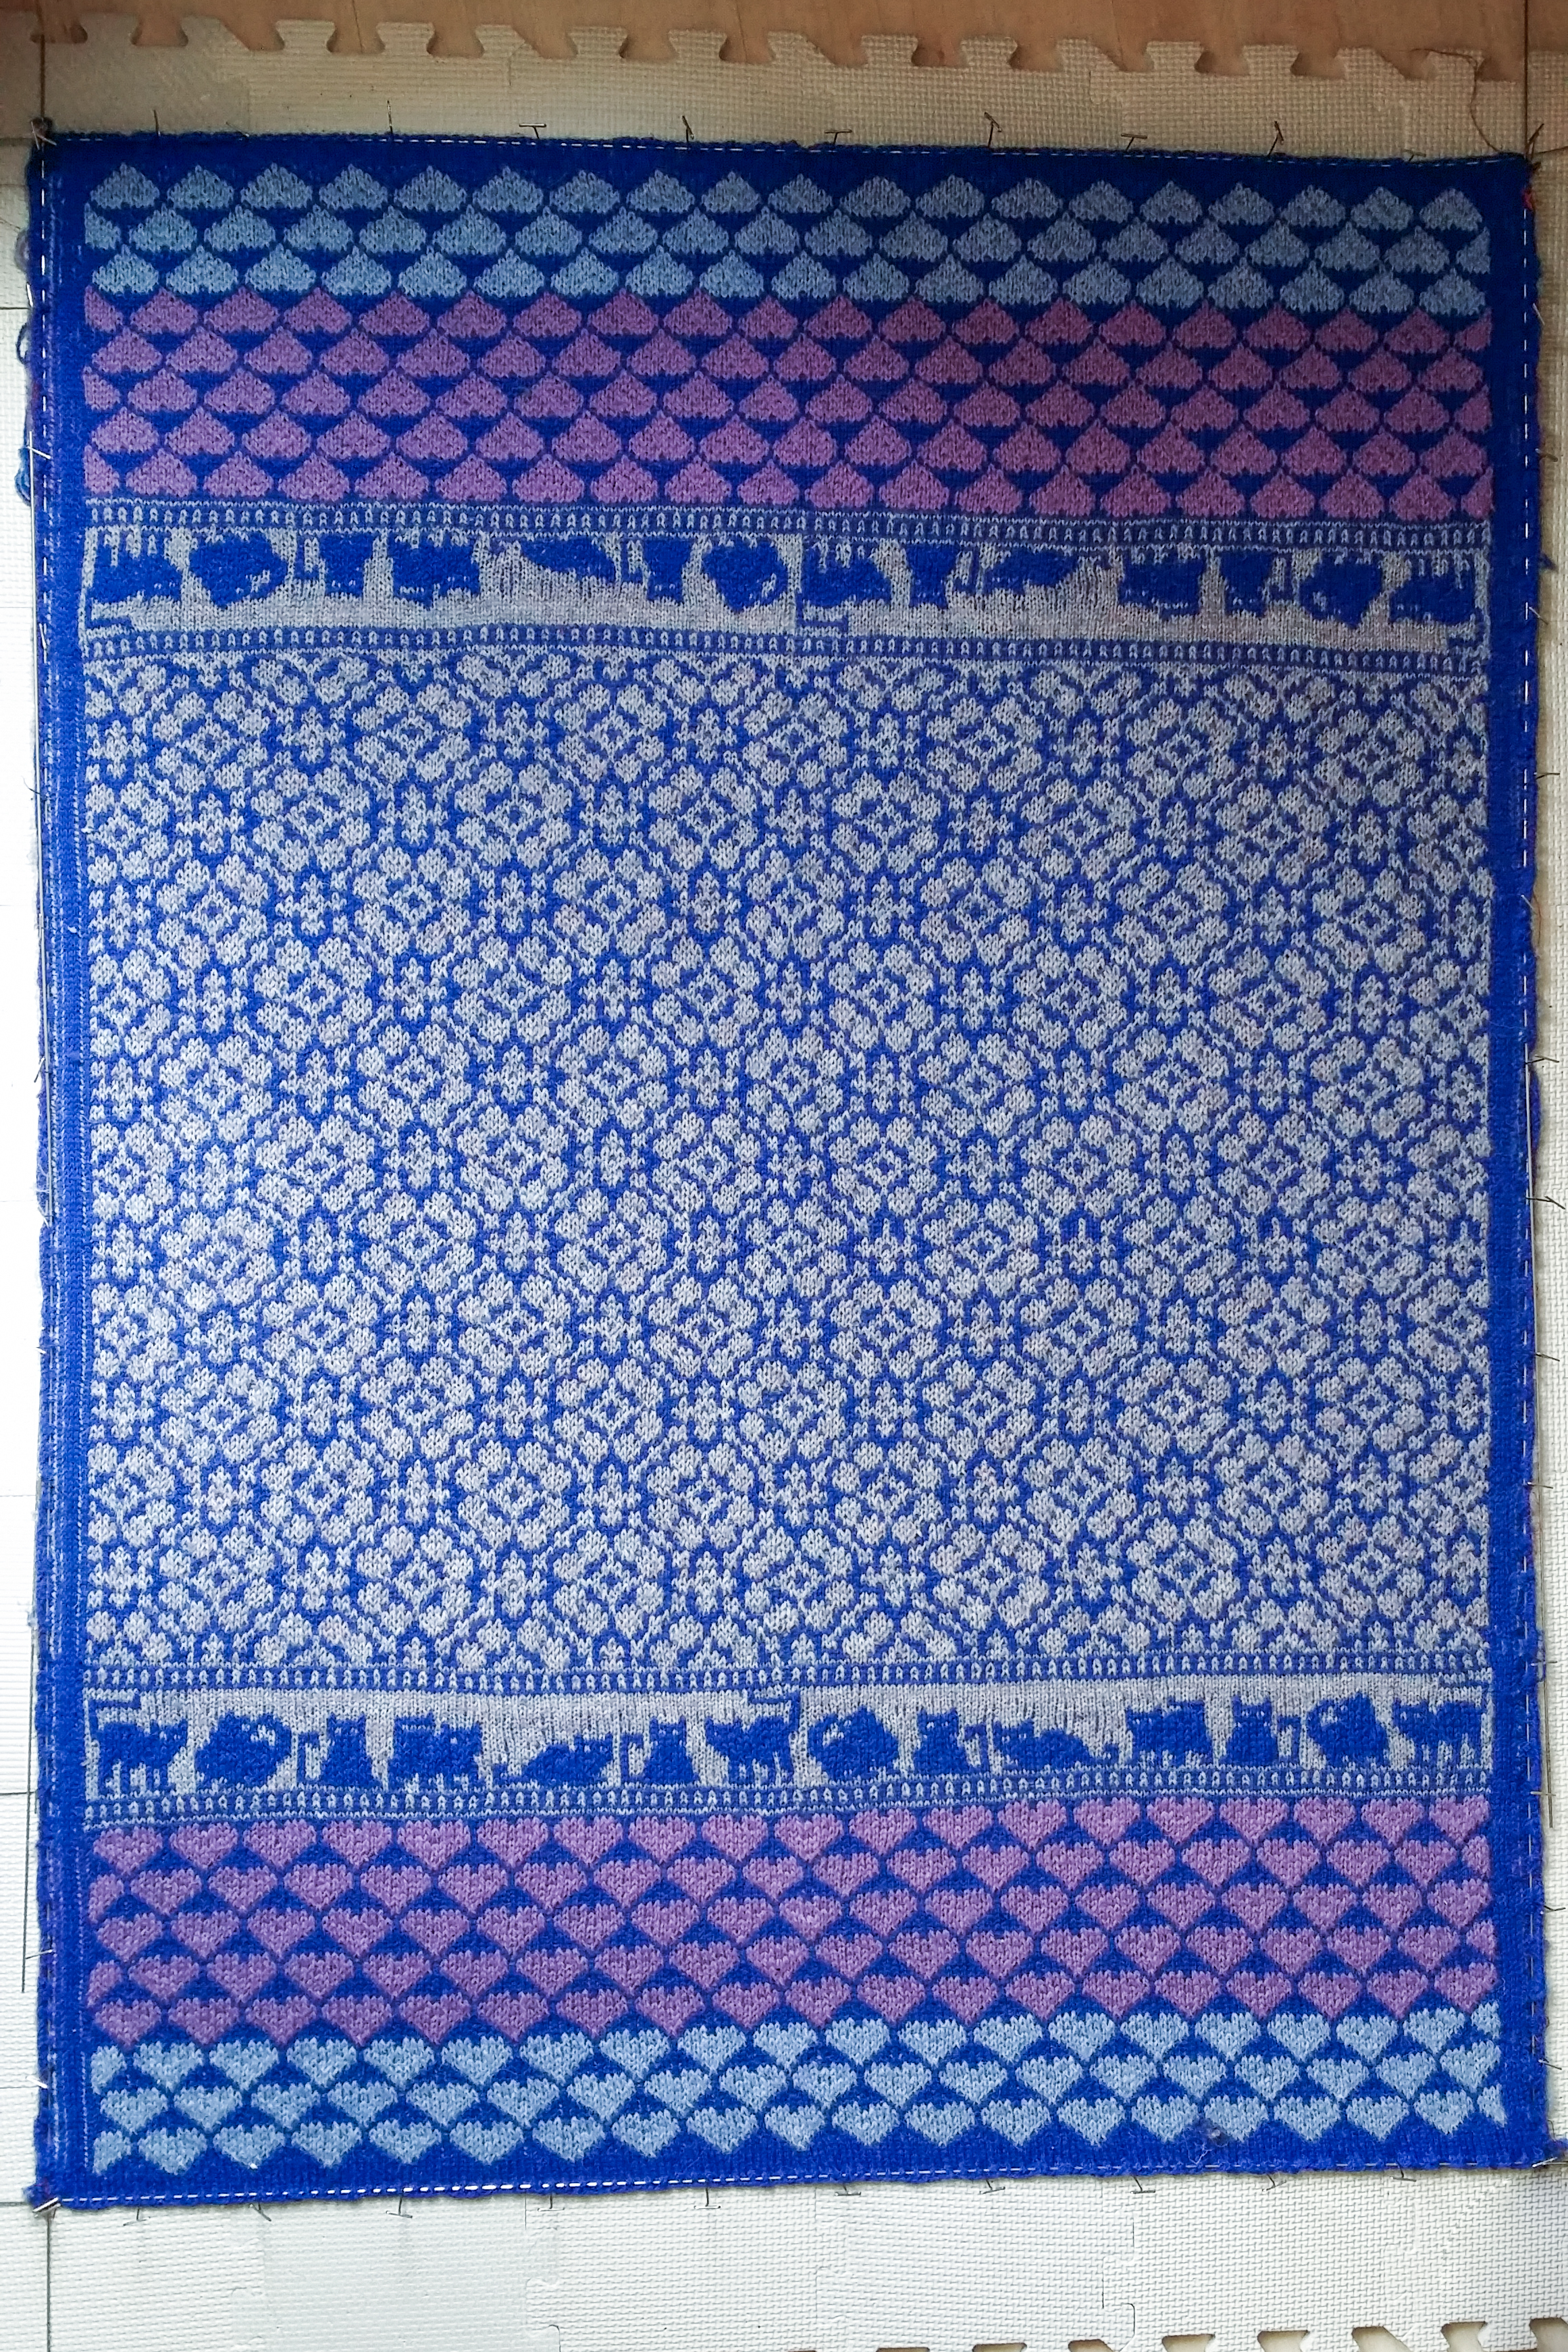
I’m very happy with the pattern and how it turned out! I used the “Shadow Cats” chart from Ravelry as inspiration for the kitties.
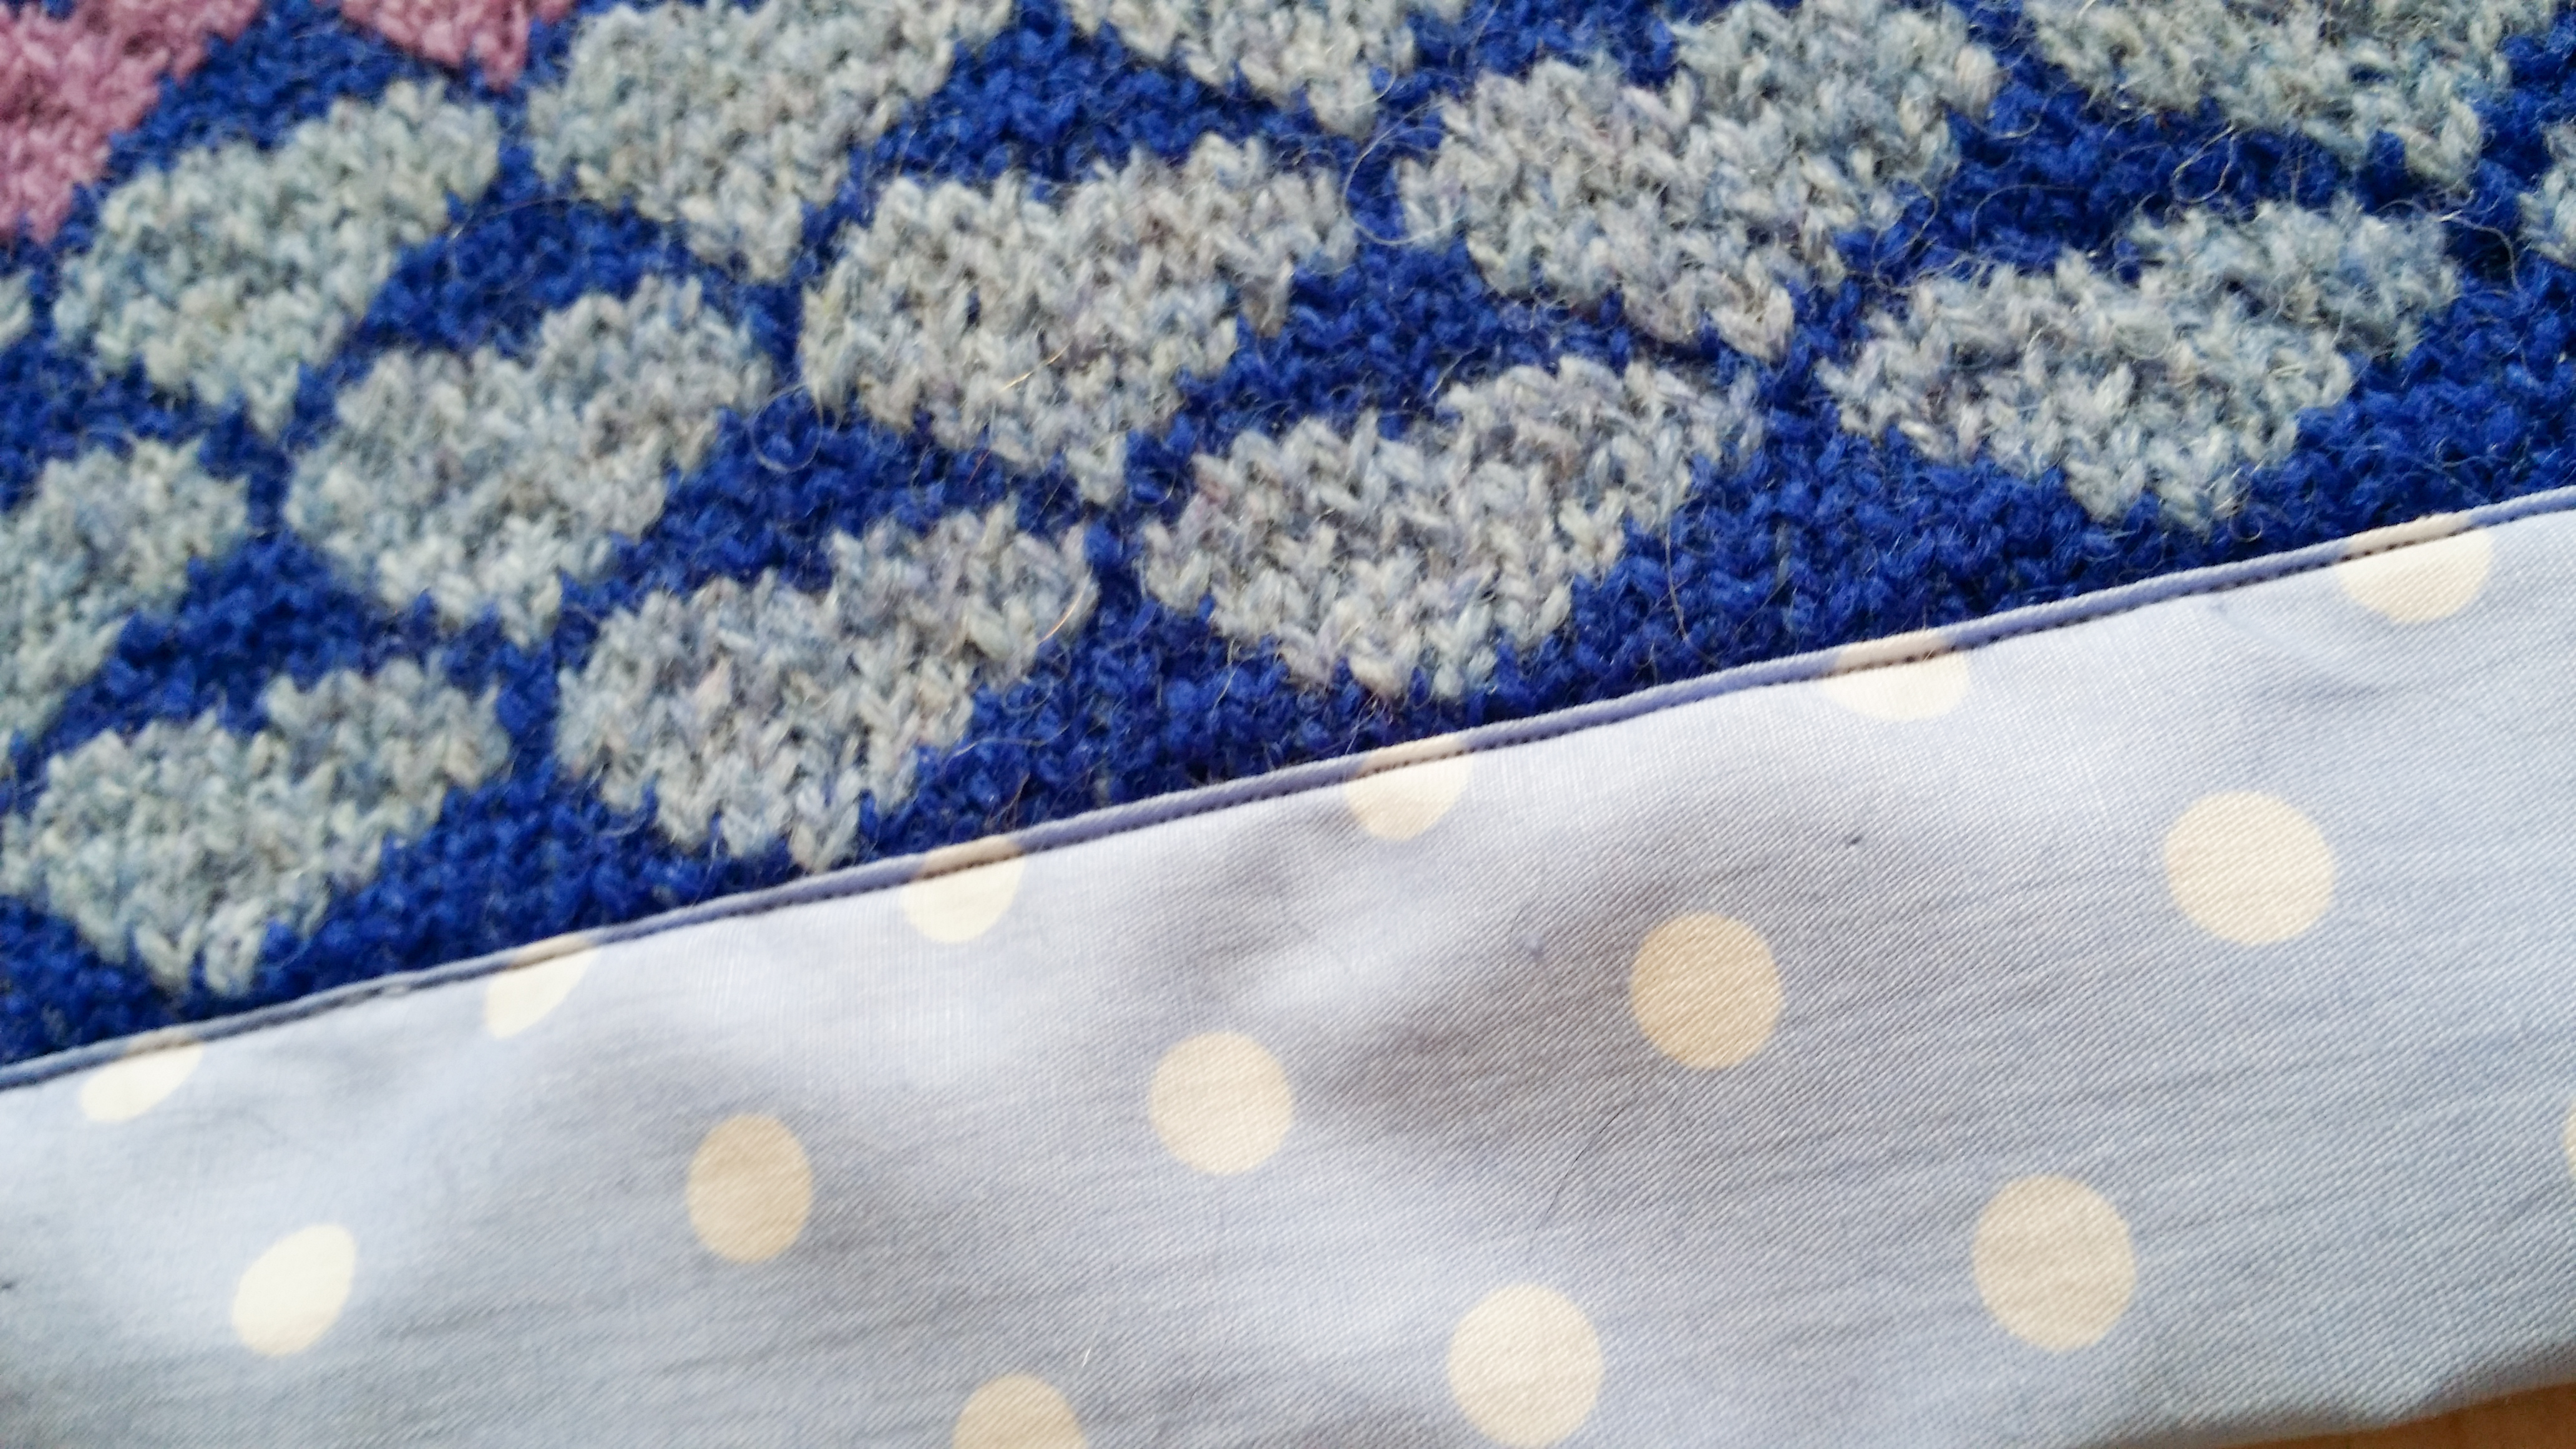
After blocking the next part started: attaching the lining in a nice way. I still had some light blue cotton with white polka dots, that would make the overall look of the blanket a bit softer. I was a bit afraid that the front and back would not stay together, because of the smooth texture of the cotton, so I decided to use interfacing in between. I put the blanket upside down, laid down the facing on top of it, and then laid down the cotton fabric. I ironed them together and lo and behold: it worked!
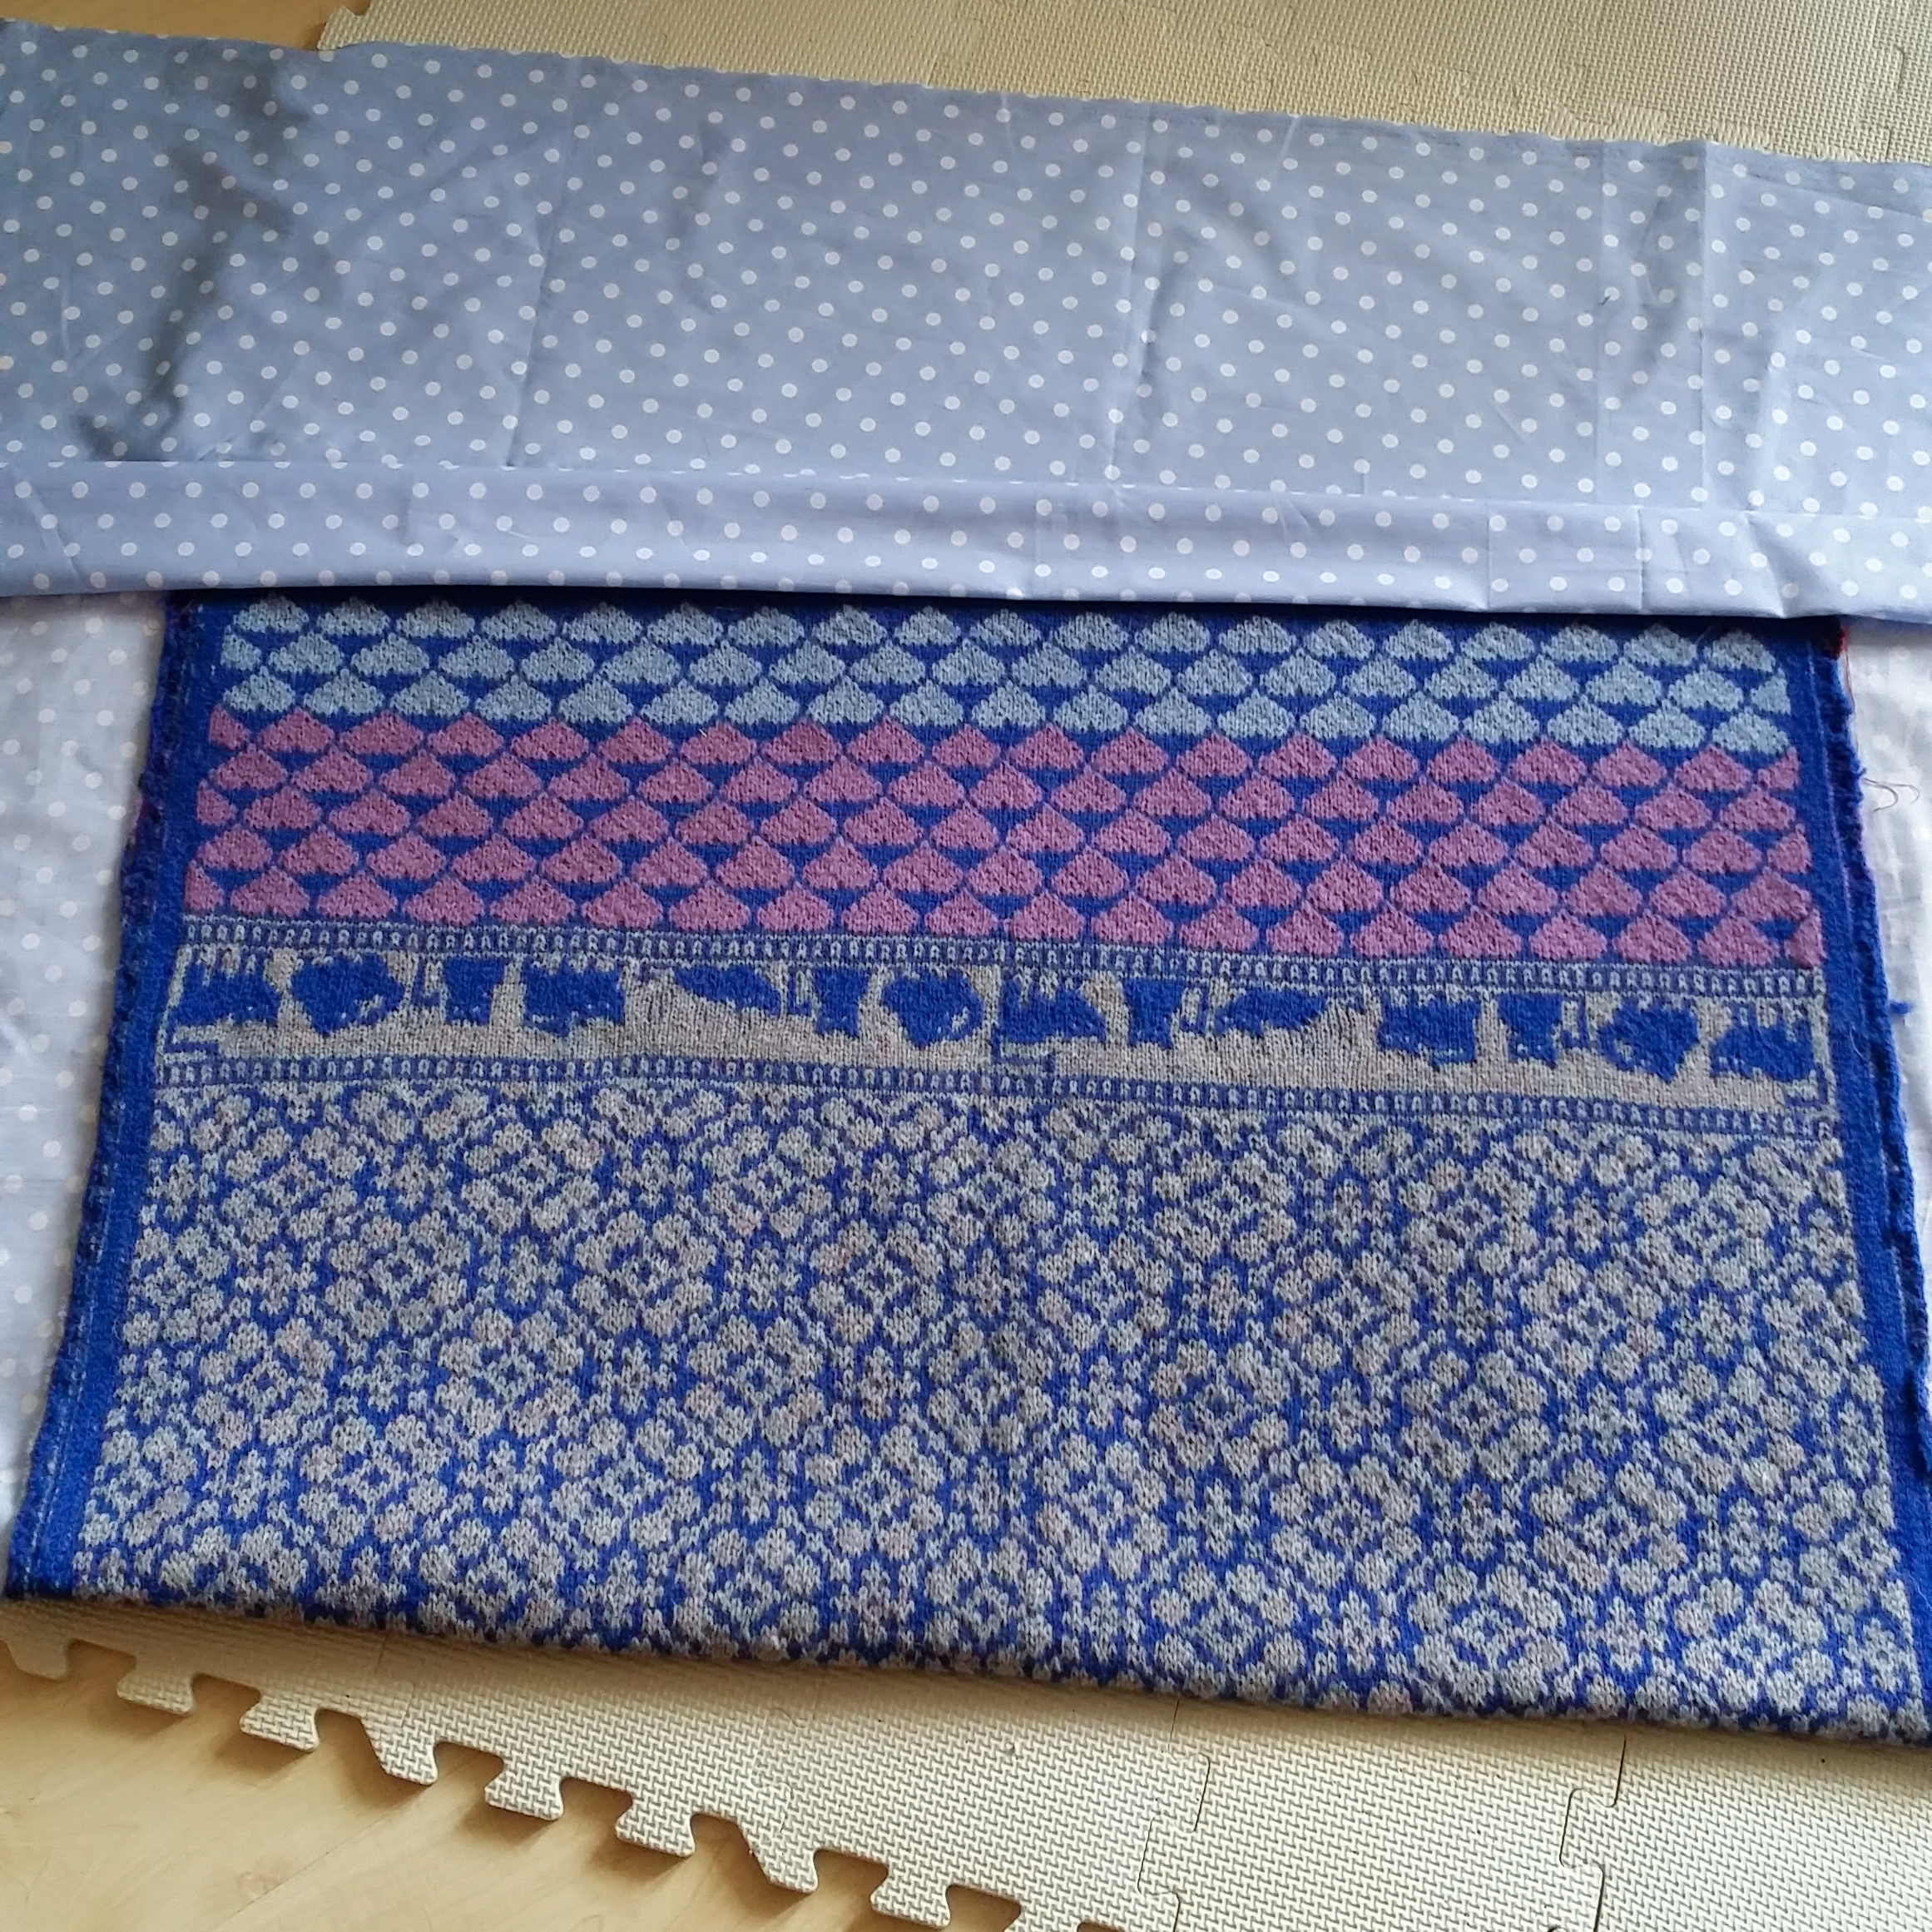
The cotton was sticking out on all sides, so I folded the ends up towards the front side of the blanket, to make a kind of frame. I used pins, and then the iron to make sure it stayed in place, and the four sides looked quite okay already. The corners didn’t, yet, of course.
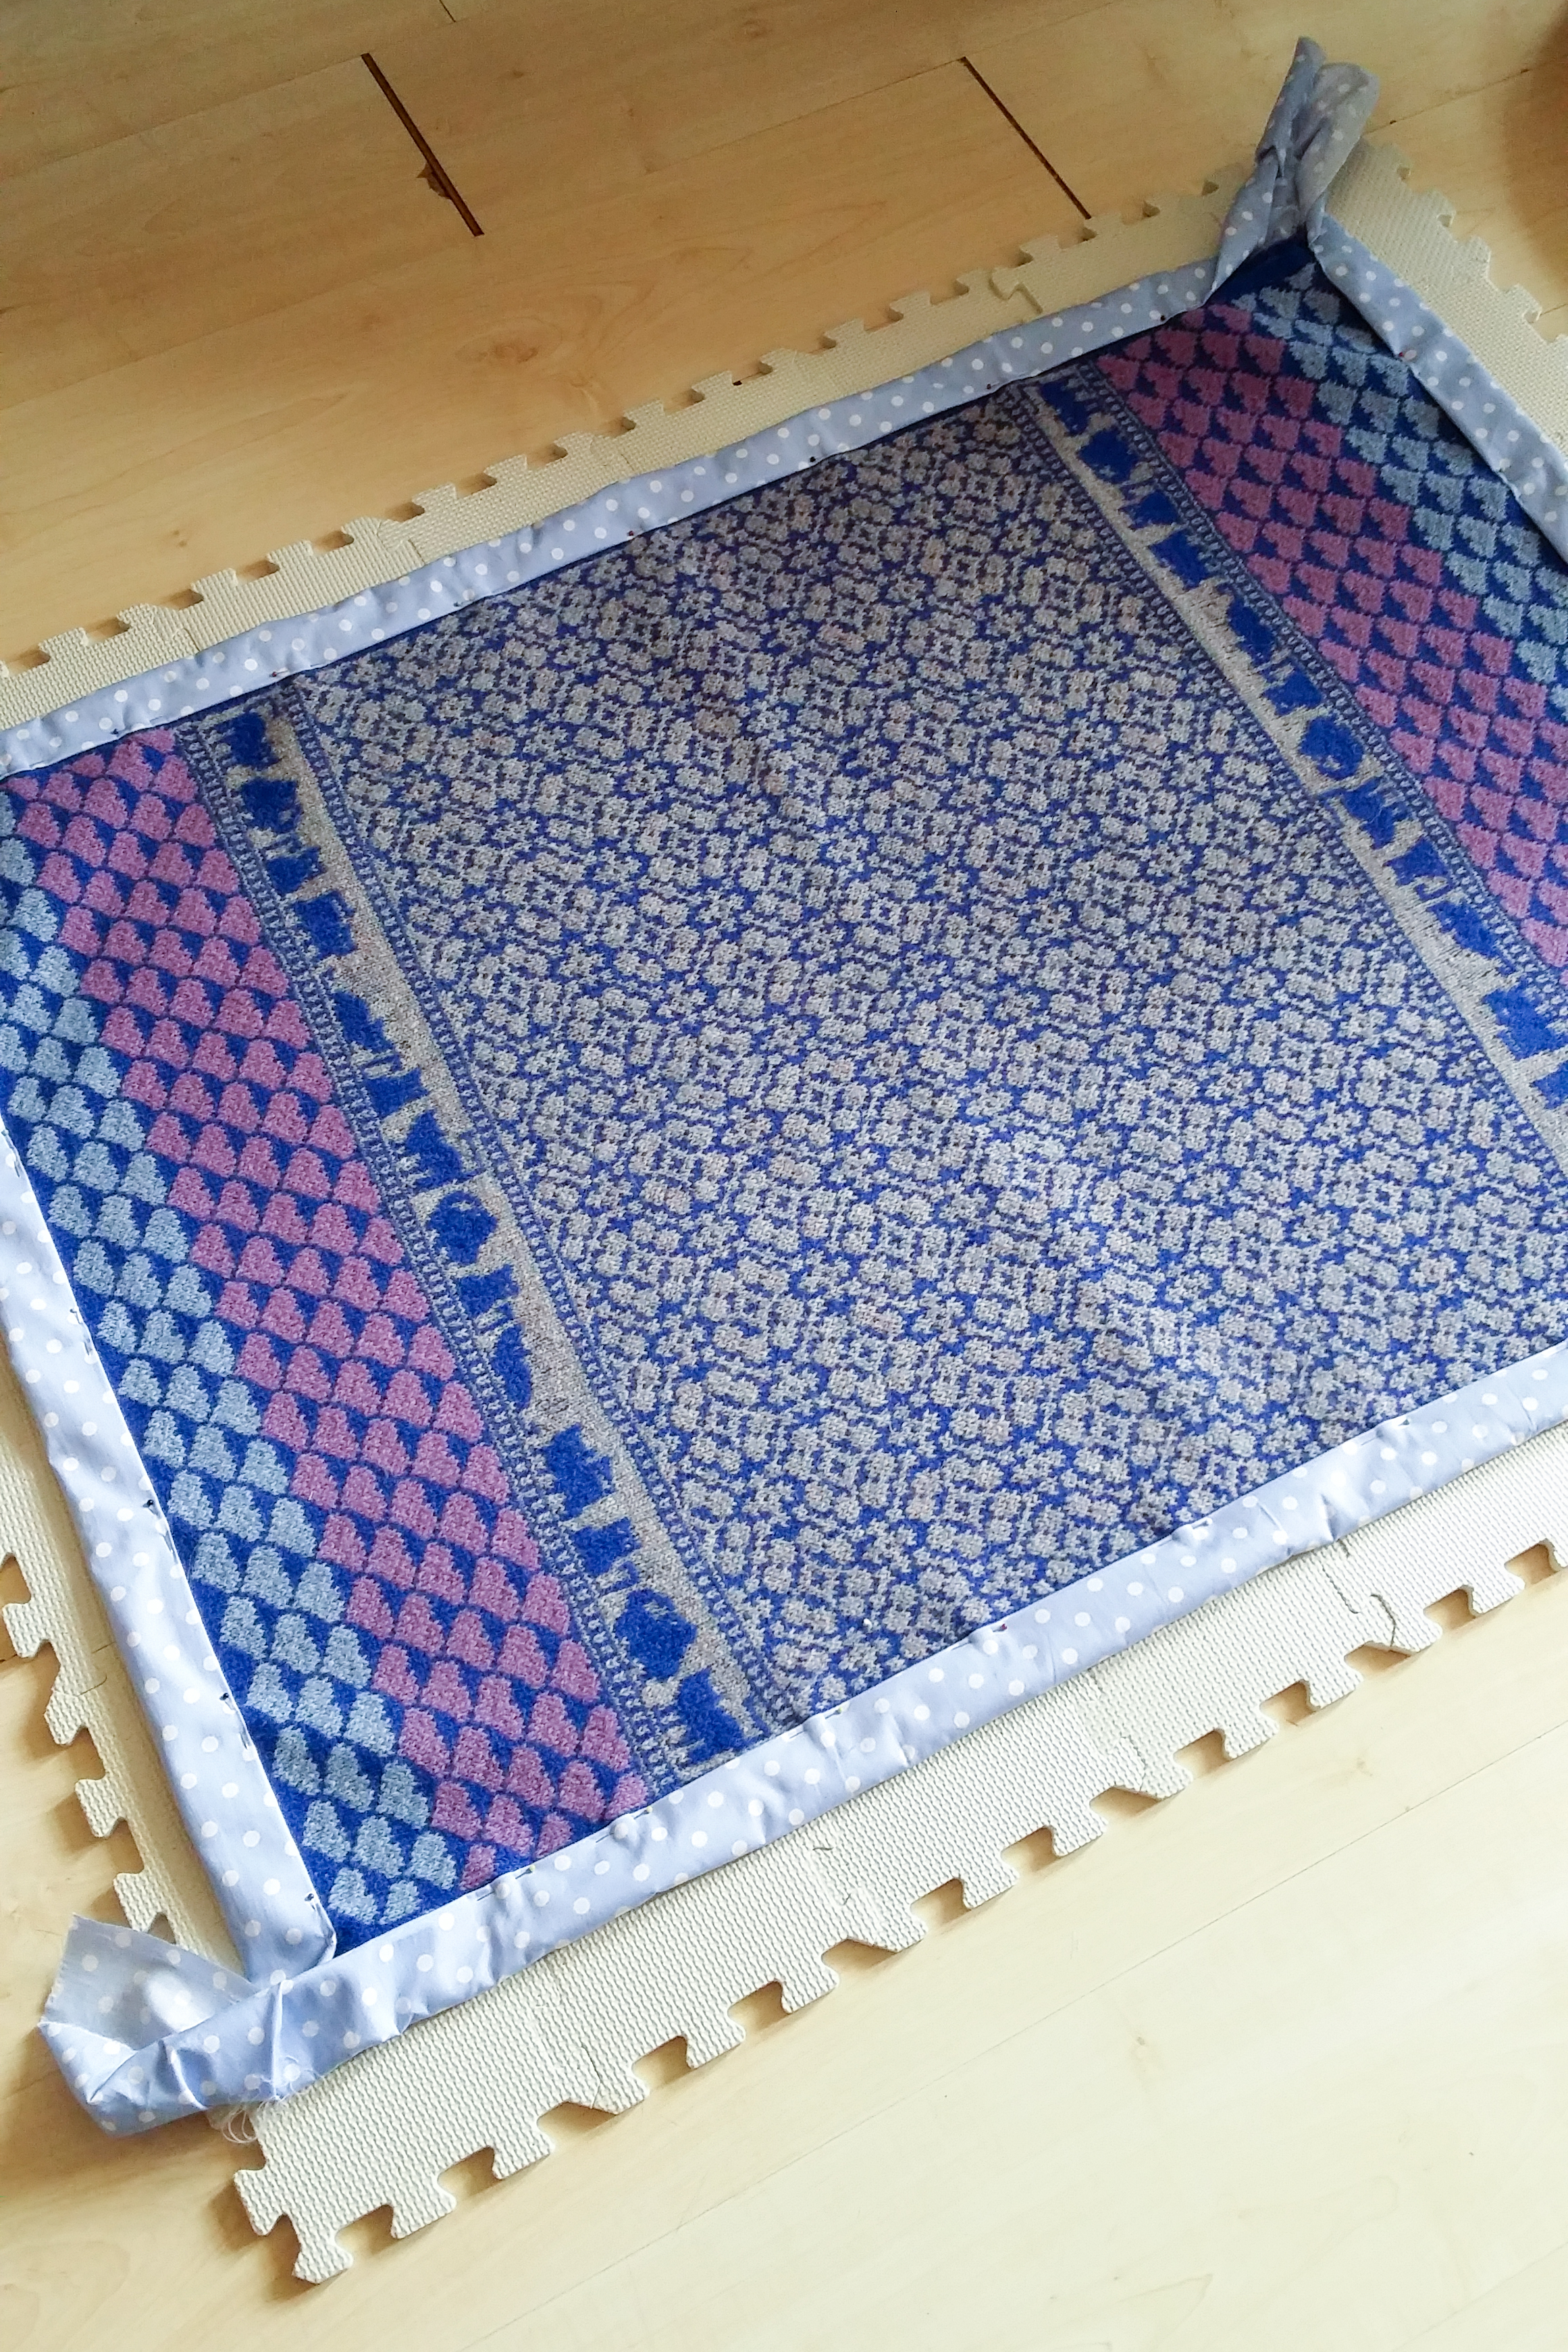
Now for the hard part: making the corners look good. In the end, I handstitched them. I used the iron to make clear fold marks where they should be attached, and sewed that together by hand. It looked quite okay for a first time.
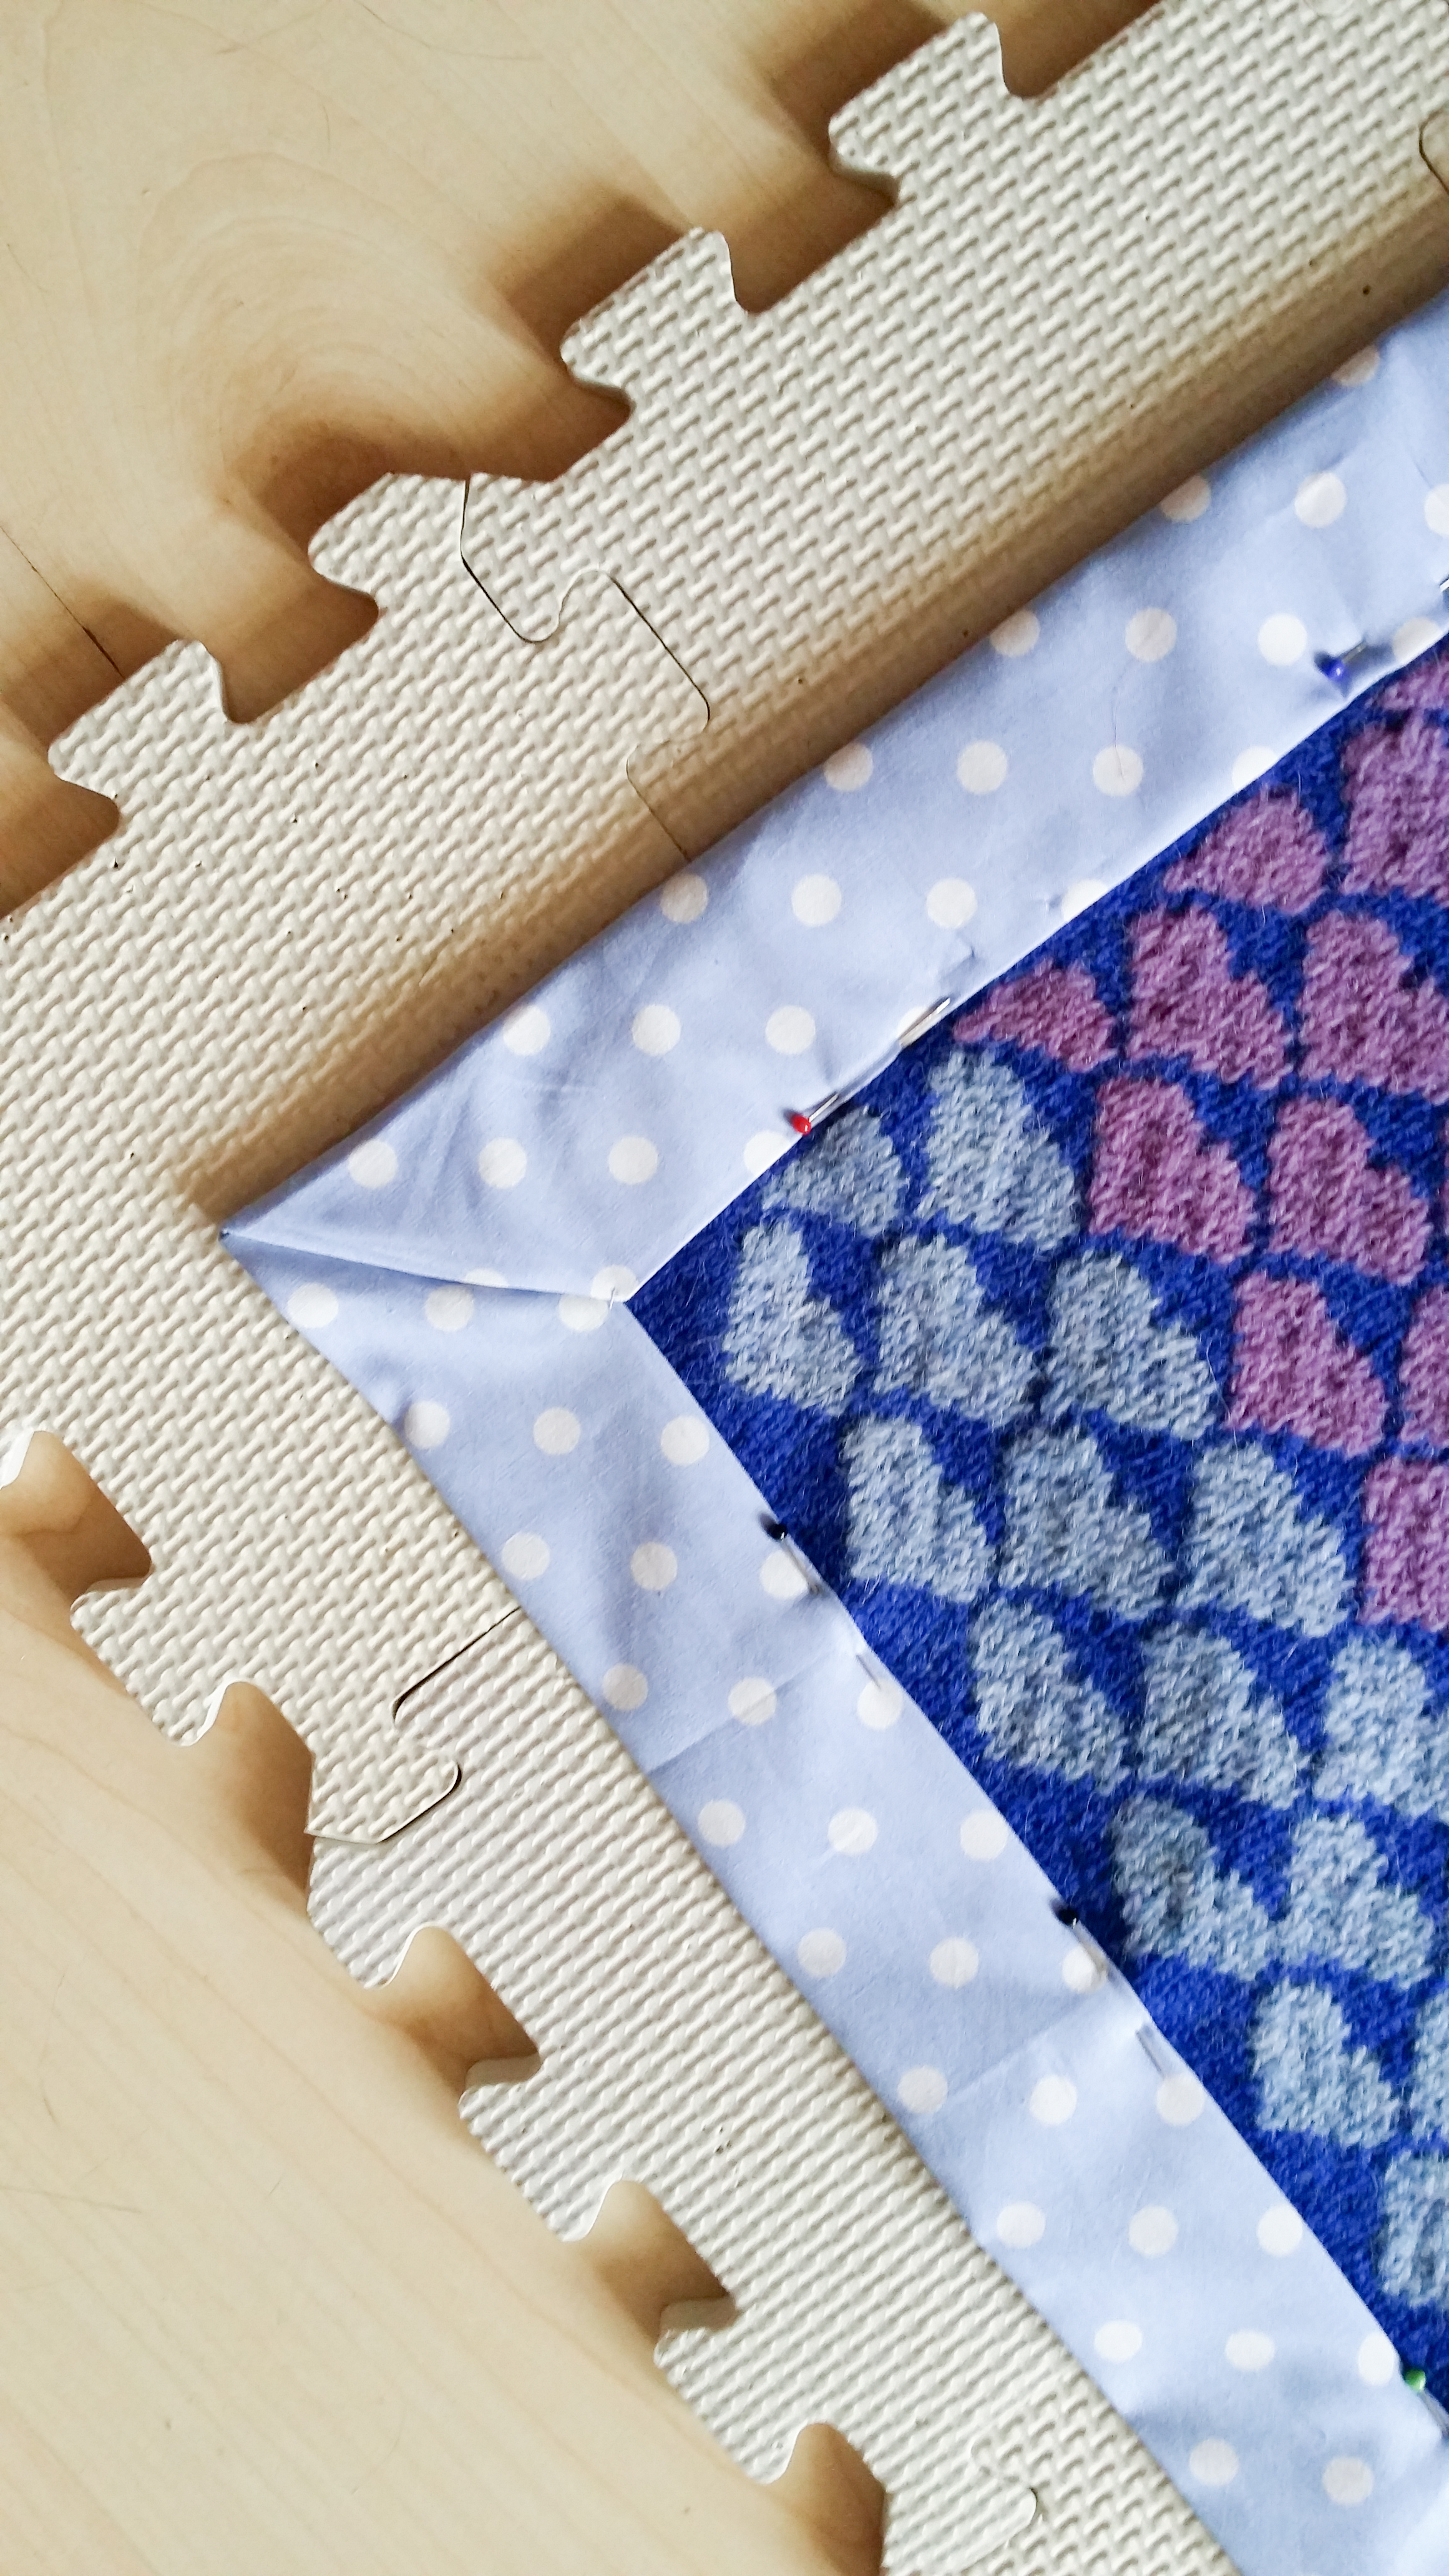
Now it was a piece of cake. All I needed to do was get my sewing machine and stitch the frame unto the knitting. I stayed very close to the edge, which looks nice, I think.

I’m not entirely sure why the blanket has a little fold in the middle, it might be because of the interfacing, but it’s not that bad. The blanket is of a nice weight, and still quite supple (though less so than the separate knitting/fabric of course).
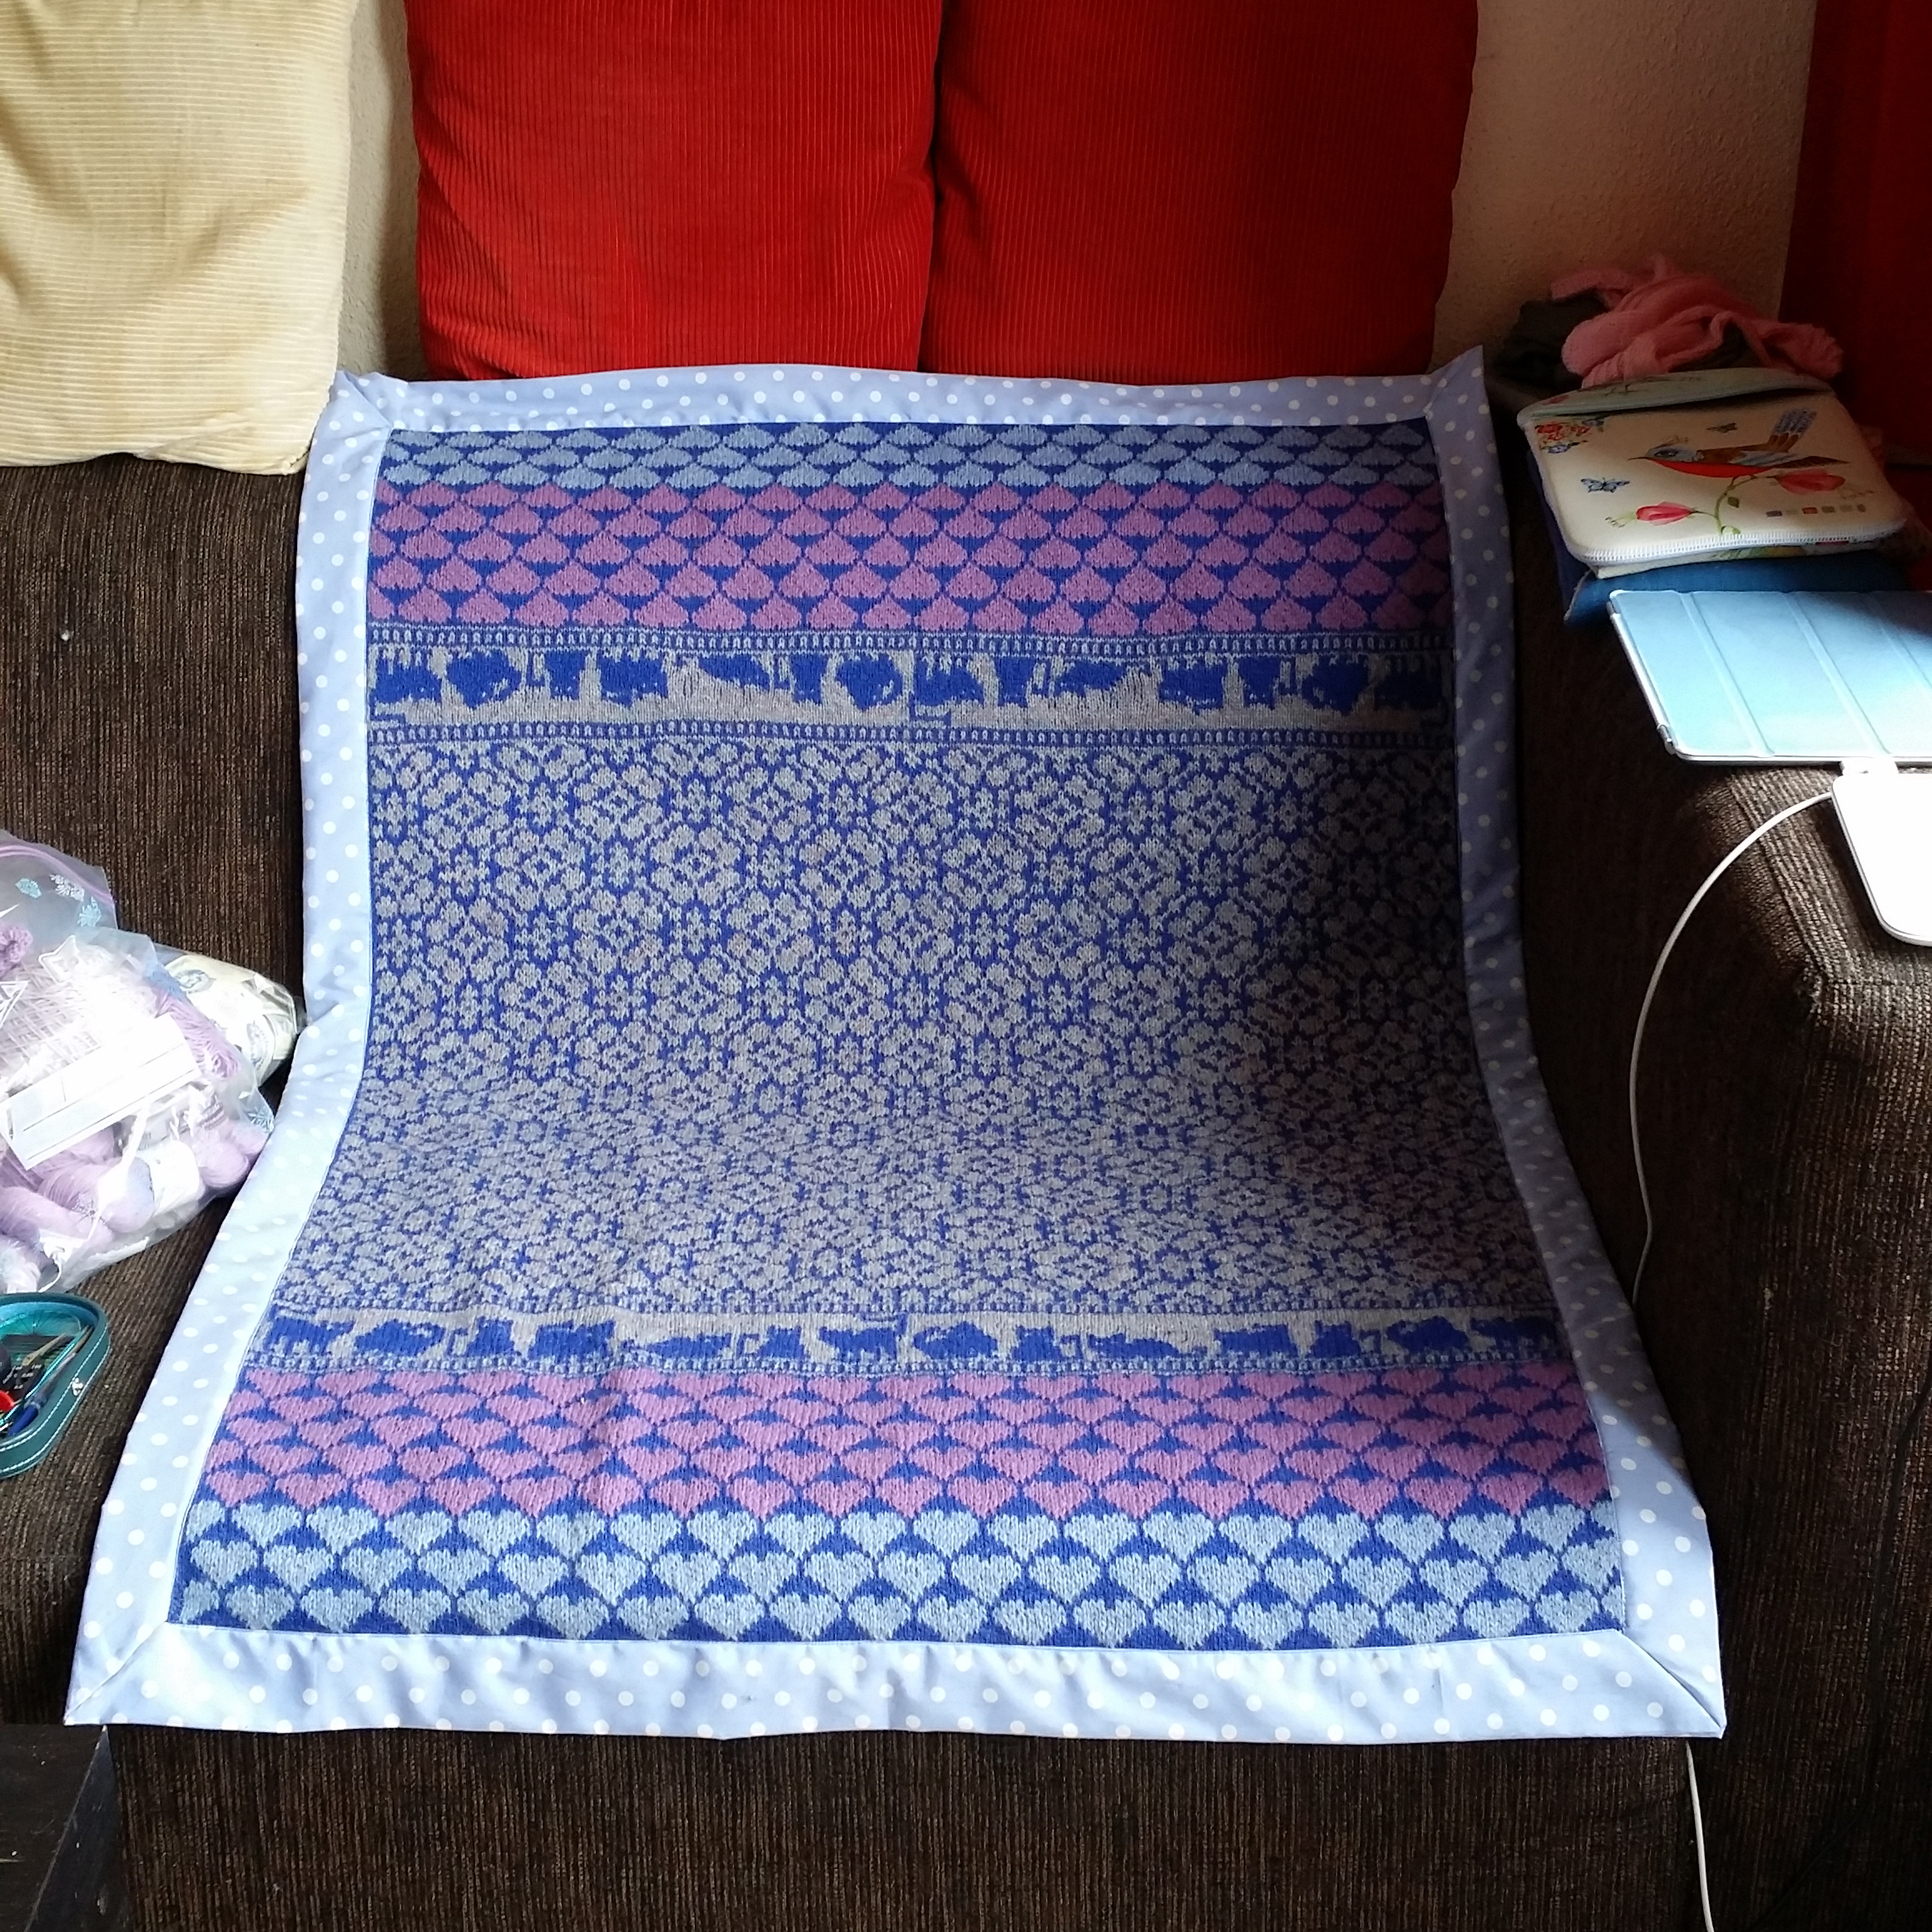
I’m very happy with the result, even though it’s way to hot to use it at the moment… I’m quite proud of it and will probably be doing more colourwork in the future!