The weaving bug has bitten me again! It has been a while since my last weaving project, and suddenly I got inspiration again. I love handwoven fabric, and I have discovered the wonders of tweed and sewing, so weaving is just around the corner from there…
I decided to get out my little Ashford SampleIt loom, and to do some plain weaving – however, to make it more interesting, I was going to do a doubleweave cloth with three heddles! I did doubleweave before, but with pick up sticks, which was quite fiddly. Now that I understand how to do four shaft weaving with three heddles on a rigid heddle loom, doing double weave with three heddles was the next logical step.
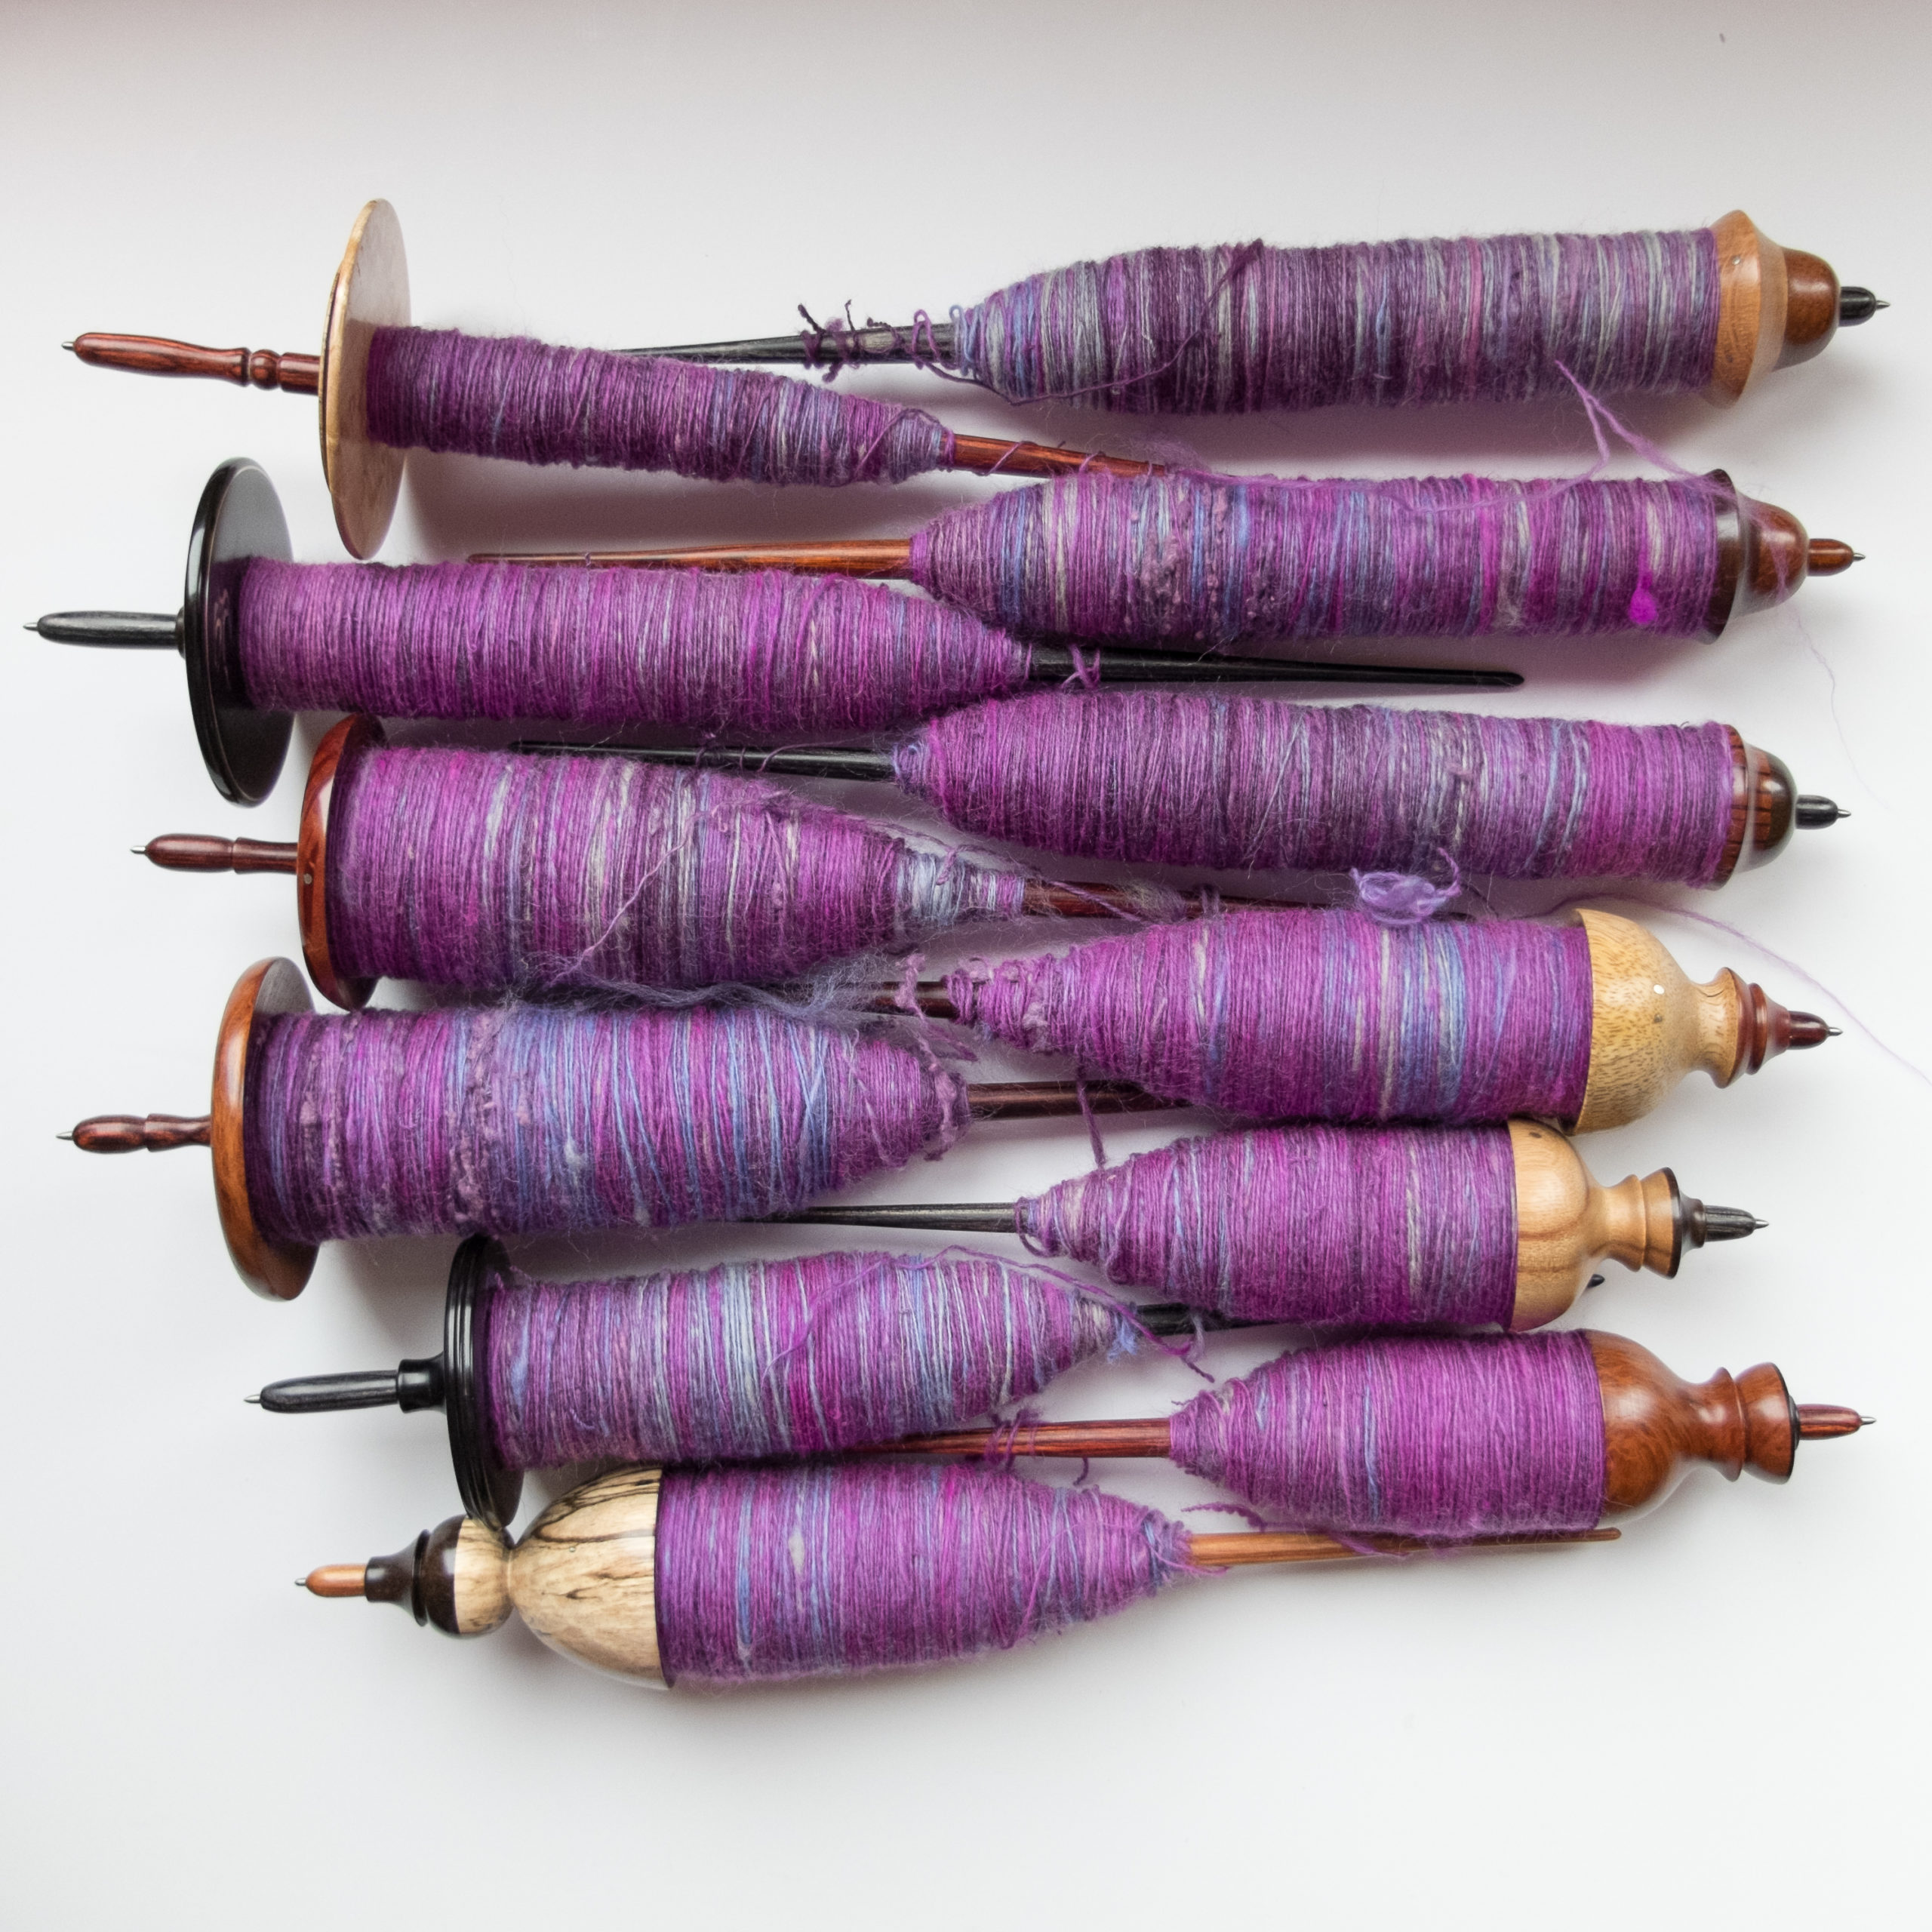
When Wol met Verve did a clearance sale of their Supersoft yarn, I bought quite a number of colours. This yarn is quite thin (light fingering/heavy lace) and contains some grease. However, it promised to bloom after the first washing, and become more soft and fluffy. I was going to test that.
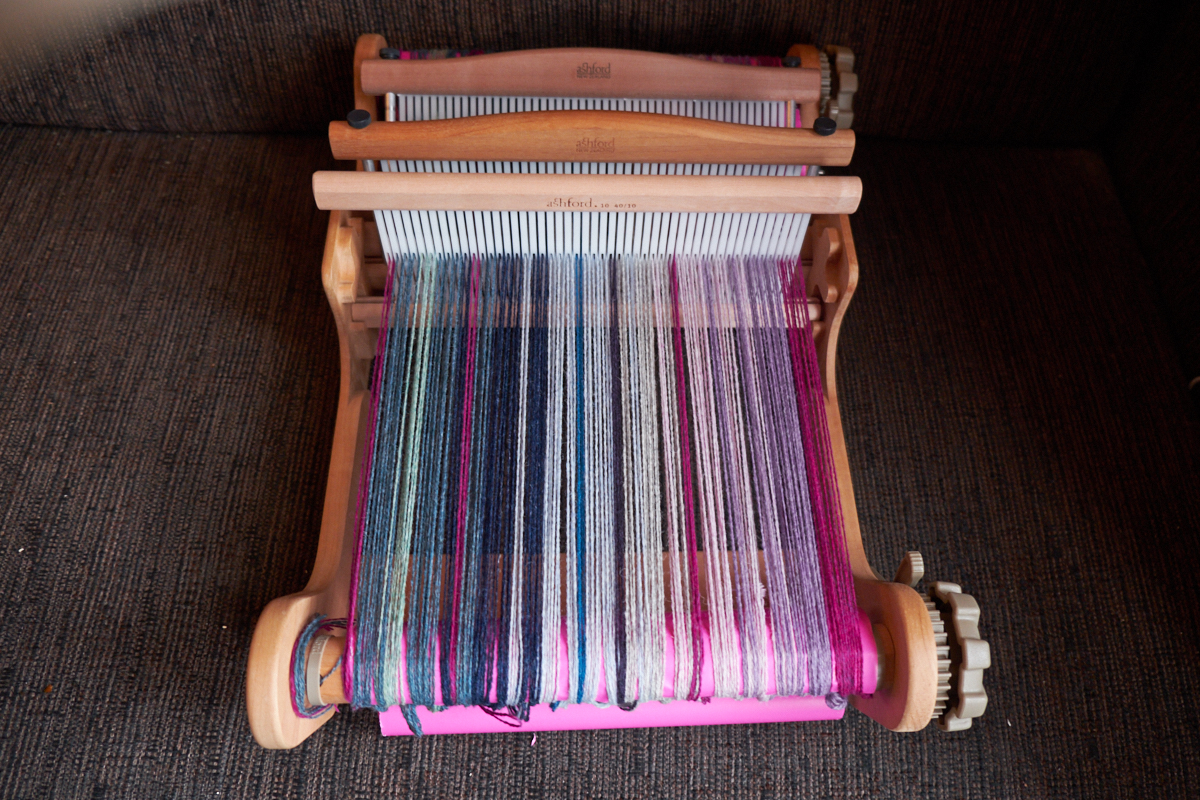
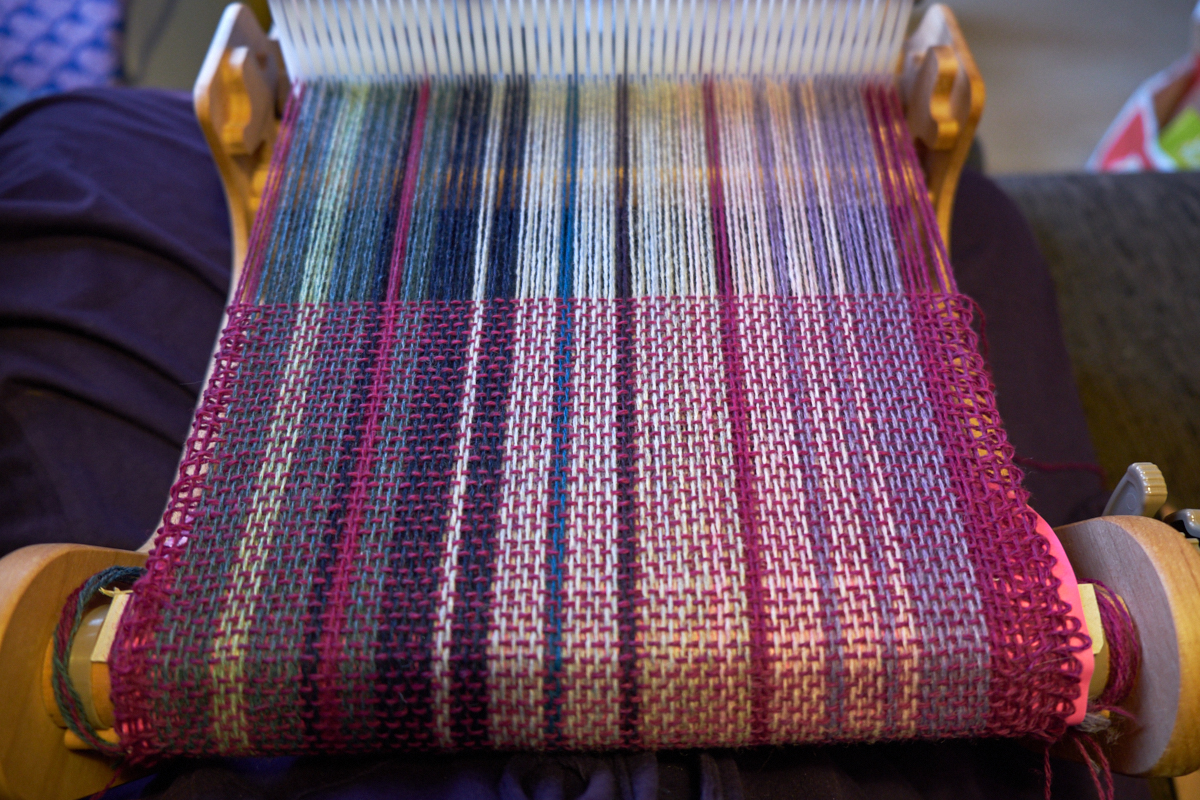
I warped my loom intuitively with many different (cool summer) colours. A bit of this, a bit of that. Slightly random, but with unity. I used the 40/10 heddles (10 epi). I threaded each slot twice, once for each layer (4 threads per slot).
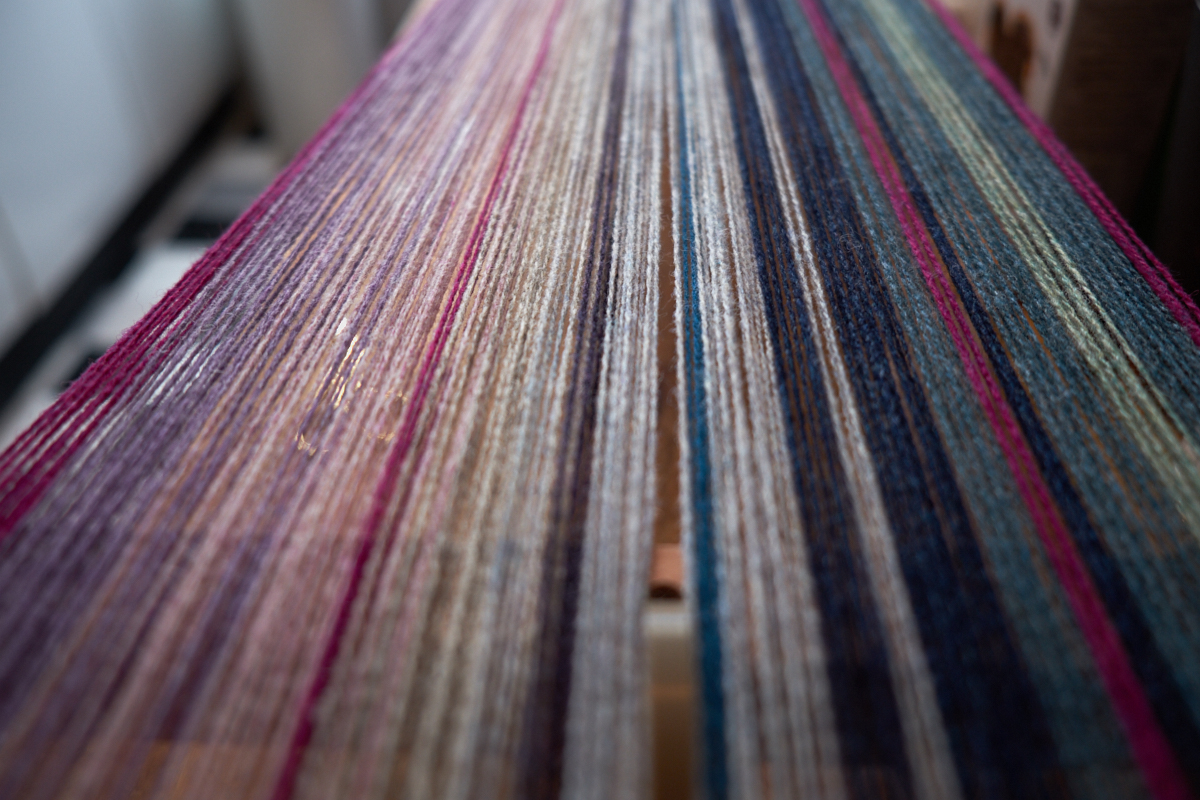
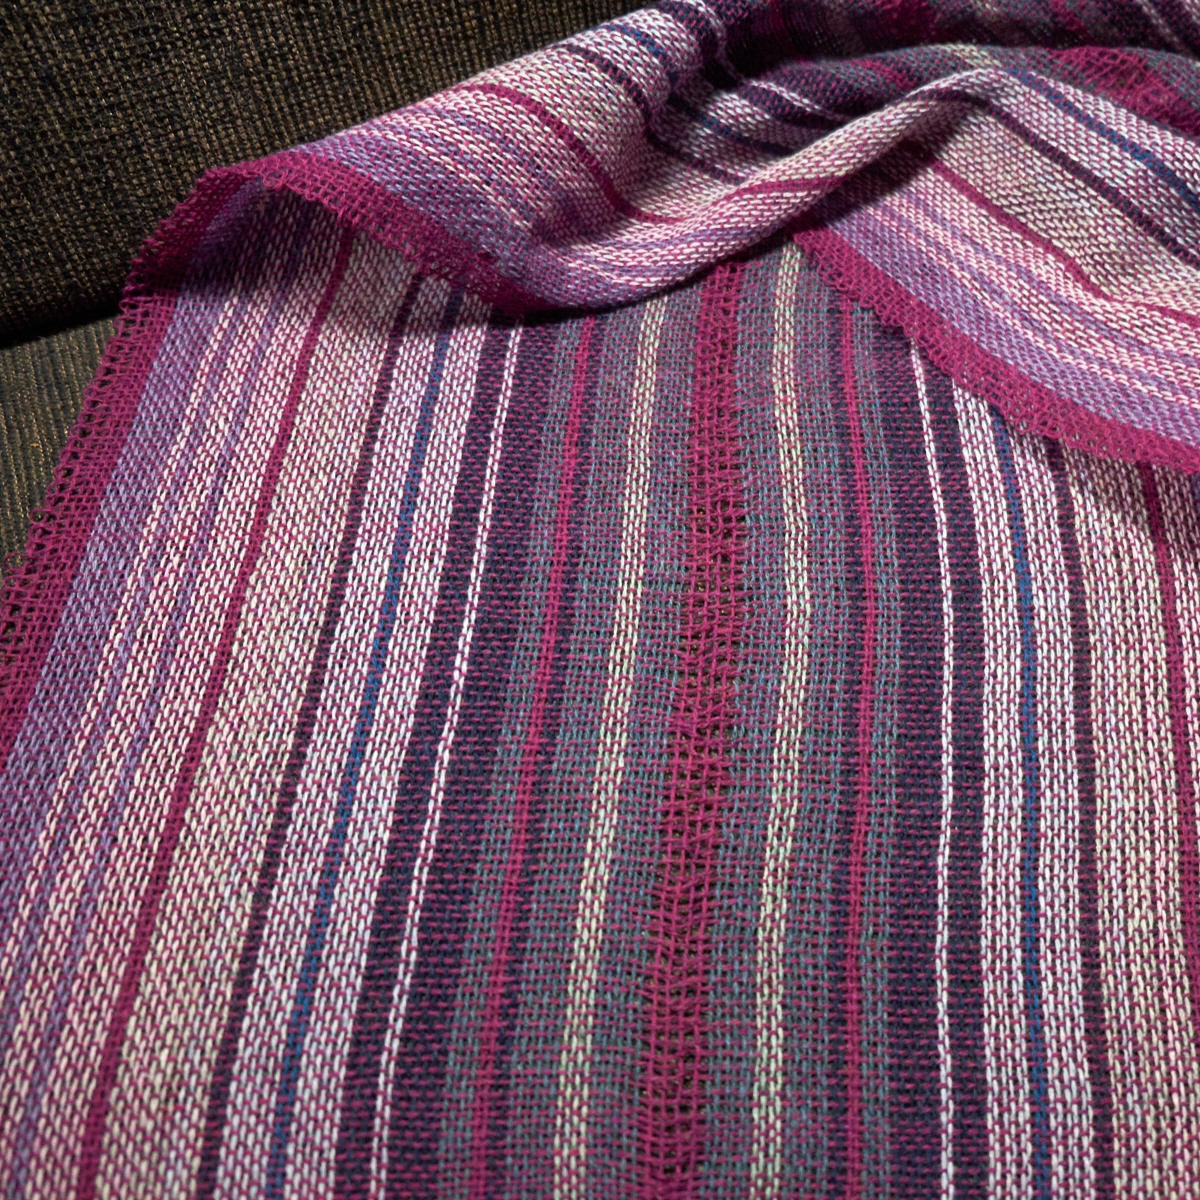
Then I decided to use the fuchsia for the weft. I was curious how that would turn out! All colours did interact well with each other, but you never really know with weaving…
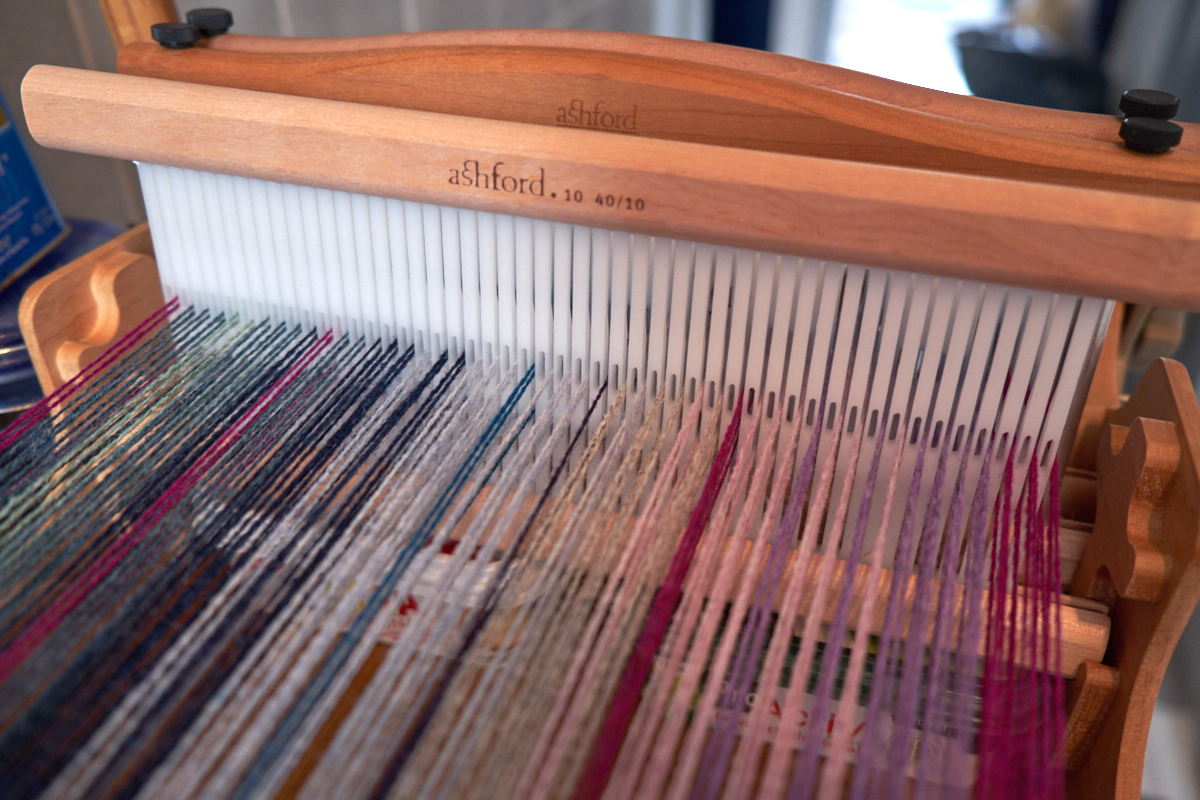
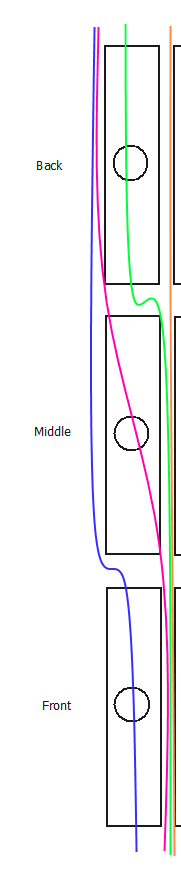
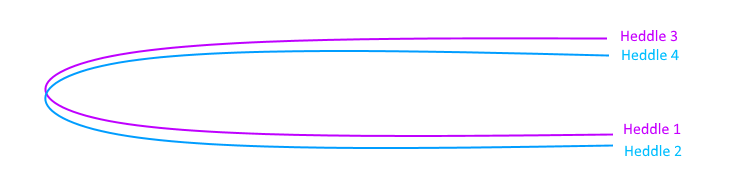
Now I had to thread the heddles properly. When looking from front to back, I did the following sequence: 1 thread (blue) through the hole of heddle one (and the slots of the other two heddles), 1 thread (pink) through the hole of heddle two (and the slots of the other two heddles), 1 thread (green) through the hole of heddle three (and the slots of the other two heddles), 1 thread (amber) through the slots only. Repeat for every set of four threads.
That was quite a lot of work, but it’s just a matter of staying focused and moving around once in a while to stretch your neck/back muscles.
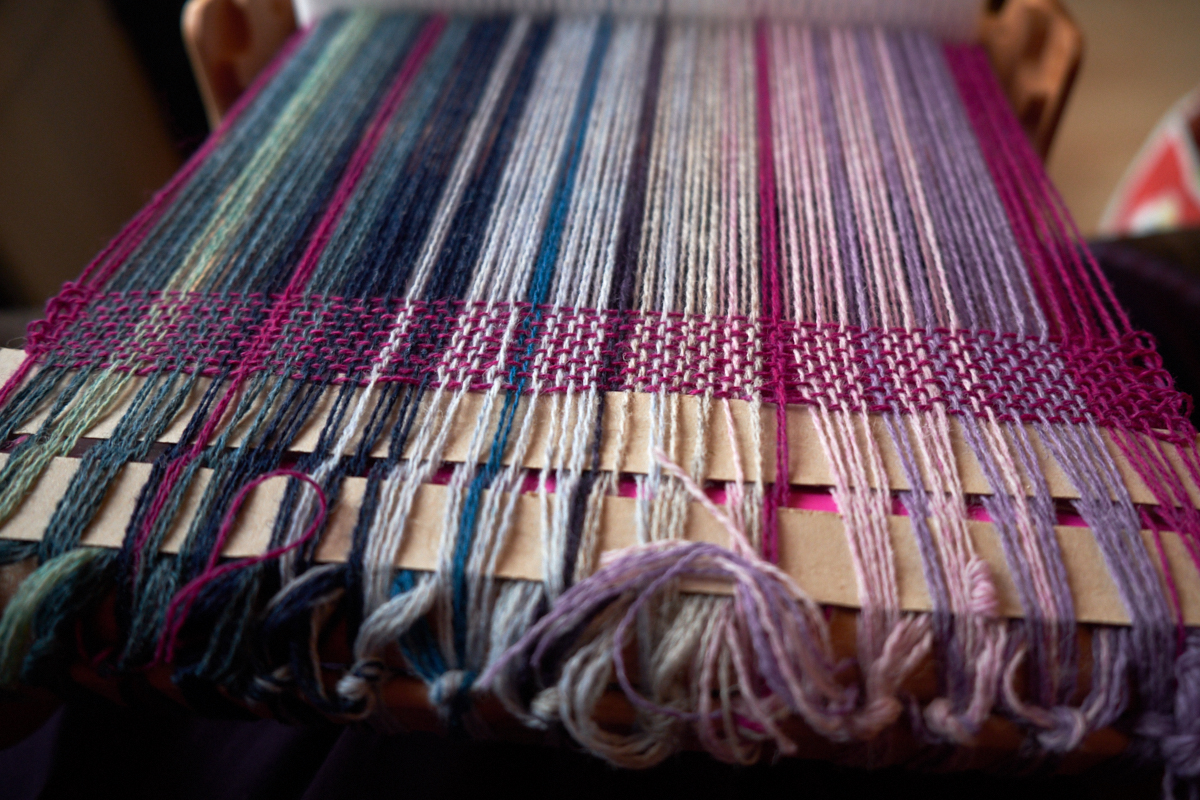
You see that pink thing? That’s paper. I used to use cardboard strips in between the layers of weaving, but they made the weaving uneven in my experience. I’m hoping that an entire layer of paper will make things more smooth.
First, I put in two strips of cardboard at the beginning of the cloth (plain weave: 1 & 2 up, 3 down & 123 up). Then I started weaving with my fuchsia yarn in the following sequence:
- Heddle 1 down
- Heddle 1, 2, 3, down
- Heddle 3 up
- Heddle 2 down
The weird 1, 2, 3 down is the way to get the threads of “heddle 4” (the threads through slots only) up. You push the rest down and they are on top.
In the picture above, you can see the double cloth. Heddles 1 and 2 weave the bottom layer in plain weave, and heddles 3 and 4 weave the top layer. They are connected on the left side, so that, when you fold the top layer back, you have a piece of fabric that is twice the size of your loom width.
After a bit of weaving, I checked if the right side was still free, and it was. I checked this regularly during the weaving project, so that I could fix mistakes early.
As I was weaving, I noticed that the weft and the warp did not form “squares”, but that the warp threads were a bit longer compared to the weft threads. I expected that the fabric would become a bit warp-heavy (because the warp was also stretched, where the weft was not). But the epi that I chose just had this result. The weaving was quite loose, but I might need to weave this with 30/10 heddles (which I didn’t expect with this thin yarn).

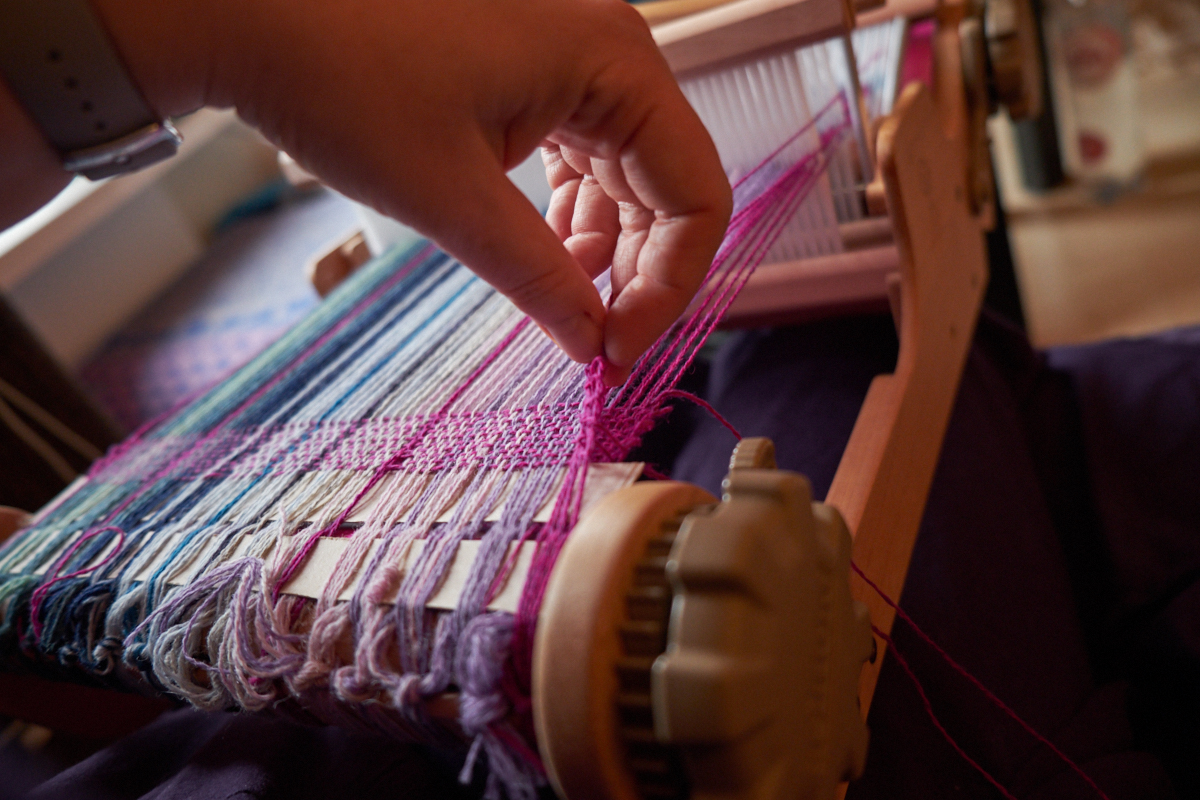
When I couldn’t create a proper shed anymore, the weaving was done. I had been weaving loosely, also on both sides, so I was expecting some extra space in the fold and on the sides. The advantage was that the fabric didn’t pull in this time. I knotted the fringe and cut the fabric off the loom.
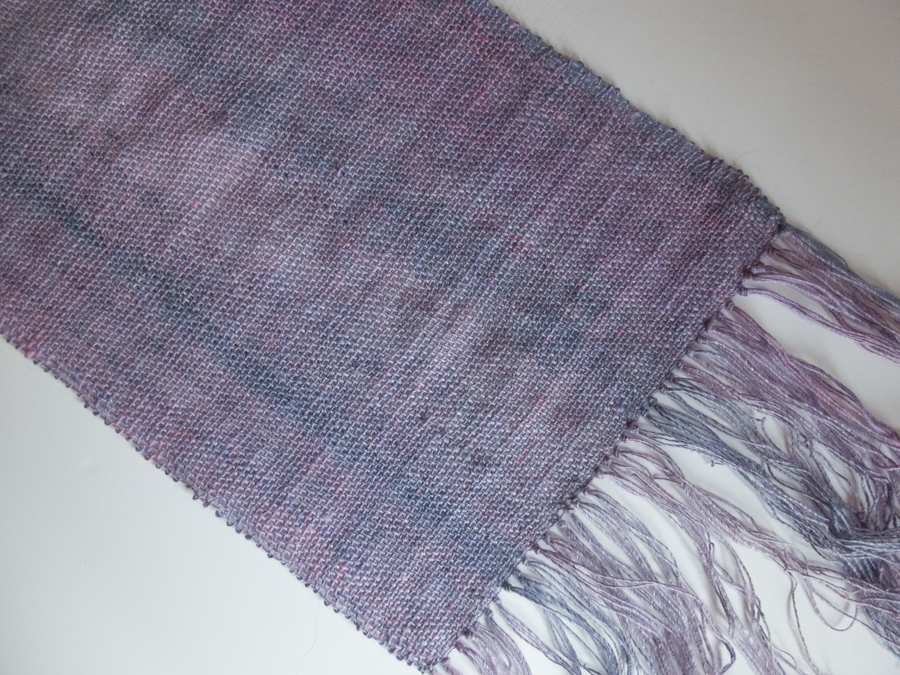
The fabric was quite fragile and loose indeed. The center spine (fuchsia) even more so than the rest of the fabric. But I did like it. Almost time to wash it… but first I twisted the fringe. I quite like that finish, I must say.

I put the shawl in hot water with detergent, and moved it around. Not that gently, because I wanted to full the shawl a bit. Not too much, just enough to fixate the threads and fill up the holes.

It worked quite well, and the wool did bloom way more than I expected. I’m in love! I let it dry for a while, and then I took out my iron and pressed the fabric. I did put a pressing cloth between the iron and the weaving.
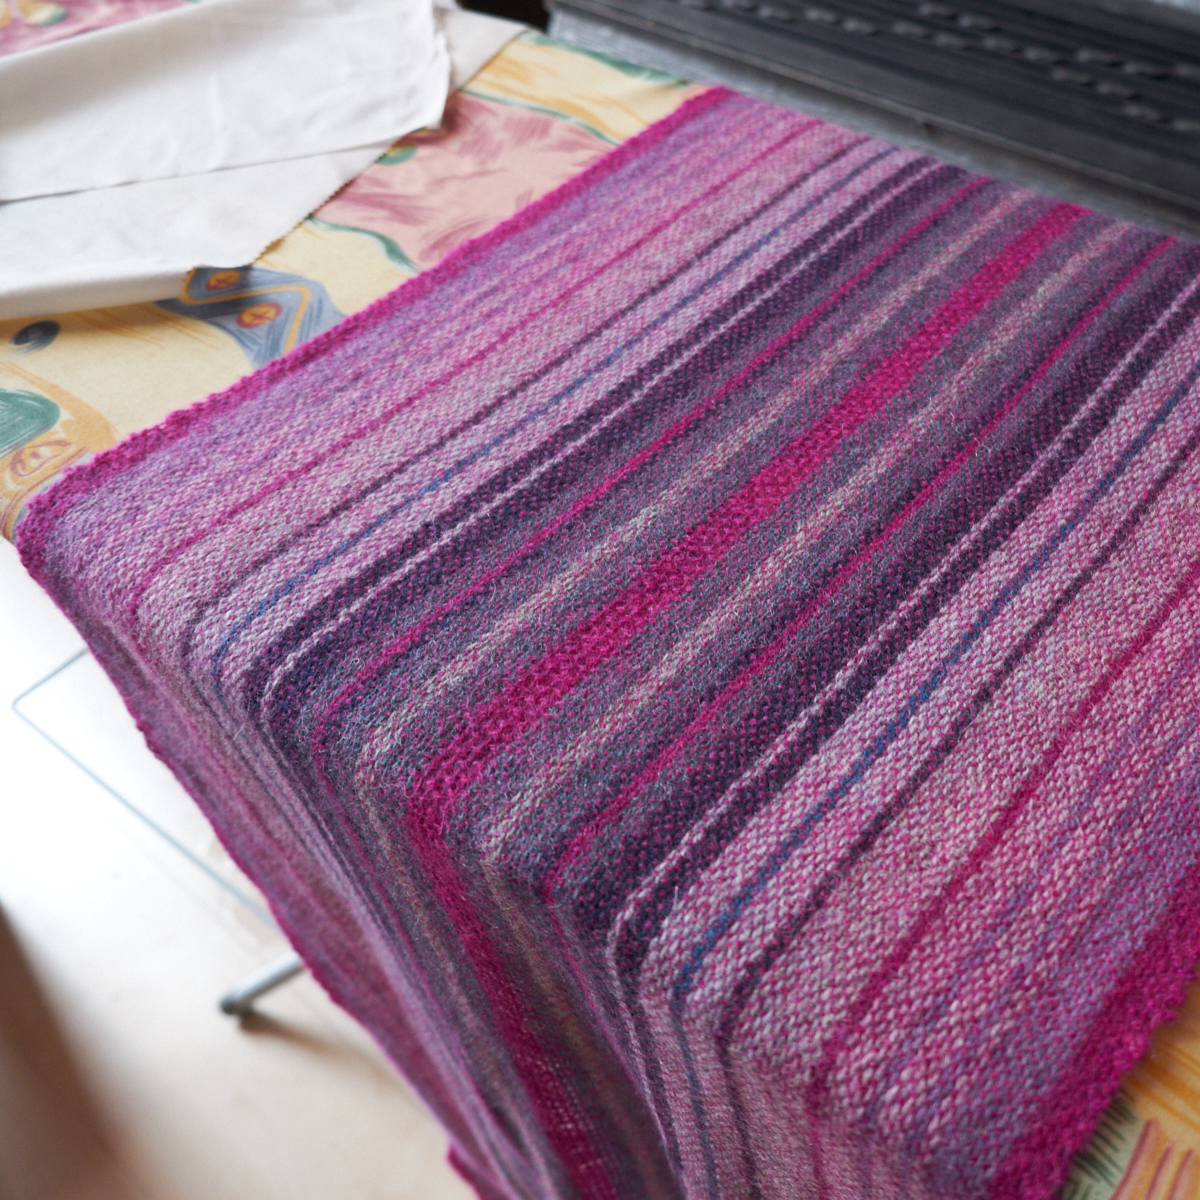
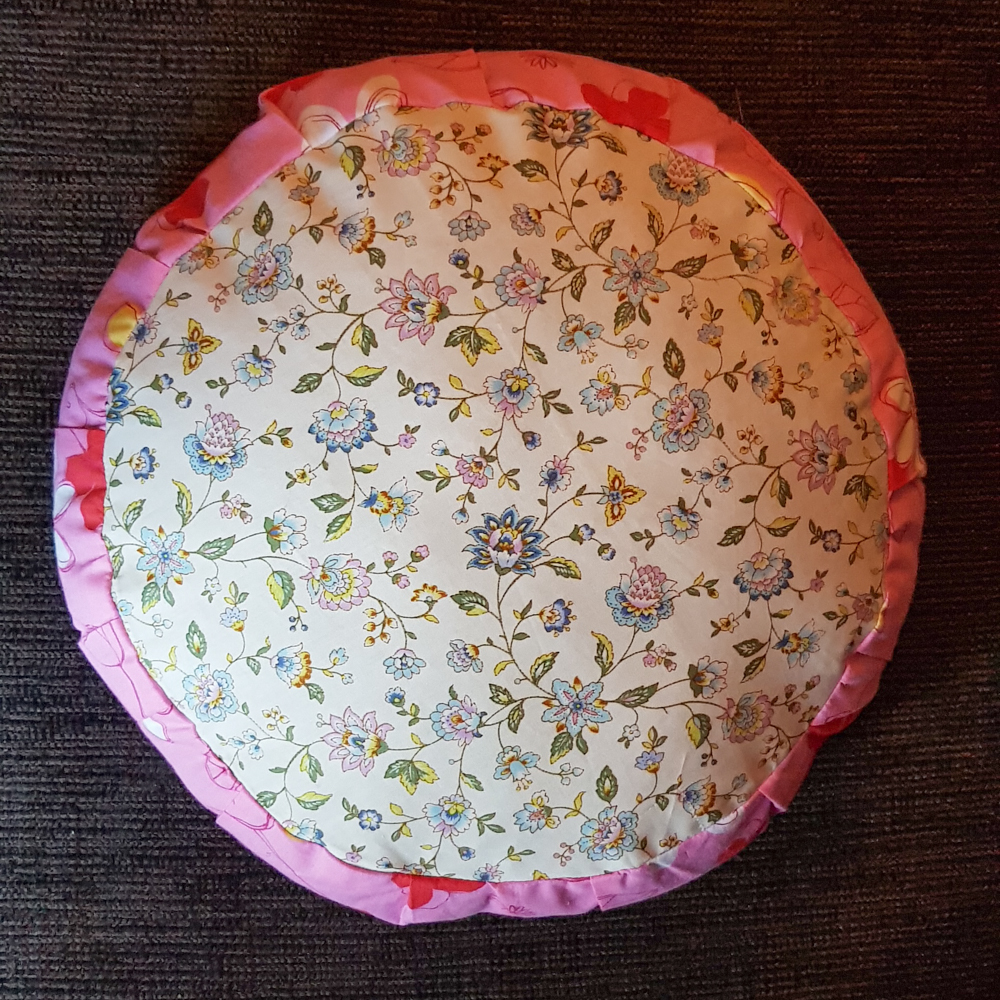
The shawl turned out beautiful and rather soft too! Its finished size is 41x140cm, which is a bit short for a shawl, but just long enough.
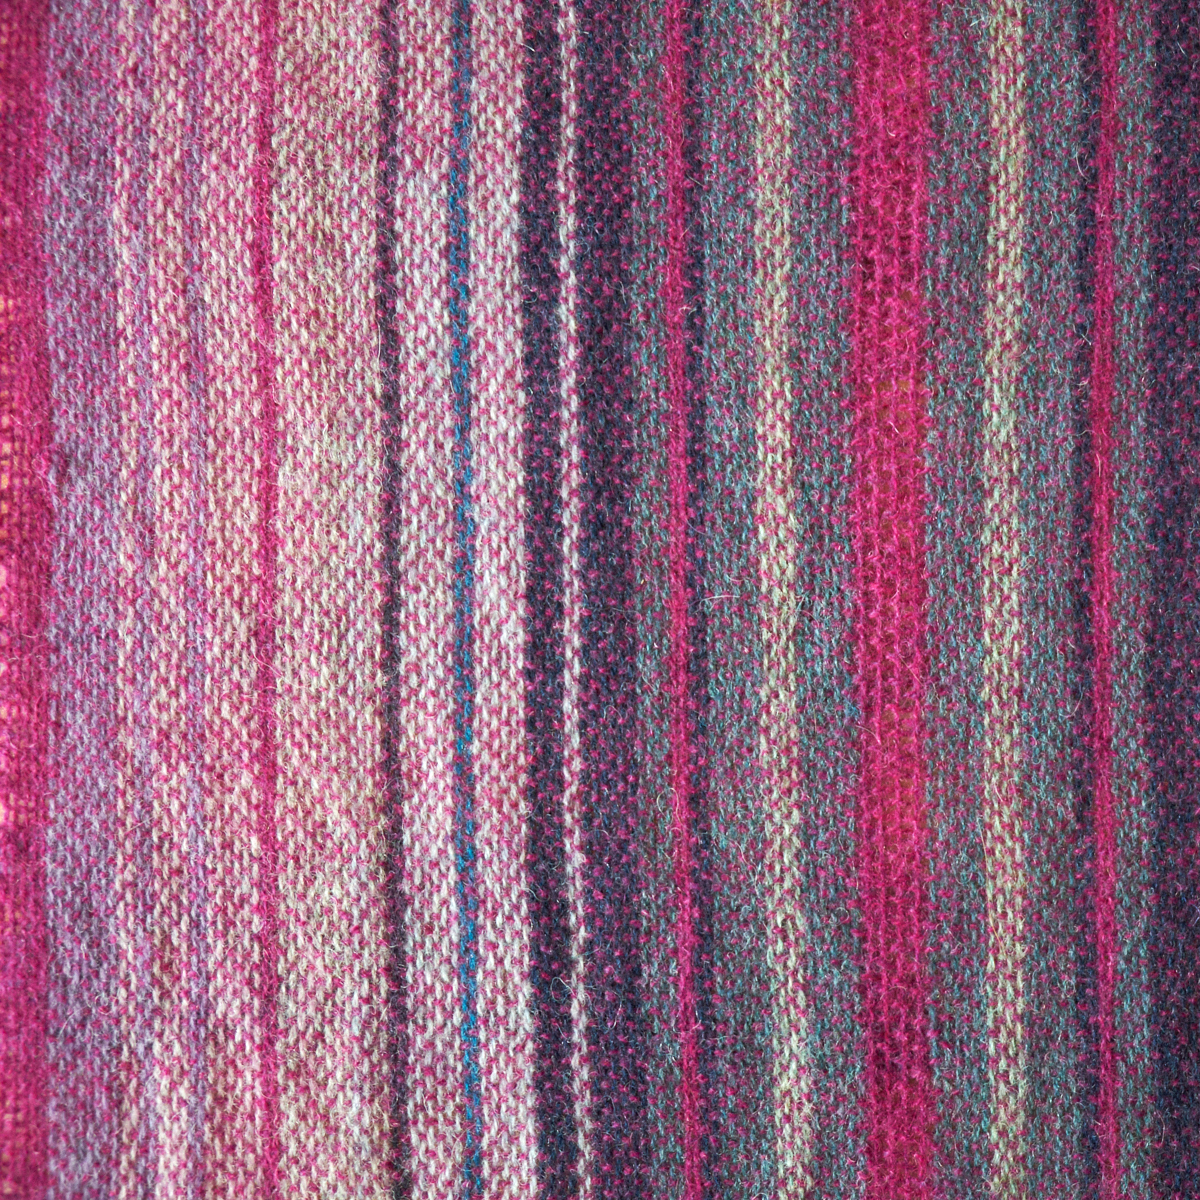
Check out how the colours interact with the fuchsia! The lighter bits on the left are light pink and grey, and the two light stripes on the right are light green. However, the fuchsia really adds its own flavour to each colour, and the result is quite harmonious. I’m going to make another one that is a bit longer, with blues and greens, I think!