The humble rigid heddle loom offers many possibilities for those who want to do more than plain weave and colourplay. If you add another heddle and/or pick up sticks, you can venture into 3, or even 4 shaft weaving territory. I already explored some of that in my previous double weaving projects. Double weaving basically is 4 shaft weaving: you need two shafts for each layer. Combining a second heddle and two pick up sticks gives you just that.
In the past few days I have been weaving with a second heddle without pick up sticks. This is equivalent to three shaft weaving. The first shaft is the first rigid heddle (up or down) while the other is in neutral. The second shaft is the second rigid heddle (up or down) while the other is in neutral. The third shaft is created when you move both rigid heddles up or down at the same time.
The threads that need to be managed by shaft 1 need to go through the holes of rigid heddle 1 and the slots of rigid heddle 2. The threads that need to be managed by shaft 2 need to go through the slots of rigid heddle 1 and the holes of rigid heddle 2. The threads that need to be managed by the third shaft go through the slots of both heddles. Huh? Then how do you lift those threads up? Well, you don’t! Instead, you move rigid heddles 1 and 2 down, leaving the shed for the shaft 3 threads on top!
Once you understand this, you can easily convert three shaft patterns to rigid heddle language. You just need to figure out how to thread the pattern on your rigid heddles. You see, a rigid heddle loom is not called that just because. The parts of the heddle are all rigid, having the same width and distance to each other, as opposed to the more flexible shaft looms. A consequence is that you cannot always achieve a balanced sett if you move into 3 or 4 shaft territory.
The Rosepath pattern
Let me explain what I mean. I have created a threading scheme for the 3 shaft rosepath pattern. However, the threads are not evenly spaced. Sometimes a hole needs to be skipped, leaving a larger space between some neighbouring threads than between others. If I had flexible heddles, I could space the threads evenly.
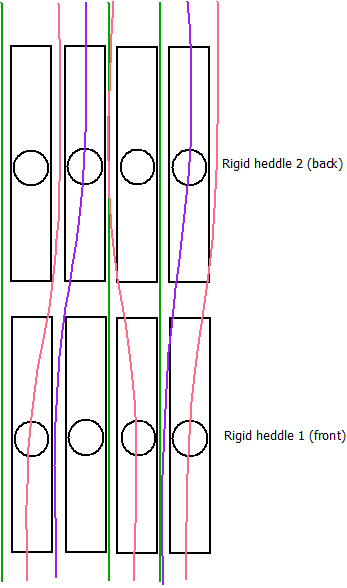
For clarity I have given each thread a different colour (red = shaft 1, purple = shaft 2, green = shaft 3). As you can see, the second hole from the left is skipped. Because of that, there is a bit of spacing between the purple and green thread, and the floats of the pattern will also be longer there. It was that, or having two threads come through the same slot/hole (like the green and purple threads a bit more to the right). What you choose depends on what you want to achieve.
The corresponding threadling sequence for the 3 shaft rosepath pattern is 1-2-3-1-3-2-1-3. Translated to rigid heddle language that would become:
- Heddle 1 up
- Heddle 2 up
- Heddle 1 and 2 down
- Heddle 1 up
- Heddle 1 and 2 down
- Heddle 2 up
- Heddle 1 up
- Heddle 1 and 2 down
(if a heddle is up, the other is in neutral position)
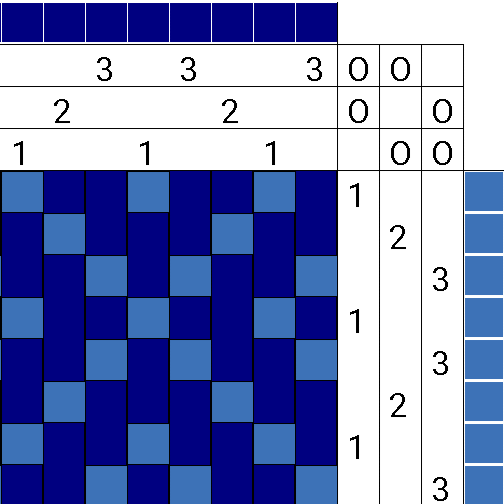
Combined, this gives the following pattern:
Enough theory, let’s move on to practice! I used some very soft Shilasdair Luxury 4 ply for this. It has a thickness of about 14 wpi. For plain weave (or tabby – I love that name!) the sett is 50% of the wpi, so 14/2=7 epi. However, since I’m weaving a form of twill (you create floats over or under multiple threads), I need an epi of 67% of the wpi: 2/3 * 14 = 10 epi (more or less). So I chose my 40/10 reeds for this project.
For a moment I was afraid that the yarn would be too delicate to be a warp (I could pull it apart rather easily), but it did hold up!
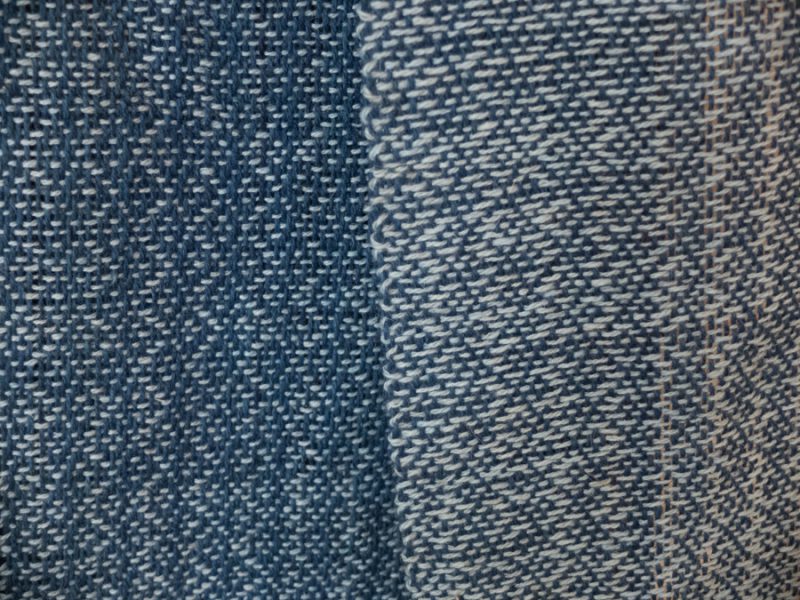
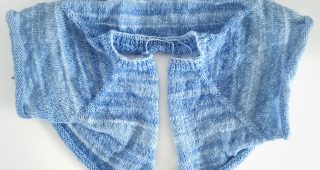
I started weaving and quickly noticed that the pattern was a bit slanted because of the uneven sett.
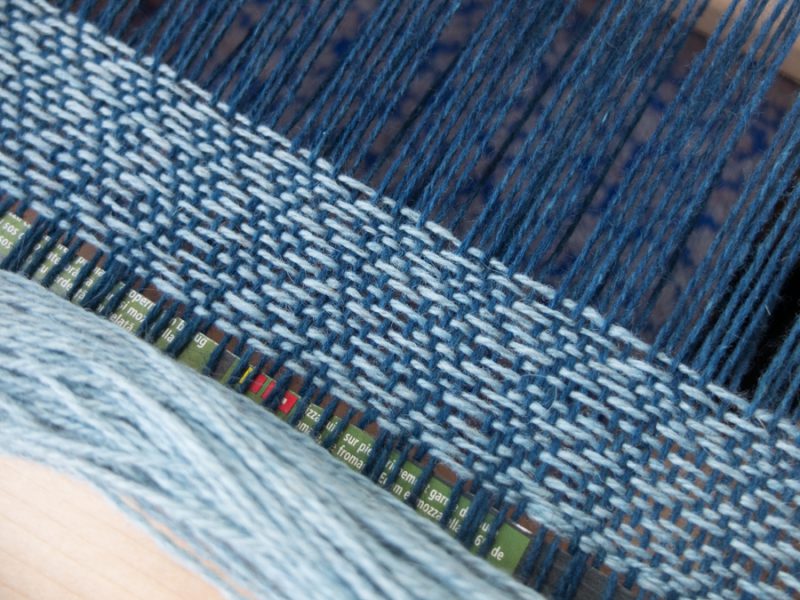
You can see the pattern better from the side, and then you notice that the dark blue does not form straight lines, but gentle waves.

This is because of the spacing, some floats are longer or shorter than they should be, which interferes with the pattern a bit. I don’t really mind, though. It feels less rigid than the symmetric version.
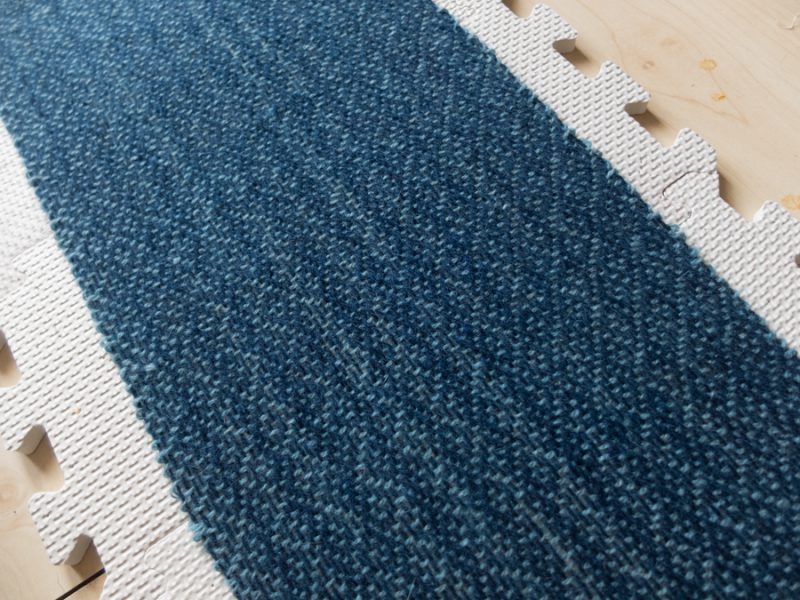
After finishing this weave I could see the result without tension on the warp. Also, I could finally inspect the other side…
It is still uneven, but the dark side looks quite nice. I think I may even like it more than the light side.
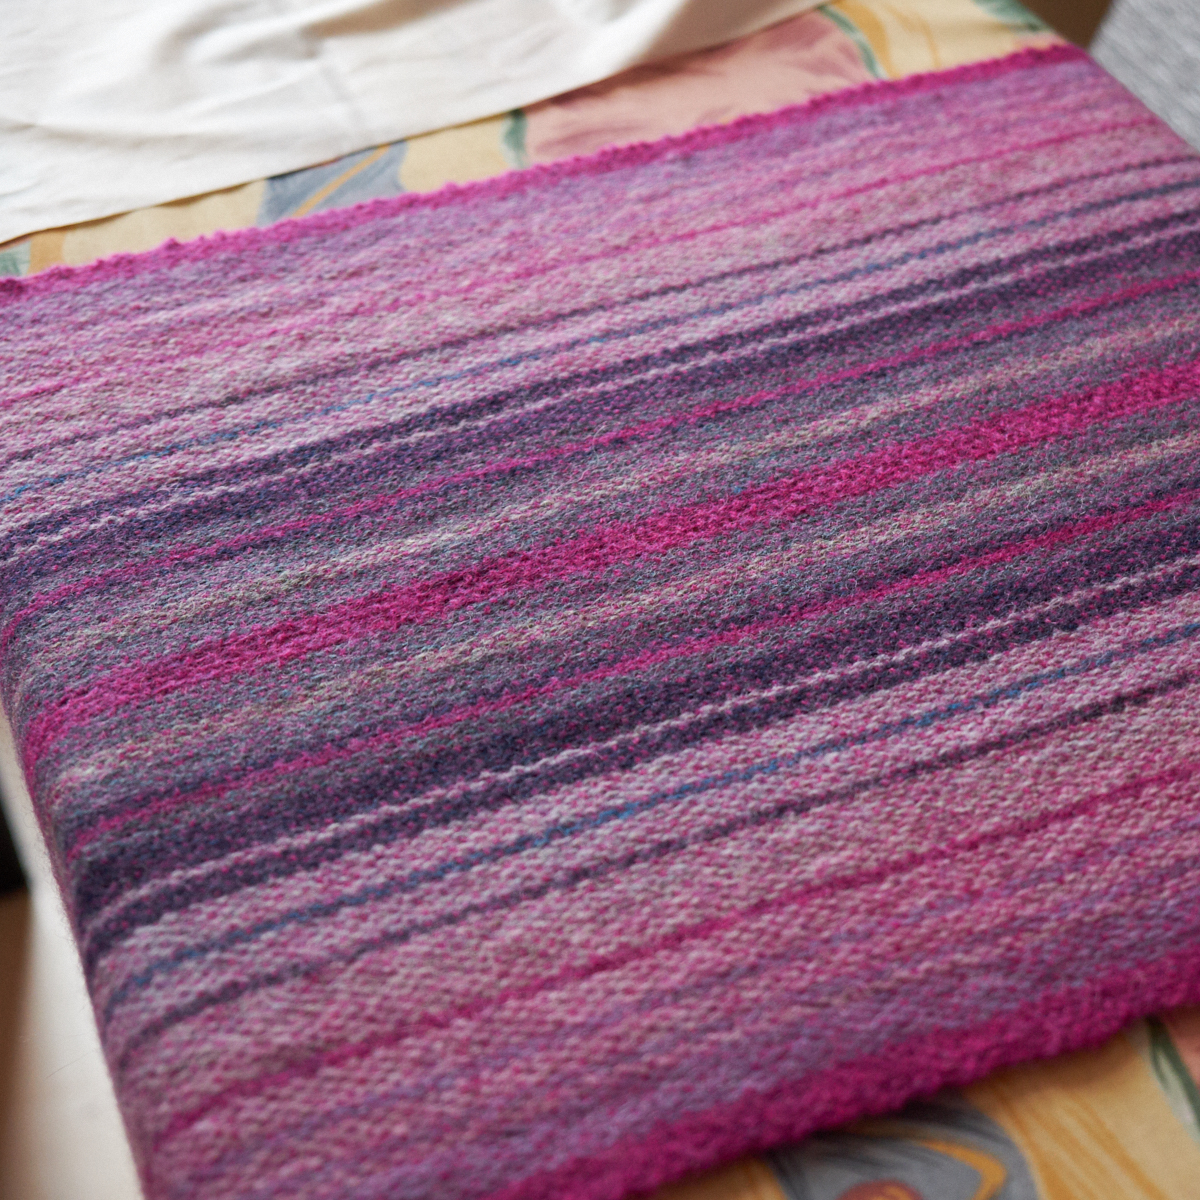
I gave the scarf a bath, hoping to even out the threads a bit. Well, they don’t, really. Perhaps it also makes a difference what kind of yarn you use. A smooth yarn could possibly spring back, but a hairy, sticky one would stay in place.
This was fun to do. I will certainly try some more twill patterns! I’m starting to see the advantages of a flexible heddle loom, though.
Try with one heddle and a pick up stick for the third.
Is the first green thread on the left to be part of the pattern the entire way through? Or is it only there at the beginning of threading? Thank you
Hi Sarah, good question! Yes, I used it in the repeat of the threading pattern. If 1 is red (hole in heddle 1), 2 is purple (hole in heddle 2), and 3 is green (no holes), the threading sequence repeat would be 3 – 1 – 2 – 3 – 1 – 3 – 2 – 1.
I started with 3 because that’s also easier if you want to use that thread as a selvedge thread. You could also end with 3 because of that.
Ciao,puoi fare un video di come si fa la messa in carta,come si stabiliscono i licci ecc.
Grazie mille