About half a year ago, I made a simple storage solution for my supported spindles, from a cardboard box, 4 tie wraps, a bit of tape and an old oven grate. I wanted to store my spindles hanging vertically to prevent any warping.
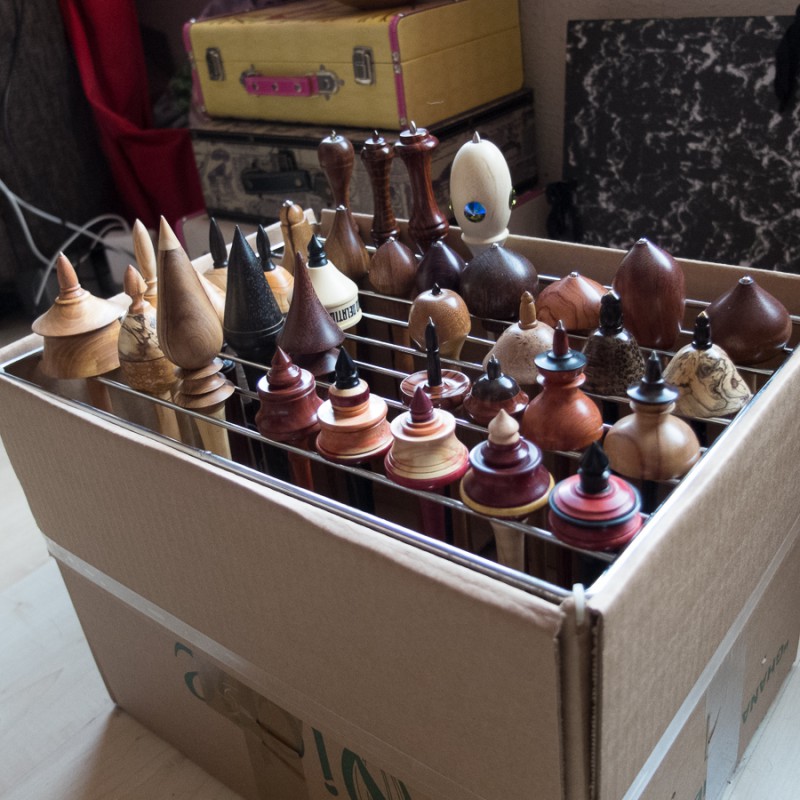
While useful, this solution did not satisfy me entirely. For one, the spindles were not covered, so they were not protected, and they also collected dust. So in the past couple of months I have been looking for a box with a lid of some kind that would be easily convertible to spindle storage. It had to be quite high (some spindles are 11″ tall, and some spindles have a tall shaft under the whorl, while others have a tall whorl): at least 34 cm. But I did not want the box to be too wide.

At Xenos they have quite a lot of boxes and chests. Unfortunately, their width grows with their height, so if I wanted the highest chest (which would be suitable), it would also be enormous in the other dimensions. Well, of course I may buy more spindles in the future, but not thát many!
In the end I found the perfect box for me. It is a hocker with storage space in it. It is large enough. And it can be used as a seat (if you are < 100 kilograms). Great! I ordered it last week and it arrived yesterday. It was a flat package, and it was child’s play to assemble. Quite pretty too! I thought about how to hang the spindles in there. The oven grate seemed to fit here too, but I needed to find something to keep it in place. Maybe some small slats to rest it on? So off I went to the hardware store.
I found some nice mounting brackets that would probably fit the grate. Ready to assemble! I decided to wait until today, to do it with daylight. Today I put all the spindles on the couch and I cut the tie wraps to get the grate.
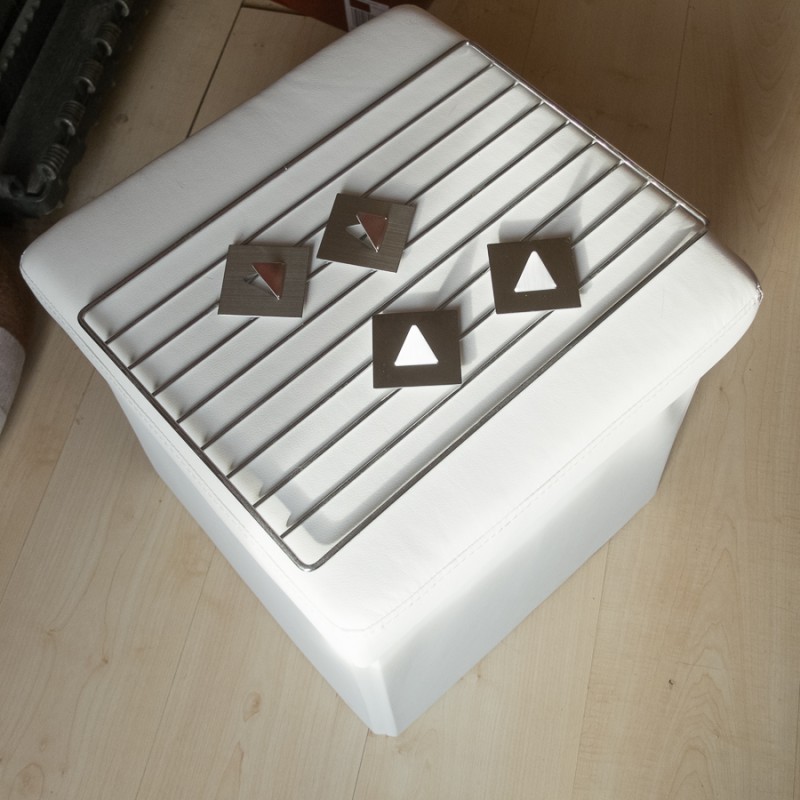
I tried to fit the grate, and yes, it fit, but… if the grate was in the box, the lid did not fit anymore! Bummer…!
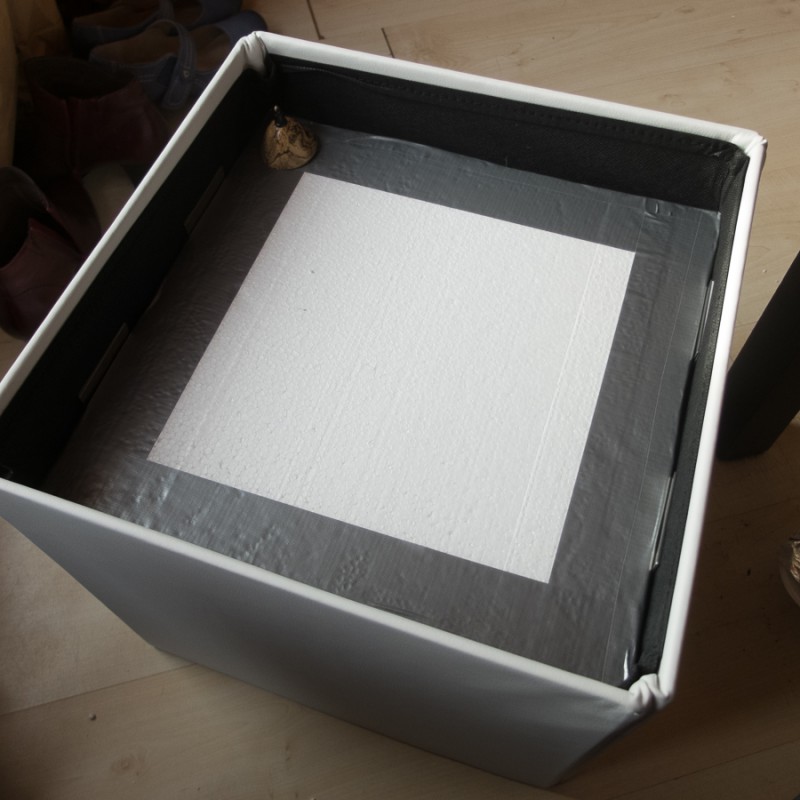
I looked around in the house to see if I had anything that I could use, and I found a styrofoam board. That looked promising! I would give this a try, and if necessary, I could use a different material if this did not work. I cut out a 35.5×35.5 square with a stanley knife.

I then used duct tape to make sure that the edges would not just crumble away. I attached the mounting brackets such that the longest shafts would still be able to hang. The board fit perfectly! Then I started making holes through the styrofoam…
After adding three spindles, I was working on the hole of the fourth, and I don’t know exactly what happened anymore, but I managed to impale my hand on the tip of one of the spindles. It went in quite deep (it felt like a centimeter, but was probably only half of that, I don’t know). I had to pull it out… it did not even bleed that much, but it hurt like hell.
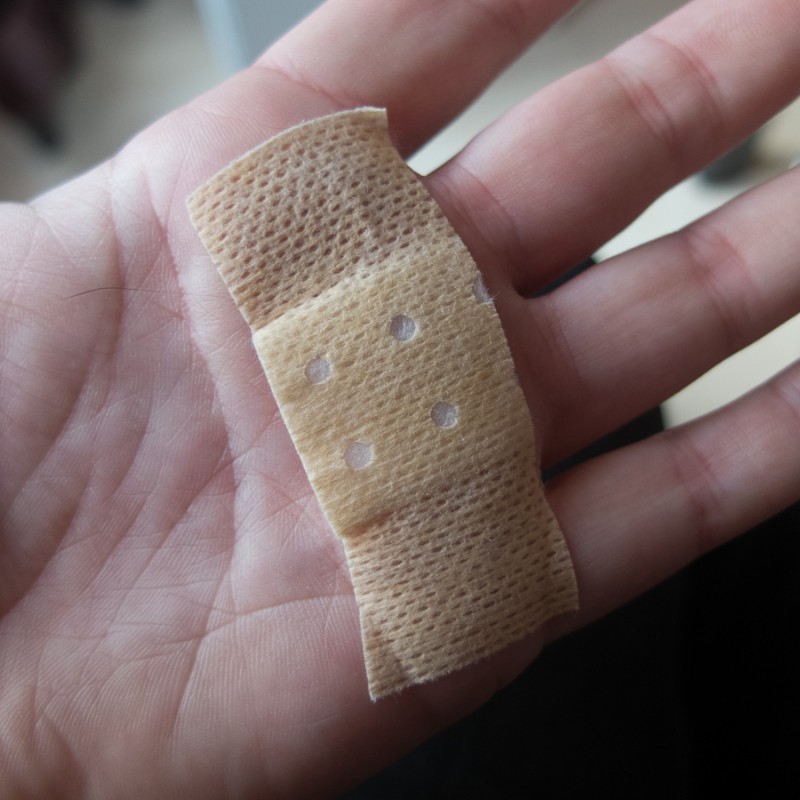
So after putting on a band aid and hanging on the couch trying not to faint for a while, I was at last ready to continue. More carefully this time.
I started to draw circles around the whorls so that I did not have to keep any other spindles in there when measuring where the new hole needed to be. I pierced the first row through the duct tape, but that was a bit more work than just going through the styrofoam, so for the later spindles I mainly used that part. I used a screw driver for the thinner shafts, and a 1 cm drilling head for the thicker ones (just by hand, no drill involved). Any future spindles will need to go live at the edges.

Some of the holes needed to be big to make sure that the spindle could hang as low as possible (otherwise the lid would not fit). The styrofoam was everywhere by now. It did not look very elegant like this, but it would be functional. I can always recreate this board in wood or a different material later.
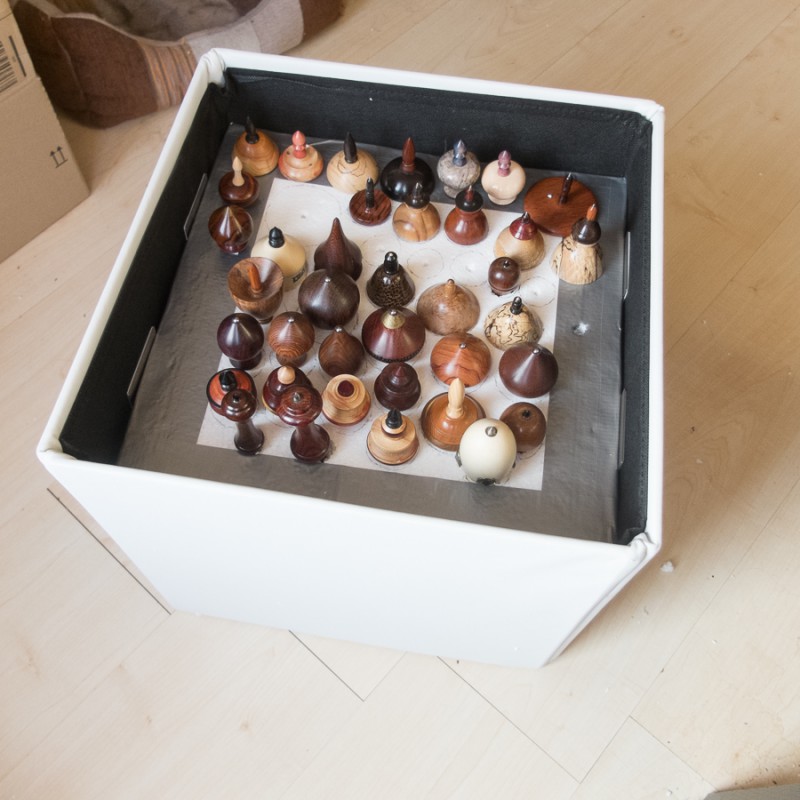
The next challenge was putting all the spindles in the right holes. It was a bit like a jigsaw puzzle!
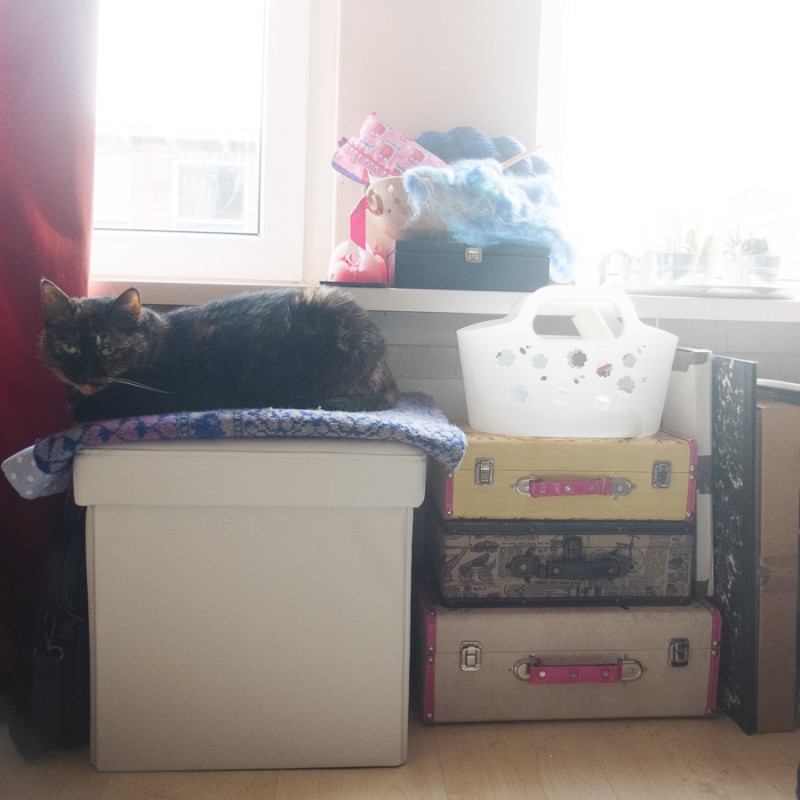
Some spindles are in use at the moment, so they are not in the picture, but I managed to put the rest where they belong. Then I closed the lid and put the cat blanket on it. The faux leather is quite fragile, Freya already scratched it a bit, so I wanted to protect it, because I expected her to like this box. I was right. Everybody is happy!
What a wonderful sight, all those beautiful wooden colours together!!
And of course a great solution for storing the spindles 🙂
I hope your hand healed up fine