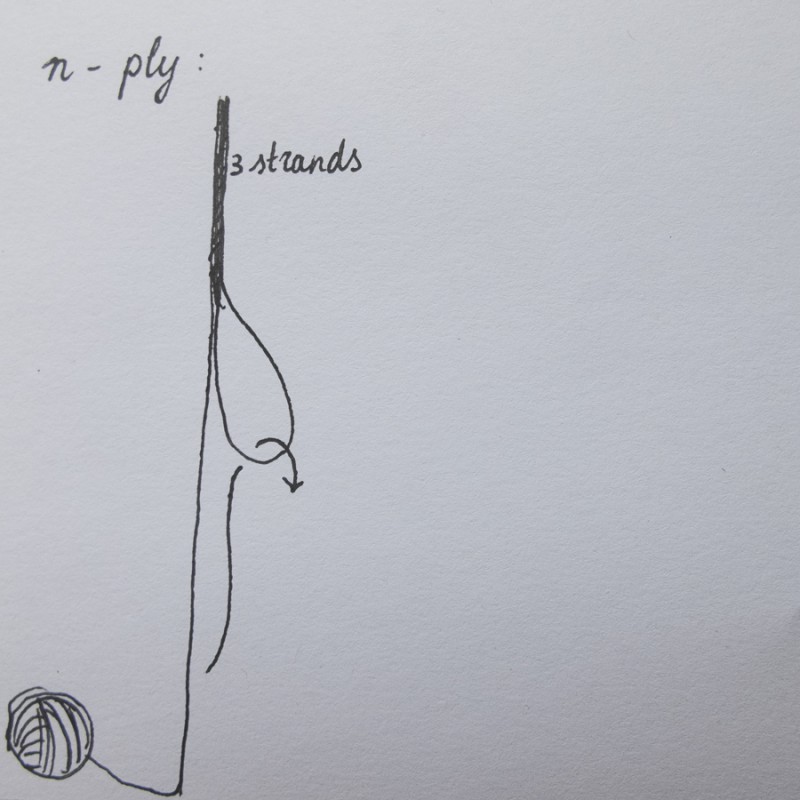
Most spinners probably have heard of n-ply (navajo ply or chain ply). It is a technique to ply one single into a 3-ply yarn directly. I use this method of plying a lot, because it keeps the colours together in order, and the result is a nice, round, bouncy yarn, less prone to splitting than 2-ply yarns. Before n-plying, I sometimes cake the singles first. Not always, sometimes I ply straight from the spindles, but if the fibers are “sticky” or have a strong twist, I will first cake them.
A while ago, when plying from a single cake, I started thinking. The yarn cake is such that you can work from both ends, the inside and the outside. That can be quite helpful when knitting. For example, when you have a gradient yarn and you want to make two-colour brioche or stranded knitting, you could knit the yarn cake from both ends and use the whole ball without having to cut it. Or you could knit two socks from the ends and neatly end up in the middle.
So… why not use a similar technique for plying?
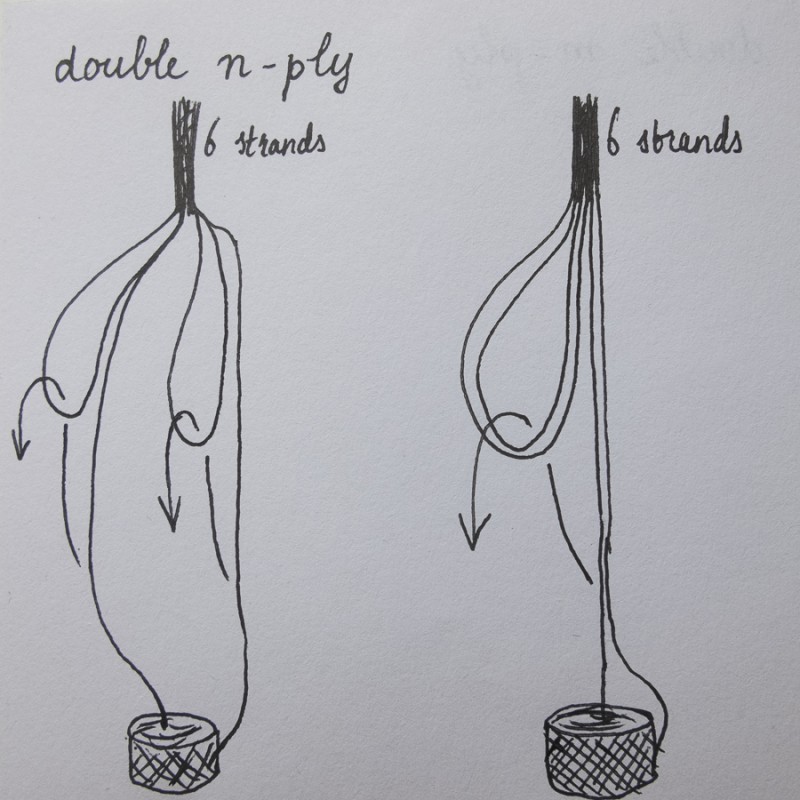
If you n-ply from both ends, you could do that in two ways. Either you do two n-plies next to each other (having two loops and two threads that you chain through them), or you could just hold the two strands together and have only one loop (with the yarn held doubled). This would result in a 6-ply (2 x 3-ply) yarn, and I think the result of the two approaches may be slightly different, especially if you do two n-plies but time them differently (first chain one, then chain the other – not exactly next to each other). I found some people who mention this technique, but it doesn’t seem to be used much (probably because people don’t really want to create 6-ply yarn – they will just spin a bit thicker instead).
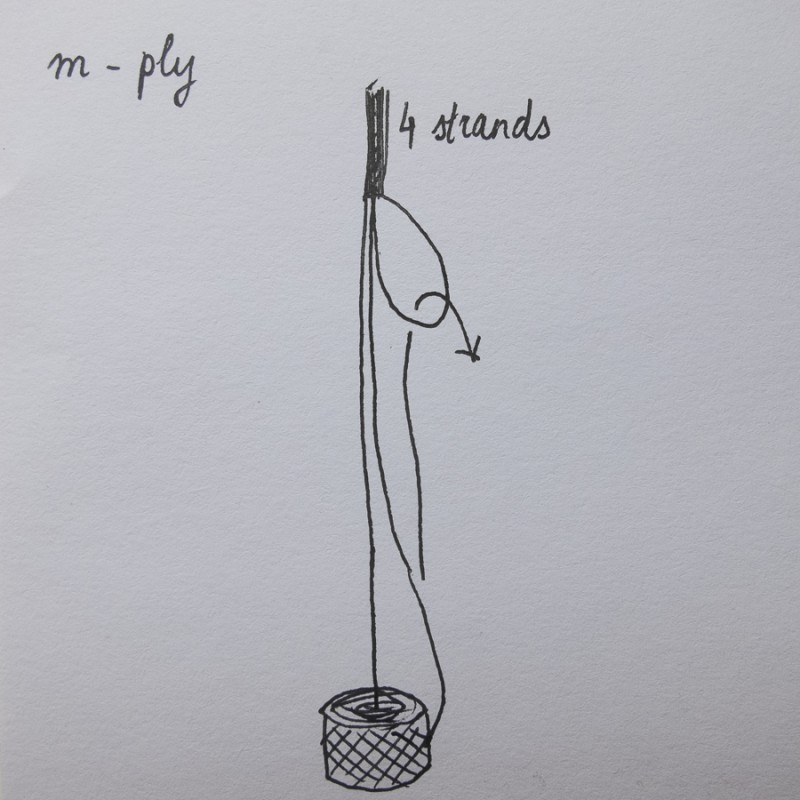
There is also another possibility, and I didn’t find that anywhere yet (but it may be an old trick in the book and I just don’t know the name). You n-ply one of the ends, and let the other end travel with it, creating a 4-ply from one single. 4-ply yarn is more common than 6-ply, and depending on how thick you spin, it may just make the difference between creating lace weight yarn or light fingering. I’m calling it m-ply for now.
I decided to give it a try.

I spun 100 grams of 50/50 merino/silk by AdrianArt (from my first rolags!). The singles turned out quite thin. I caked the singles, and started the experiment. I decided to chain-ply the outside thread, carrying the inside one along.
I soon found out that the cake sitting on my lap may not be the best way to do this. The singles were quite clingy, so sometimes the cake was pulled up a bit, disturbing the tension and rhythm. So I took out my old yarn holder and put the cake on it. That was better!
Next question: where should I put the yarn holder? I first put it between my legs, but the yarn holder stick was a bit too long for that: the angle was off and I had to work with my arms held too high. So then I put it on the ground, which worked much better.
The outside thread was wandering around the cake and around the inside thread, so every time that I picked up the outside thread to chain it through the loop, I picked it up as low as possible, to avoid tangling. This worked quite well as long as I maintained the rhythm and did not lose tension on the inside thread.
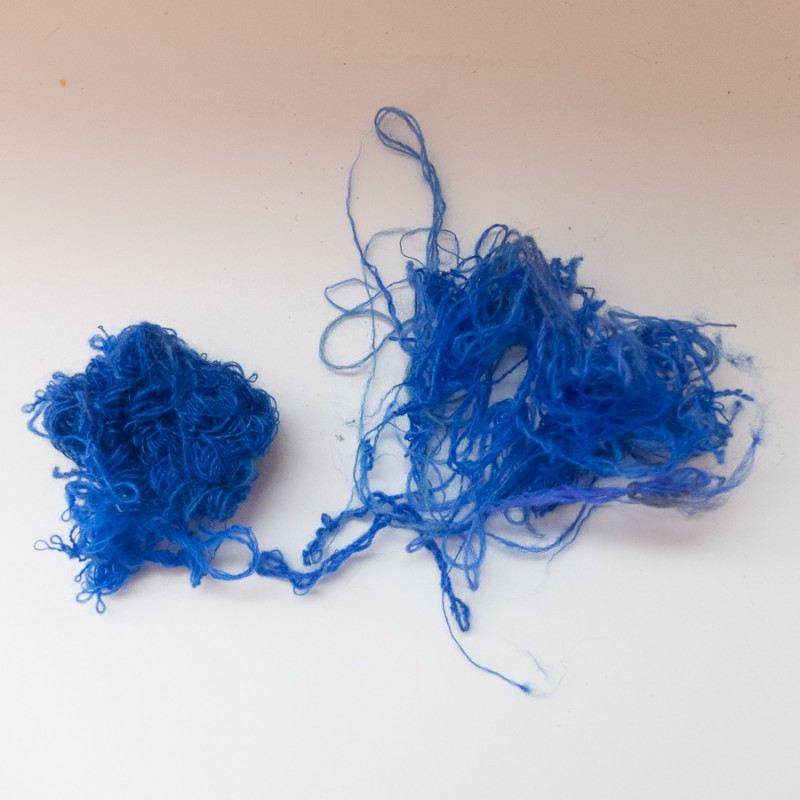
However, sometimes, the threads did stick together a bit, because the yarn was rather snaggy, and whenever that happened I had to untangle a bit of the mess (which did not always work because I got very frustrated). It happened a couple of times during the plying, and at some point I decided that it was faster to just rip out the tangled bit and reattach the threads and continue. Also, the last bit of the cake became quite frustrating, because the inside thread started to pull out other layers with it, which became entangled in the outside thread as well…
At one point I was about to give up, and then I remembered reading about Andean bracelets. That is a technique to wind the yarn onto your hand in such a way that you can then wind it off from both ends at the same time. This was as good a moment as any to try a new technique, so I gave it a go. I wound the threads onto my hand doubled, so that I would ultimately get 4-ply yarn too. I managed to salvage most of the remaining singles, but I gave up on the last tangled bit.
The Andean bracelet technique worked wonderfully, and I ended up with almost 100 grams and 492 meters of light fingering 4-ply yarn in the end.
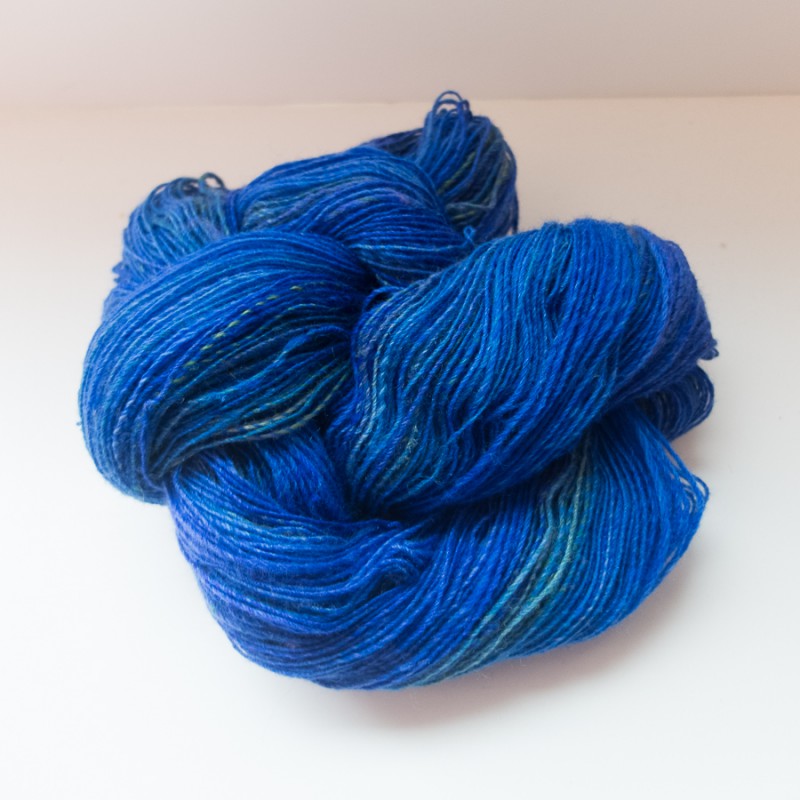
Even though it was a study in frustration to do this, I do like the result. This technique would be great for plying (semi) solid yarns, and also for breaking up the order of n-ply a bit by adding the random colour of the extra strand.
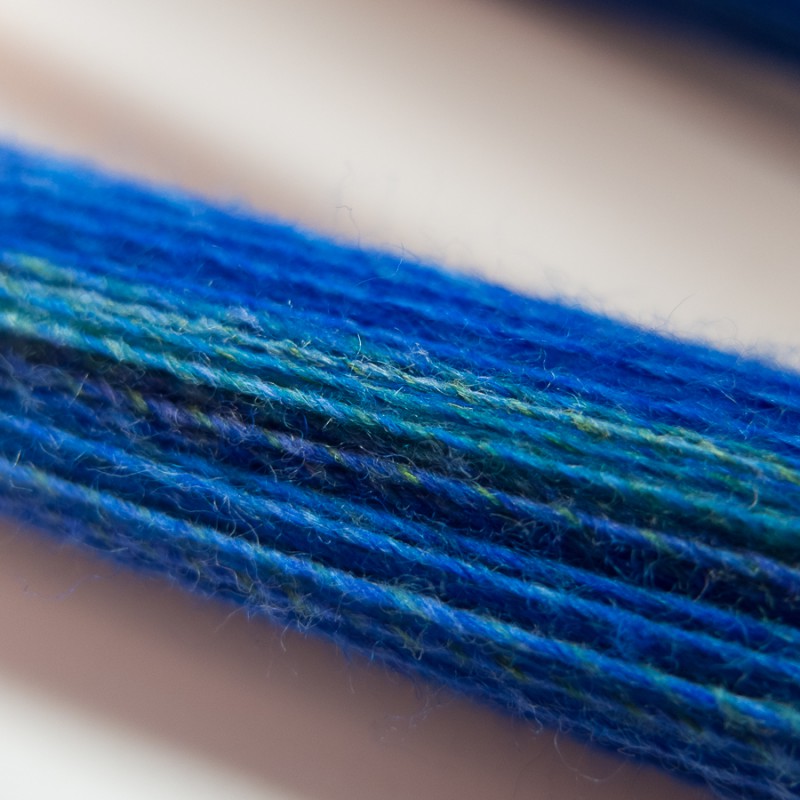
I think the technique would work better with smoother fibers and longer staple lengths, though. My singles had too much “grip” which messed things up a bit from time to time. This is all the stuff that got tossed out for one reason or the other:
I may try this again sometime with different fibers.
By the way, why m-ply? It’s actually because it uses one more strand than n-ply, so I gave the n-character an extra leg 😉
Clever! Sorry it was so frustrating but it made for beautiful results.