I can now tell you from experience that it’s possible to do card weaving on an Ashford SampleIt! It’s not all straightforward, though…
Card weaving is an ingenious type of weaving that has been around for thousands of years. It is unknown who invented it, but the technique has shown up all over the world. The oldest samples found are from the 8th century BC, in central Europe, the end of the iron age.
The idea of card weaving is simple, but it gives you endless possibilities. You take a series of square cards (they can be different shapes, but square is common). They have a hole in each corner. Pull a thread through each hole. The threads form a warp and are then tied to an object, perhaps a doorknob or a chair. The cards are stacked sideways, and the front ends of the warp are knotted together and attached to, for example your belt. Now you can start weaving!
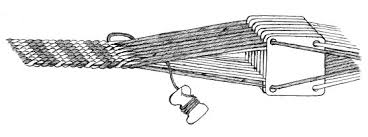
The cards separate the threads and create a shed to put your shuttle through. You then turn the cards to create a different shed. As each card has four holes, it potentially has four different colour possibilities. You can also turn the cards forward or backward, even separately. This gives you the equivalent of four shafts (if you move all the cards at the same time) or almost free weaving (if you turn cards individually to create a pattern).
The threads at the front enclose the threads at the back, so the resulting fabric is quite thick and dense. Perfect for bag handles, belts, and the like. If you like you can even weave a tube or do double weave!
Of course I wanted to try this technique, and as I have a loom already, I thought it would be interesting to try to card weave on it. I took out the heddles and made a warp (direct warping just like usual). Then I threaded the cards. I found an interesting pattern with 24 cards and 2 colours, which I thought would be fun to try.
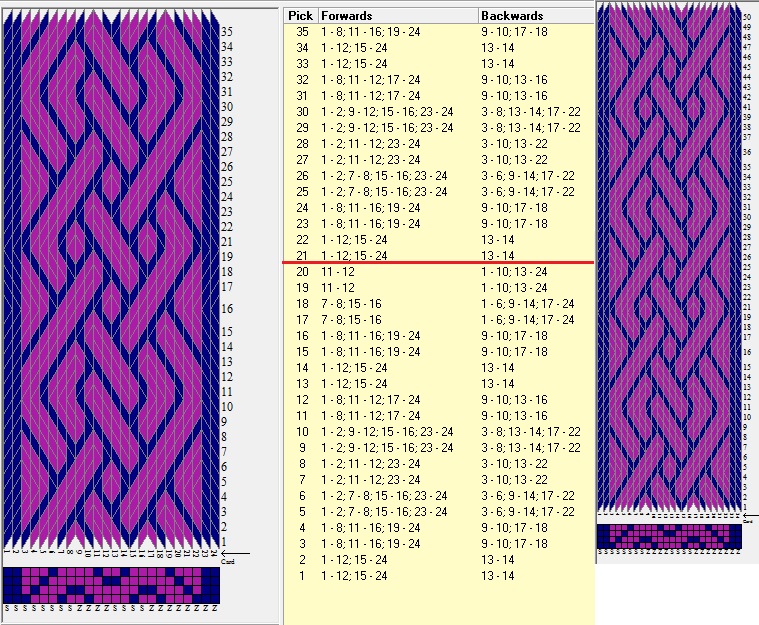
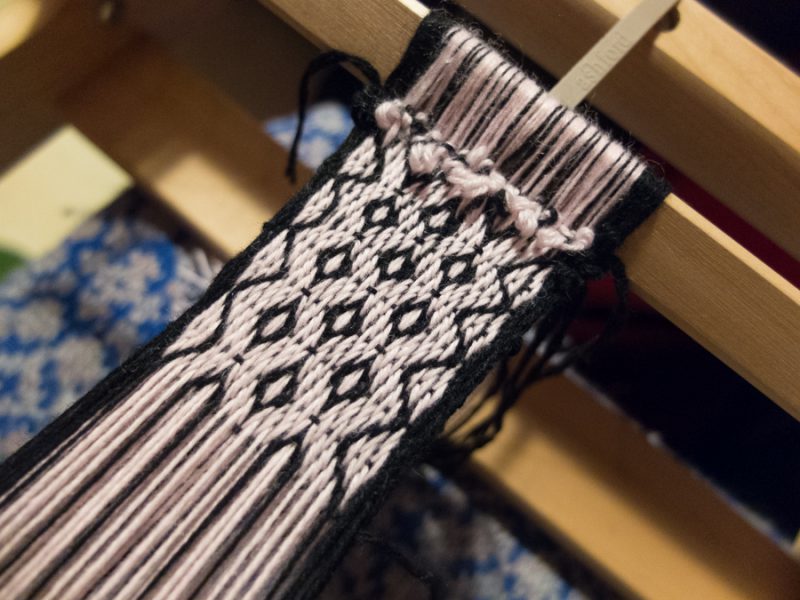
I did have to thread some cards front to back (S) and others back to front (Z). You see, in card weaving you get a slight curve in your work because of the turning. Threading cards in different directions counters that tendency a bit, and it also creates beautiful right or left leaning “stitches”.
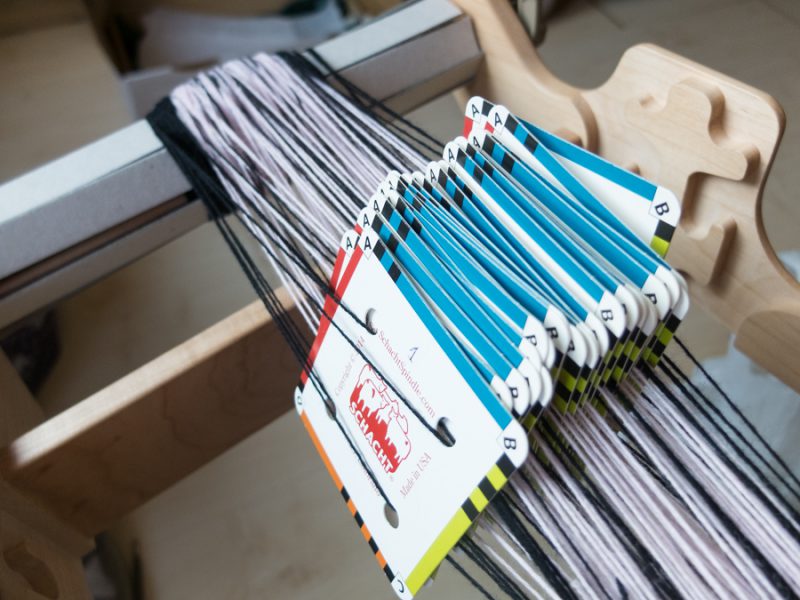
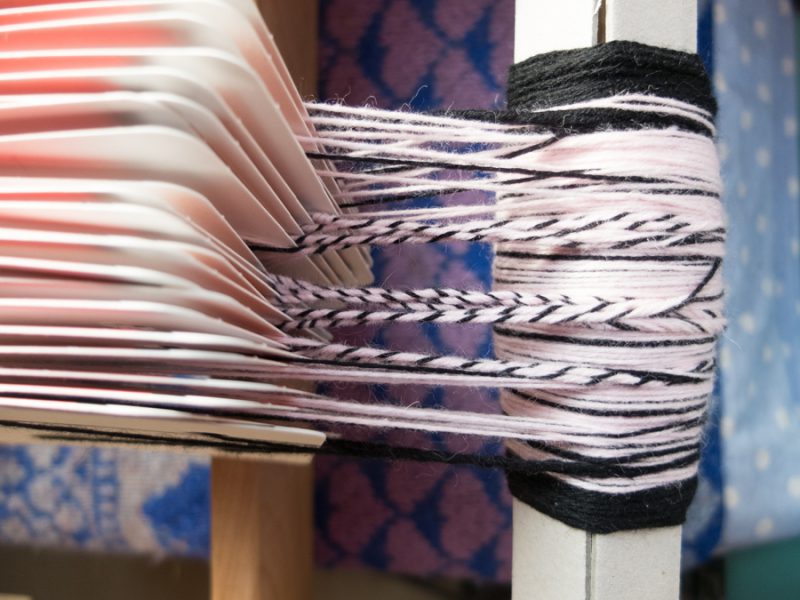
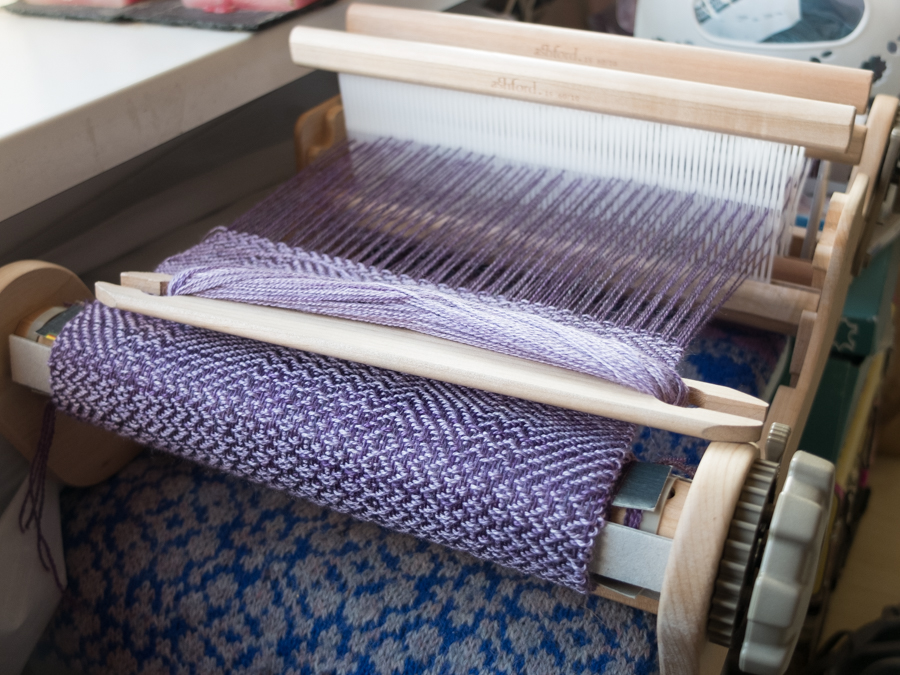
As you can see, the cards have enough space to hang between the front and back beam of the loom. They can even rest just in front of the back beam:
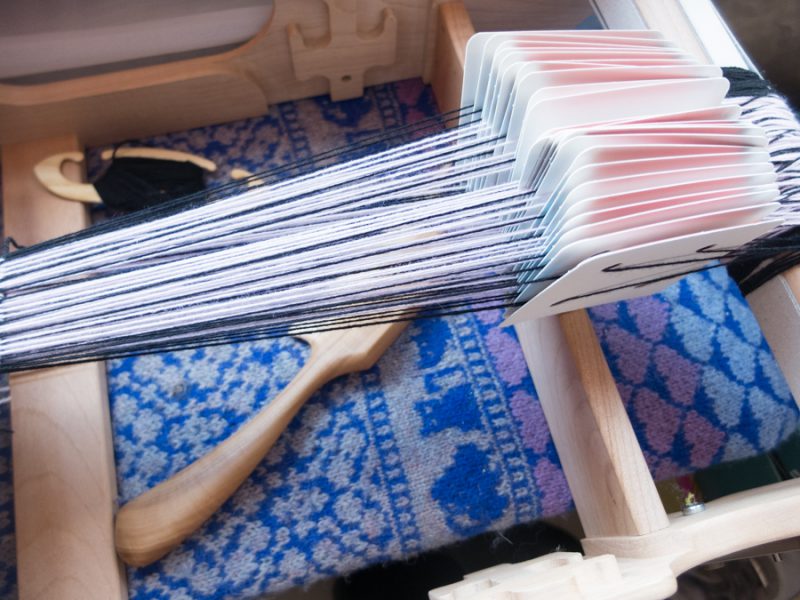
The thing lying below the loom is my awesome apple wood beater. You need to really beat the weft hard, as card weaving is a warp-faced kind of weaving. You don’t see the weft thread except for those picks where you change direction in turning the cards!
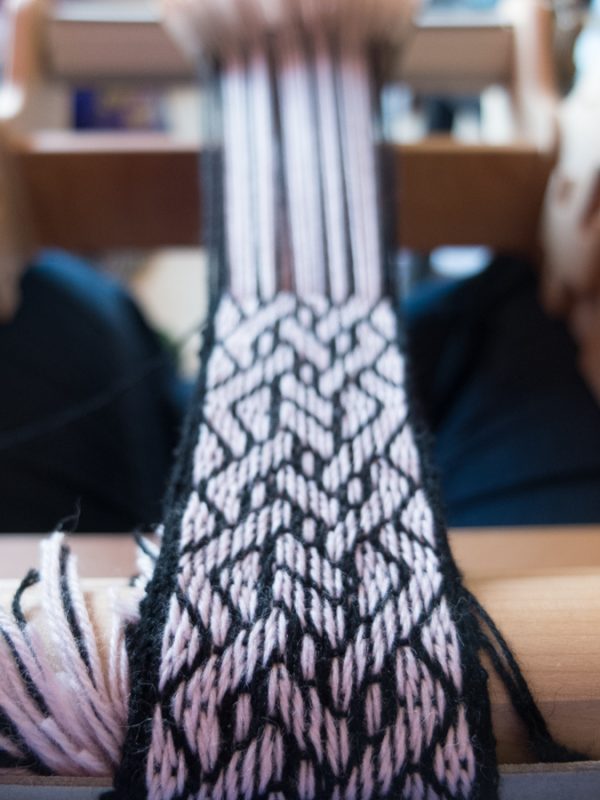
Oh dear! That’s not looking good… At first I thought I had just made a mistake and forgotten a pattern row or something, but it didn’t solve itself at the next repeats, so I cut it off the loom and re-tied the warp in place. I quickly found out that I had started from the wrong position (corners C-D on top instead of D-A). Silly mistake, but now I knew what I had to change, at least.
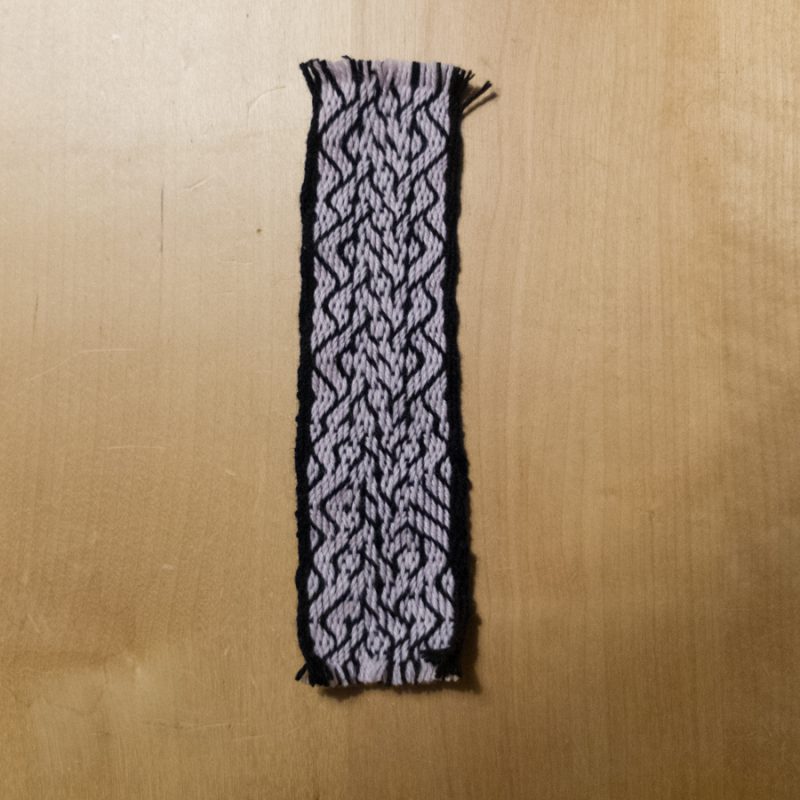
That’s more like it! It’s fun to see this pattern appear. It’s a bit magical! I love the crisp lines and the stark contrast.
I did run into another problem, though. My pattern did not have the same number of turns backward and forward, so the threads started to twist together more and more, keeping less and less space for weaving because of their tension. And because my warp was wound onto the back beam, the twist could not travel further and relax a bit. So I just wove until I had no space left, and cut my second bit of band from the loom.
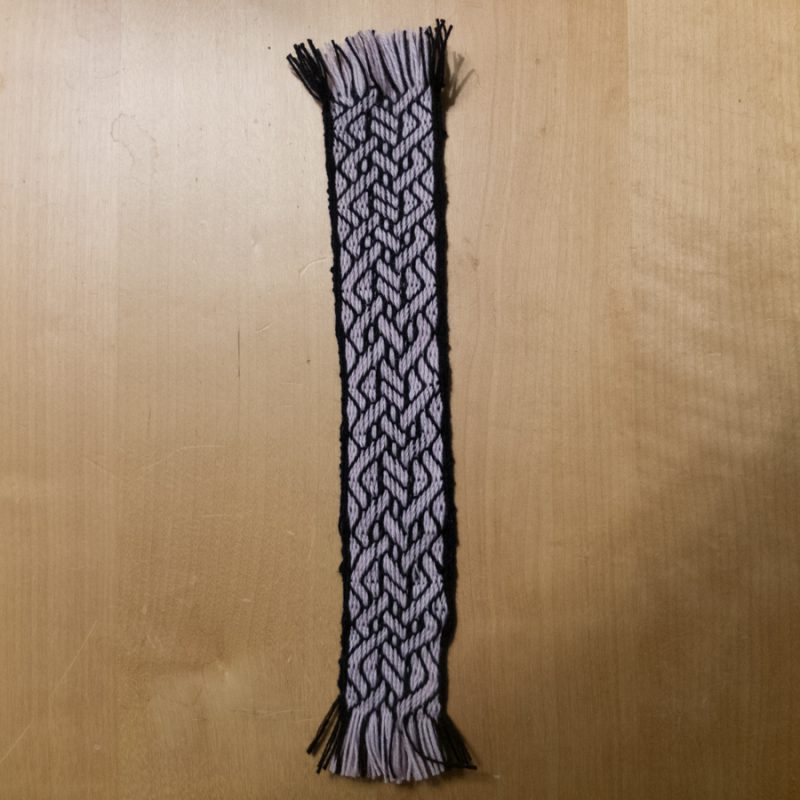
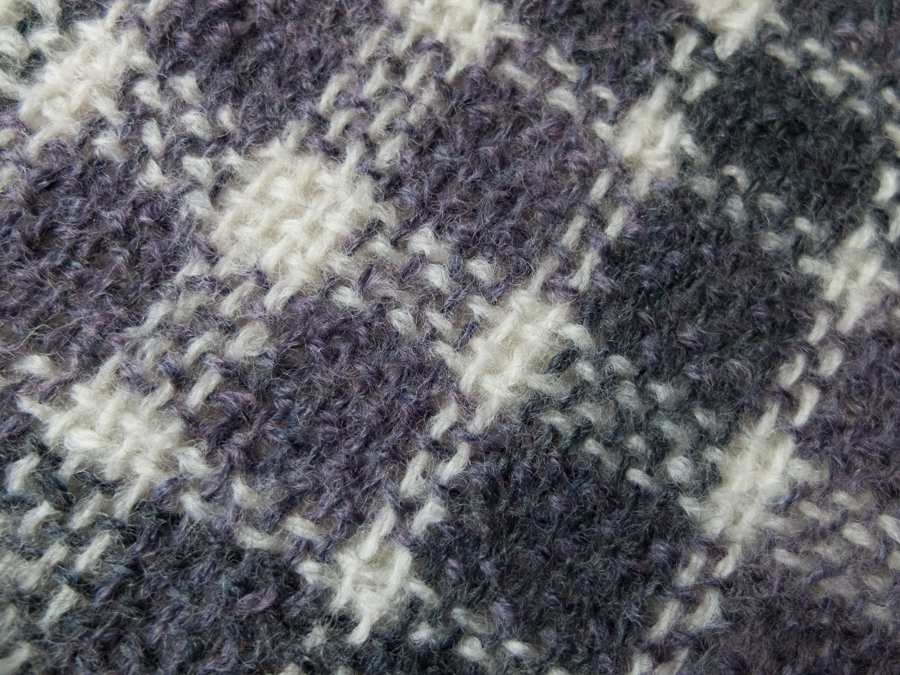
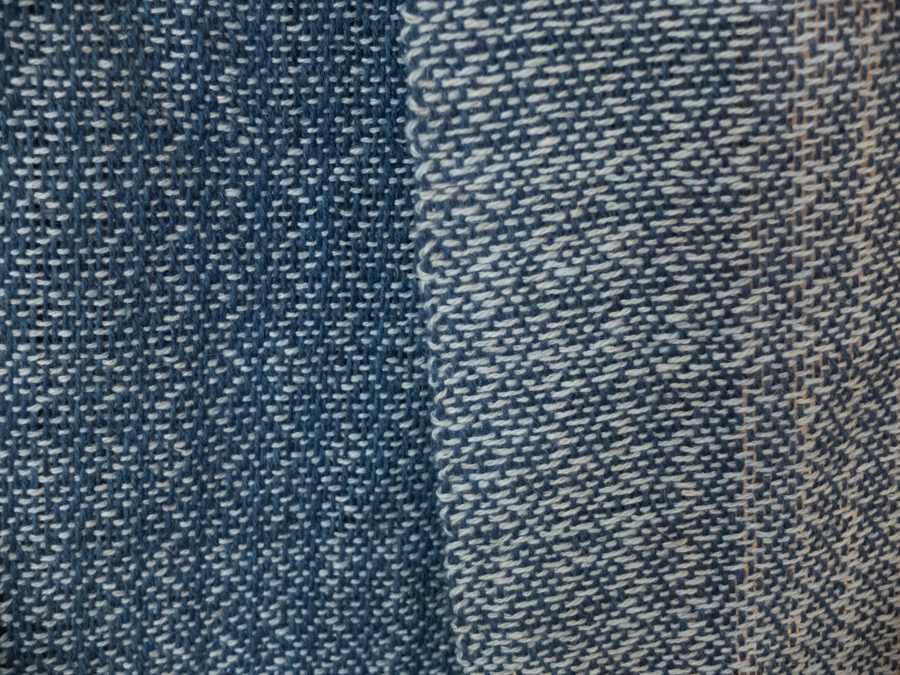
I decided to do the rest of the band in a simple, straight-forward pattern of four turns forward, four turns backward. I moved all the cards every time. This resulted in an interesting and actually quite beautiful pattern:
I’m going to finish this band with this pattern, but it may take a while, as card weaving is quite labour intensive. But it’s fun!
By the way, you know when you’re obsessed with weaving when you visit a thrift store and see potential looms everywhere…
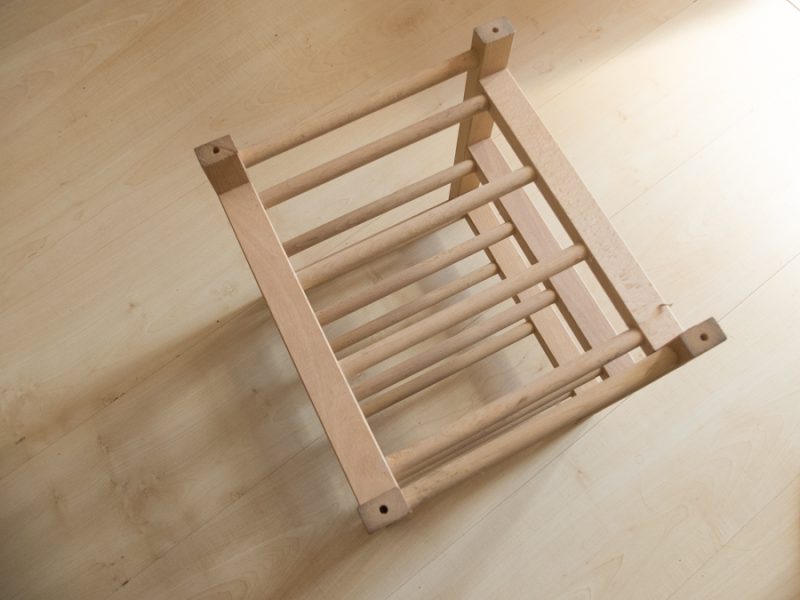
This one is mine for a mere 2 euros. I’m going to get some carabiners and clips and try to weave on it after this!
Oh! I was searching for a pattern using 18-24 cards and this looks beautiful! I am a first timer and ready to go!
Thank you for posting your trials!
Great! Card weaving is fun 🙂
I’m glad that my notes are helpful. Good luck with your project!
Hi Melindis I wanted to ask you a question about the weaving of the post “Card weaving on a rigid heddle”. Unfortunately I get out of the wrong drawing, and usually I leave a-d turned towards the other head of weaving. What do you mean to start A-D on top in this case?
Thanks
Hi Mohrhen,
If you look at the cards from the side, the corners with A and D are at the top, while B and C are at the bottom. Like this:
A D
B C
I just found this interesting blog. I’m brand new to tablet weaving and thought I’d just try it using my SampleIt to see if I’m really interested in doing this. I see you direct warped, so have looped the back around the back apron rod. Do you make your warp the length of the loom or did you add extra and wind it along the back beam as usual? I really want to get started but not sure the best way to do this. I don’t have to have a long band, just really enough to see if I like the process.
I see you warped this on the back apron rod. Did you make the warp just as long as the loom? Or did you add extra and wind it around the back beam the way you would with a rigid heddle weaving?
Hi Cynthia, I made the warp a bit longer than the loom length. However, whether it will work does depend on the weaving pattern that you choose. I did try to weave a pattern that did not have balanced turns (not as many turns forward as backward), and because of that the warp threads were tangling around each other after a while.
Thanks! I added some to the length for a sample and just to get started. Worked well enough. Thanks!